Repairing bean to cup Krups EA8800 coffee machine

Today is a sad day, my coffee machine is broken ! No more engineer fuel 😢 After multiple tests, it looks like the coffee grinder is worn out. Coffee powder is accumulating and it blocks the grinder. My coffee machine is making a troubling noise but it does not make any more coffee.
First good news is that Krups brand is distributing spare parts. You can find them easily on the internet. I finally ordered a new coffee grinder on Midi Pièces Ménager website for 75€ including shipping costs. Cost is quite high but it is less than 10% of the cost of the machine.
Here I will detail how I teared down the coffee machine and how I fixed coffee grinder issues. It can be useful if you have the same type of machine.
Update from April 29th, 2021 : Added machine exploded view
Tear down and reassembly
Step 1 : Top cover disassembly
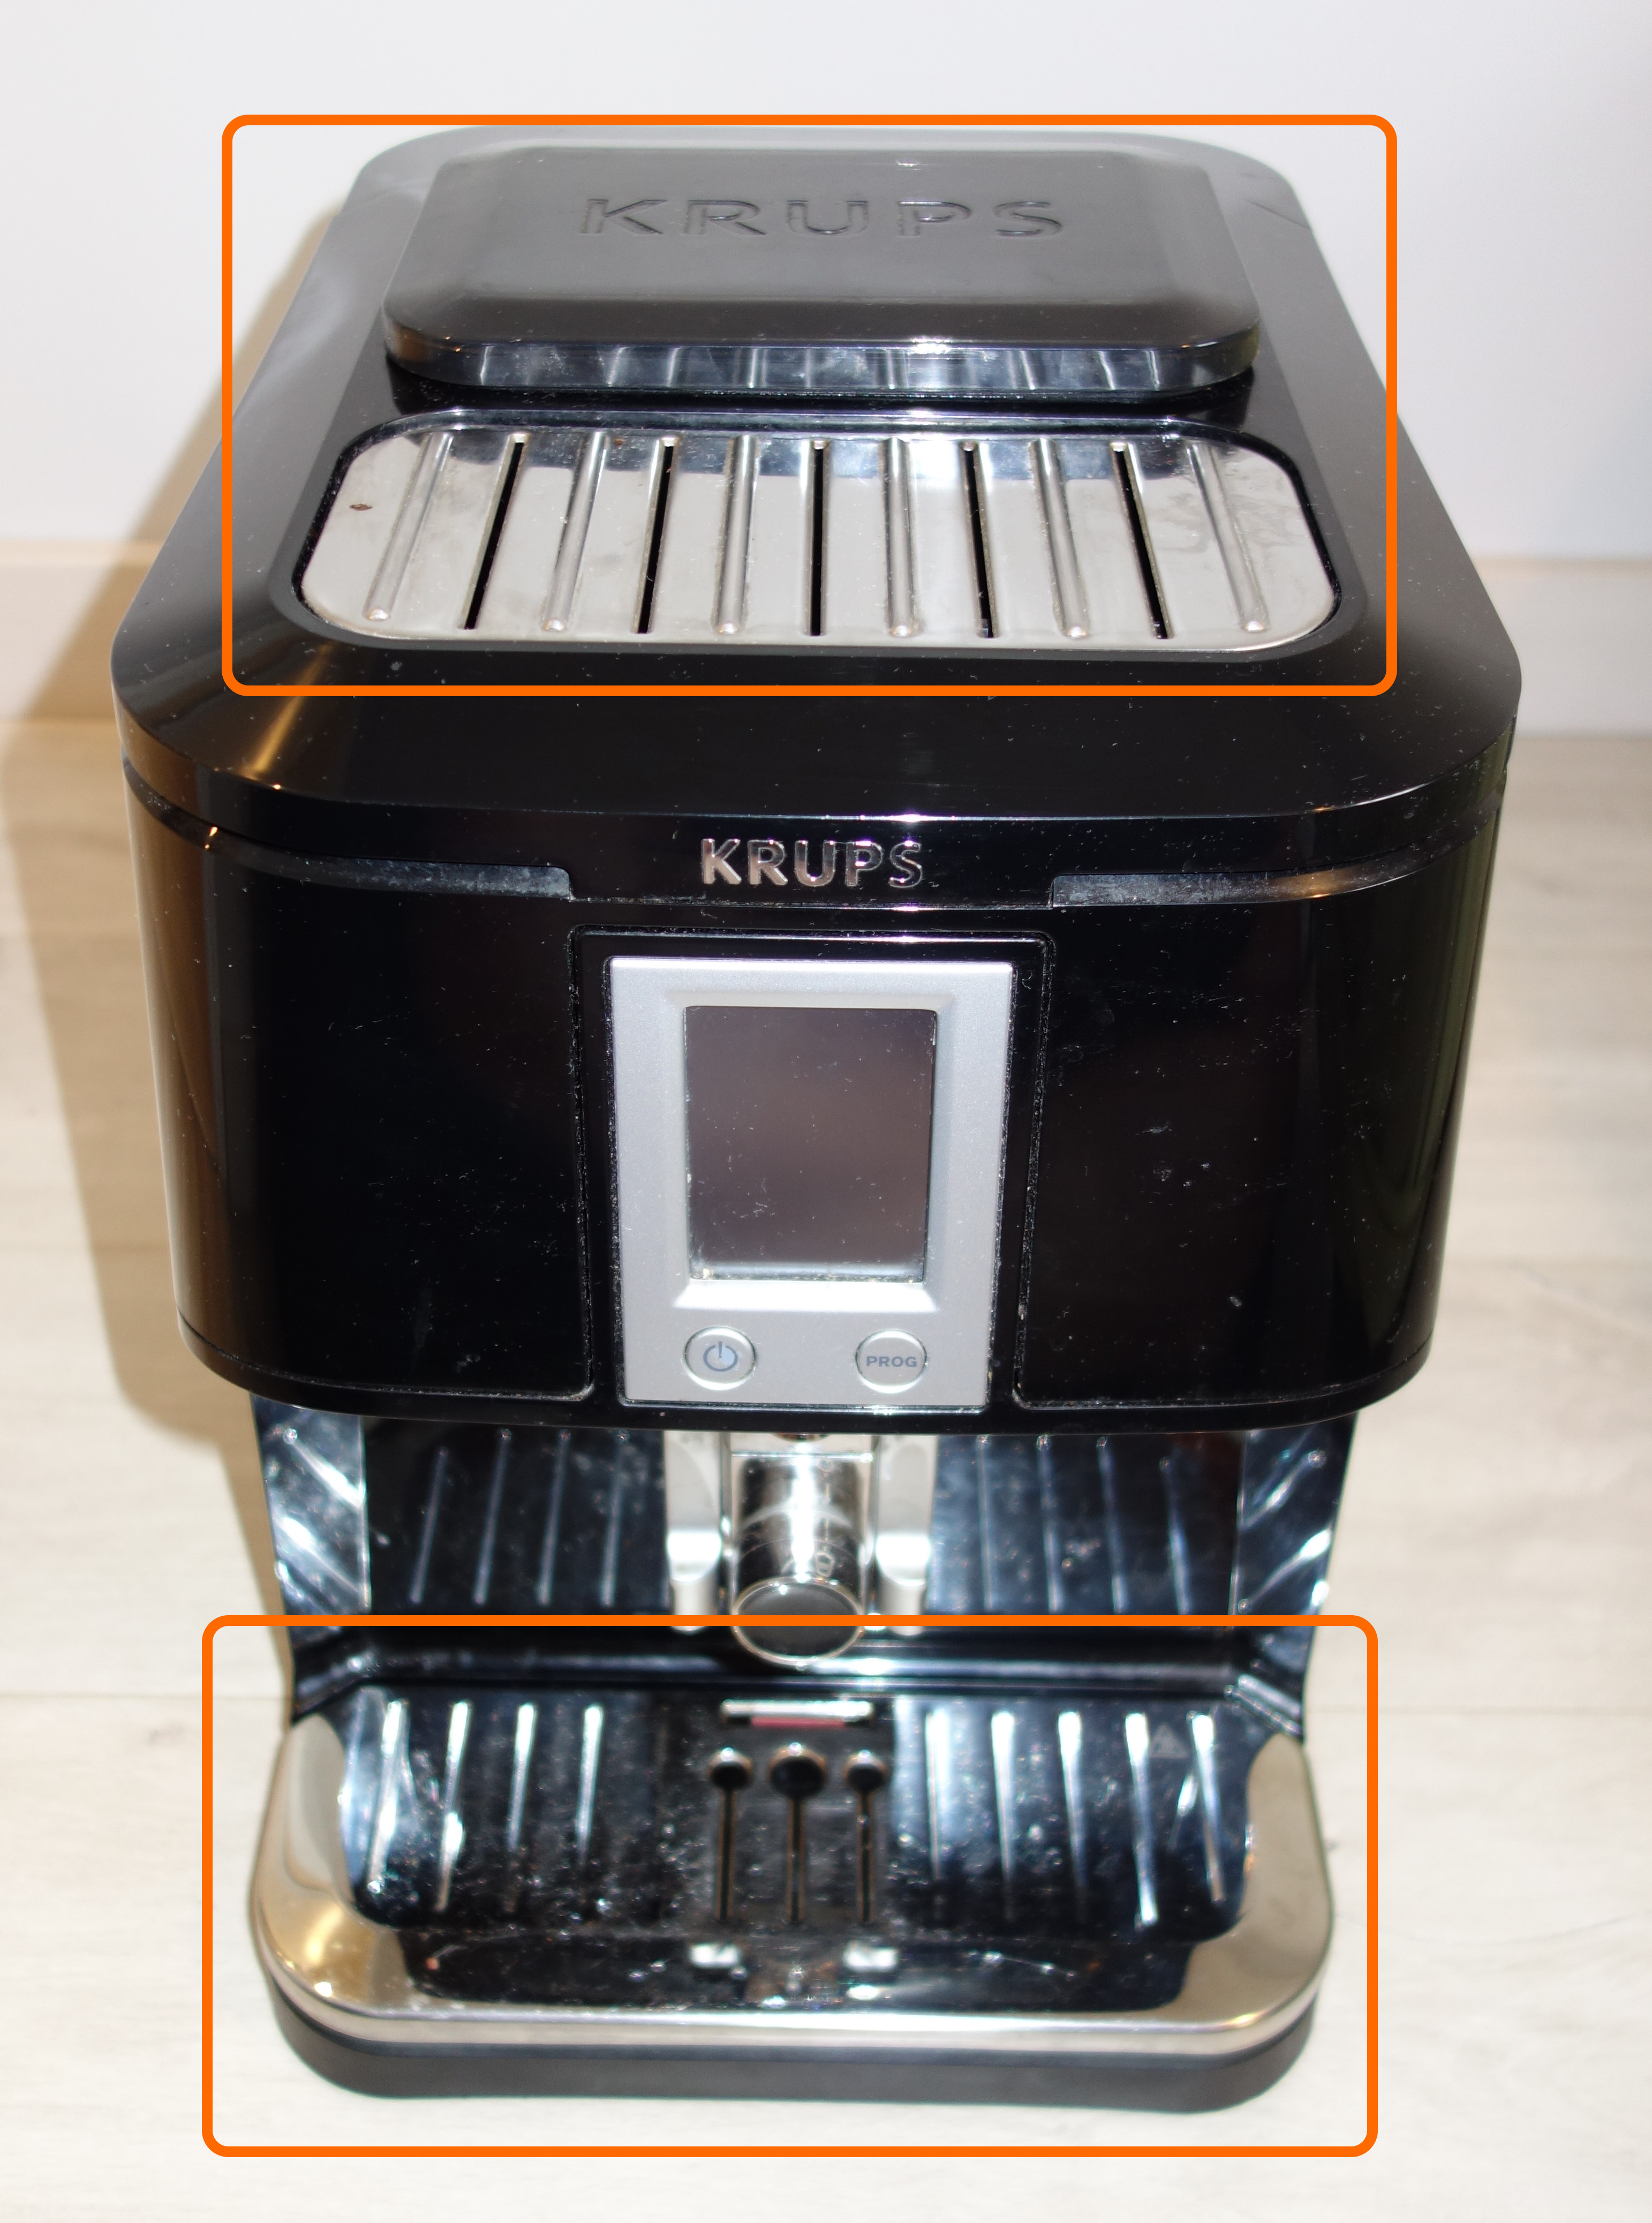


Begin by removing used liquid tray, the water tank, the top metal grid and coffee bean container cover.
Remove all coffee beans you can with your hand.
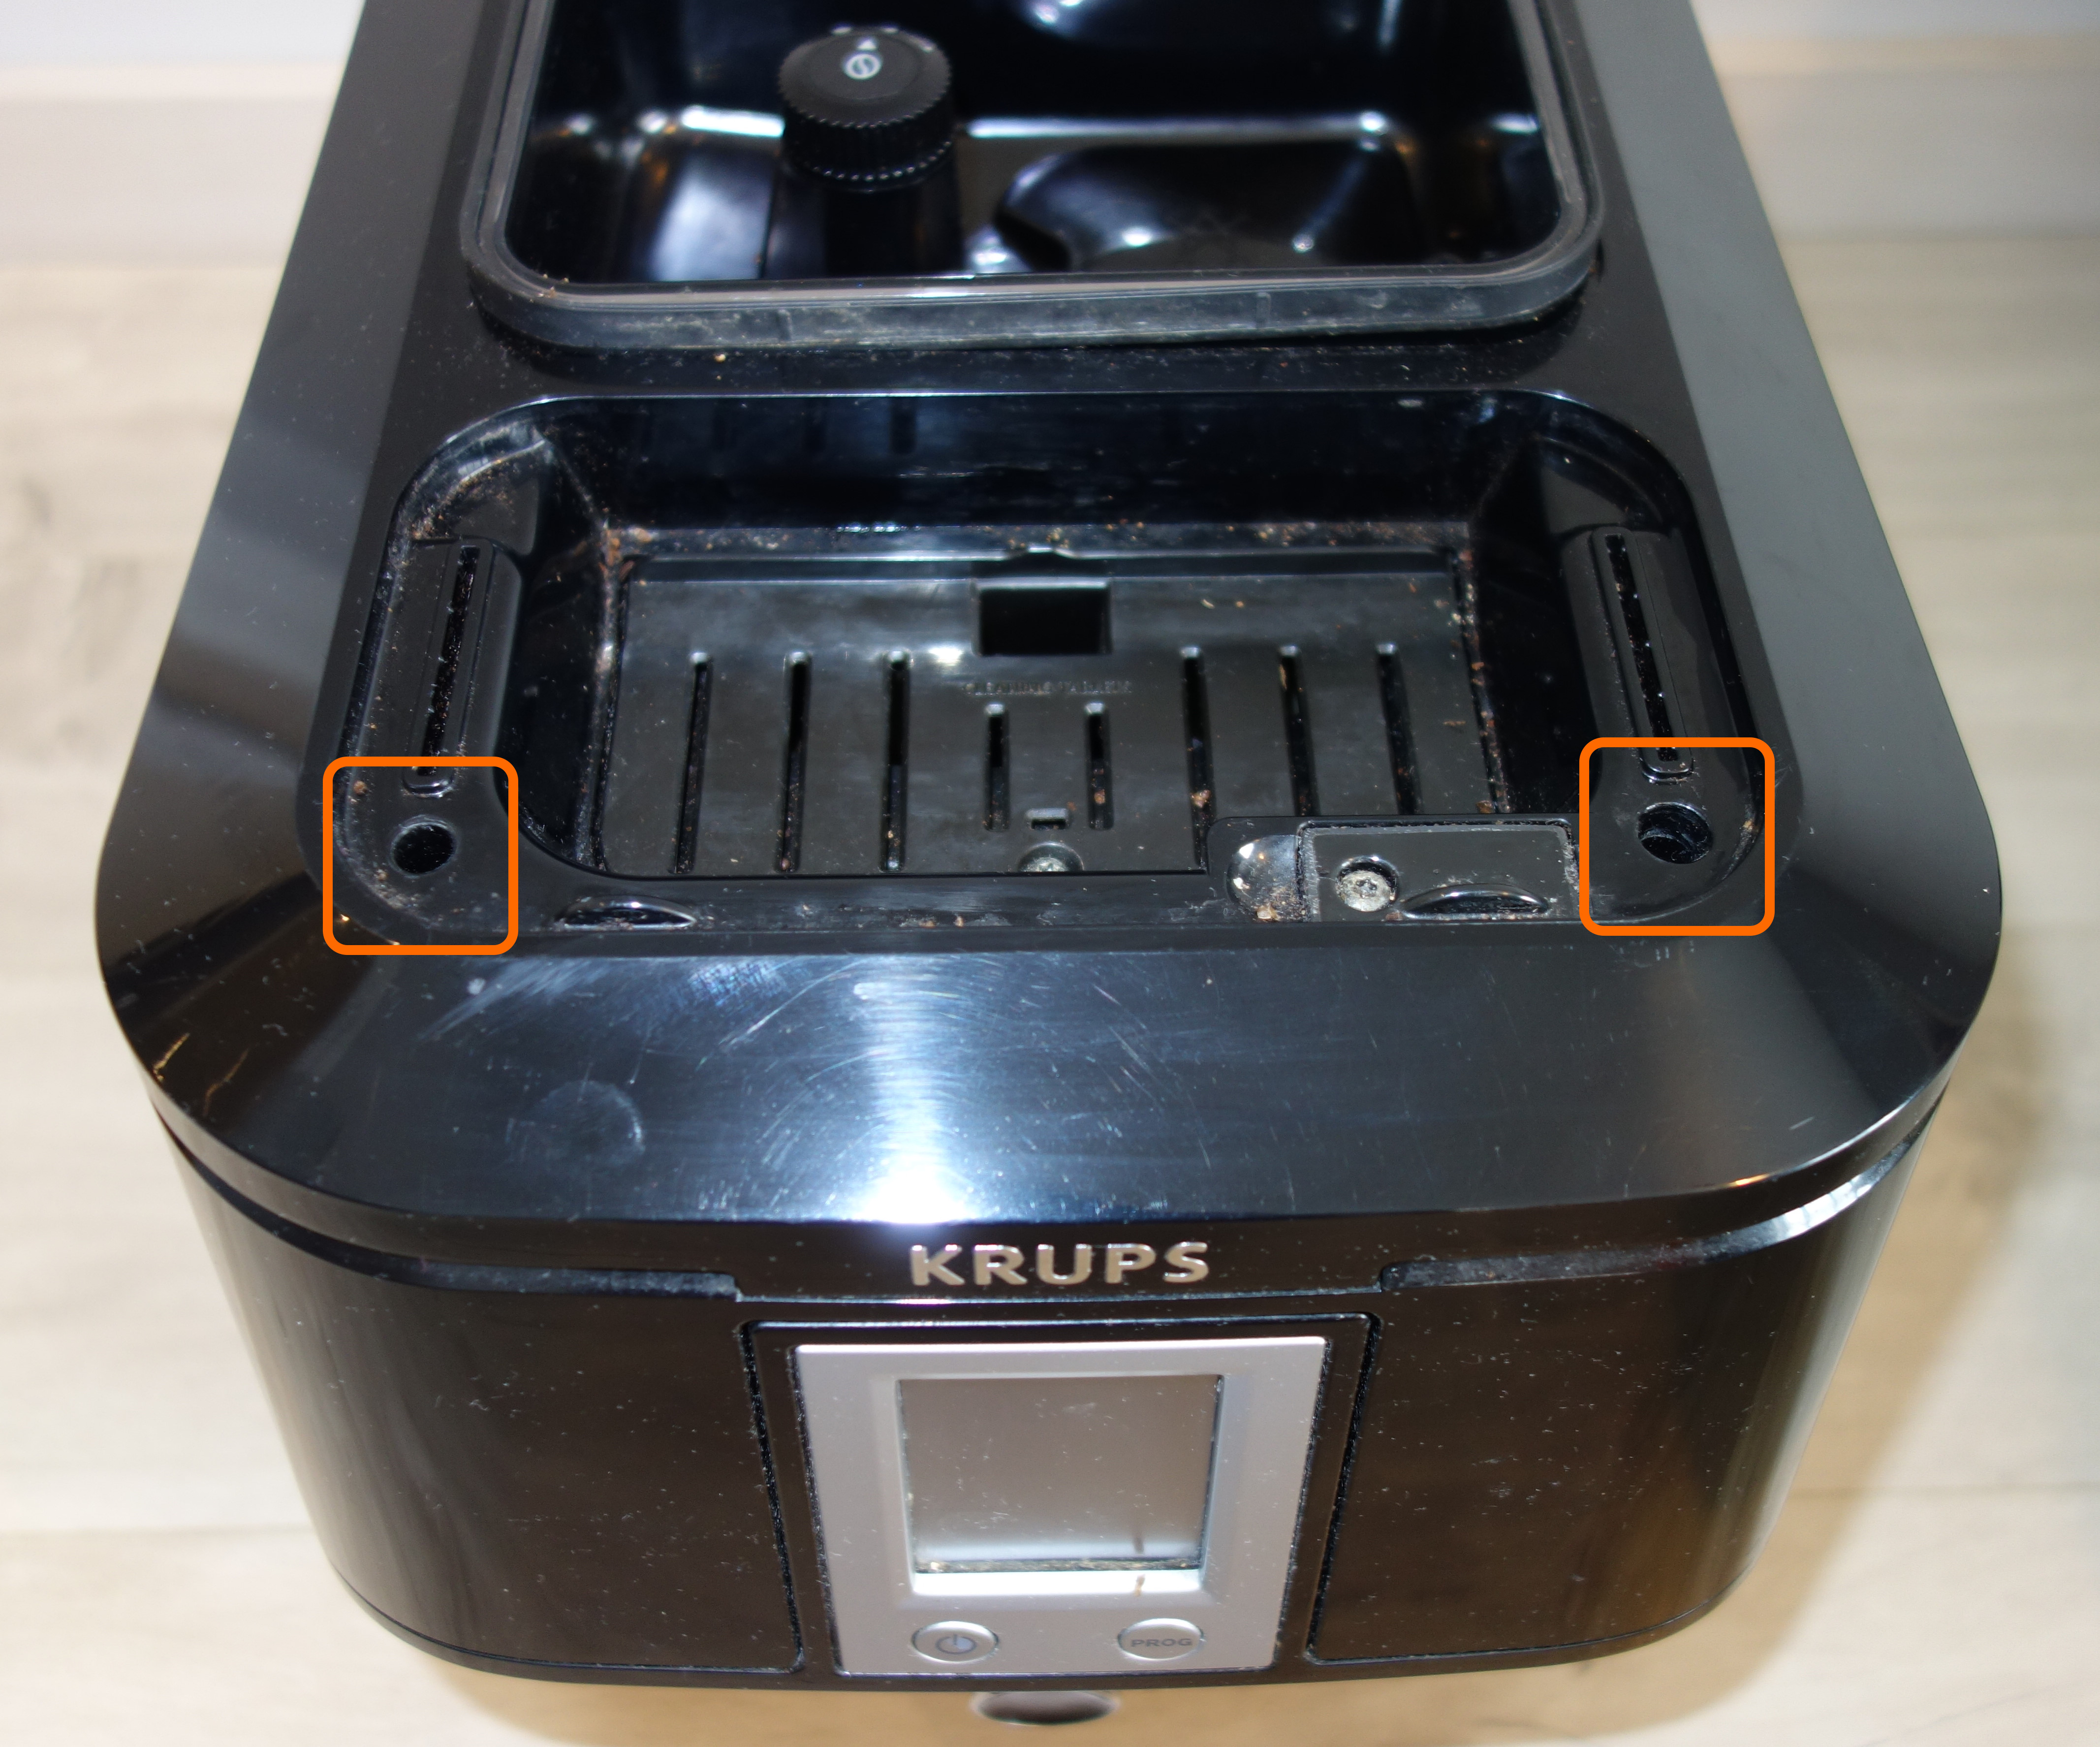
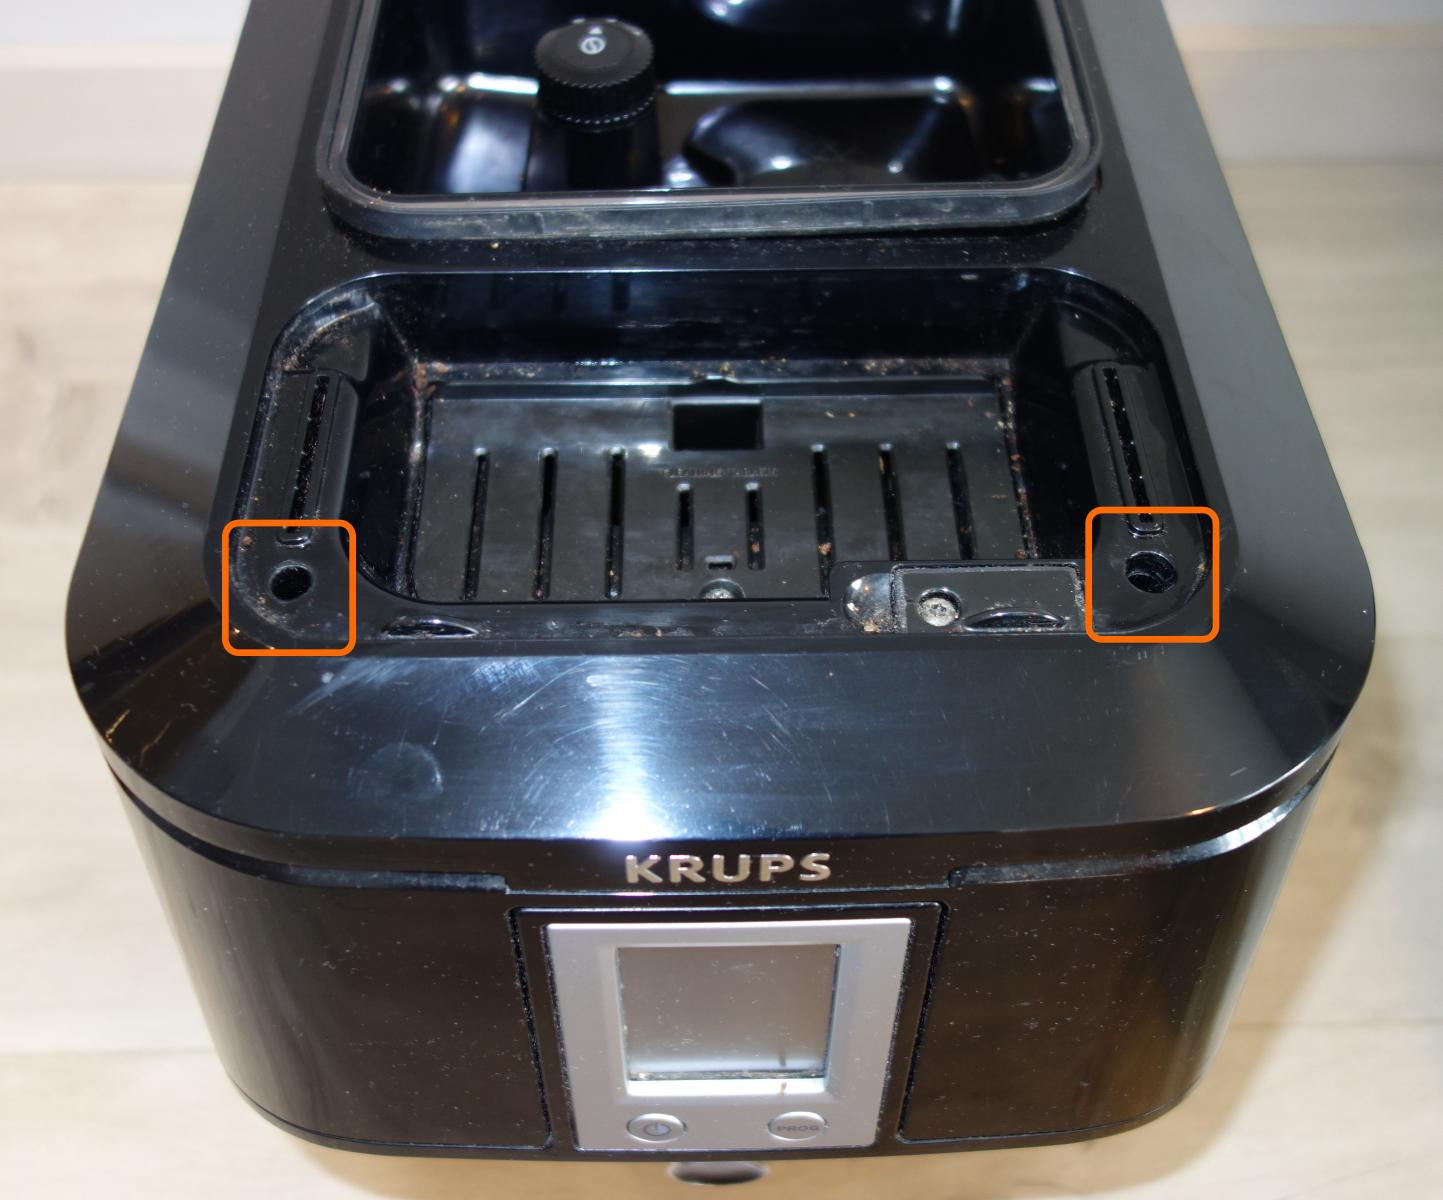
Under the metal grid, remove the two rubber parts. Remove screws behind rubber parts.
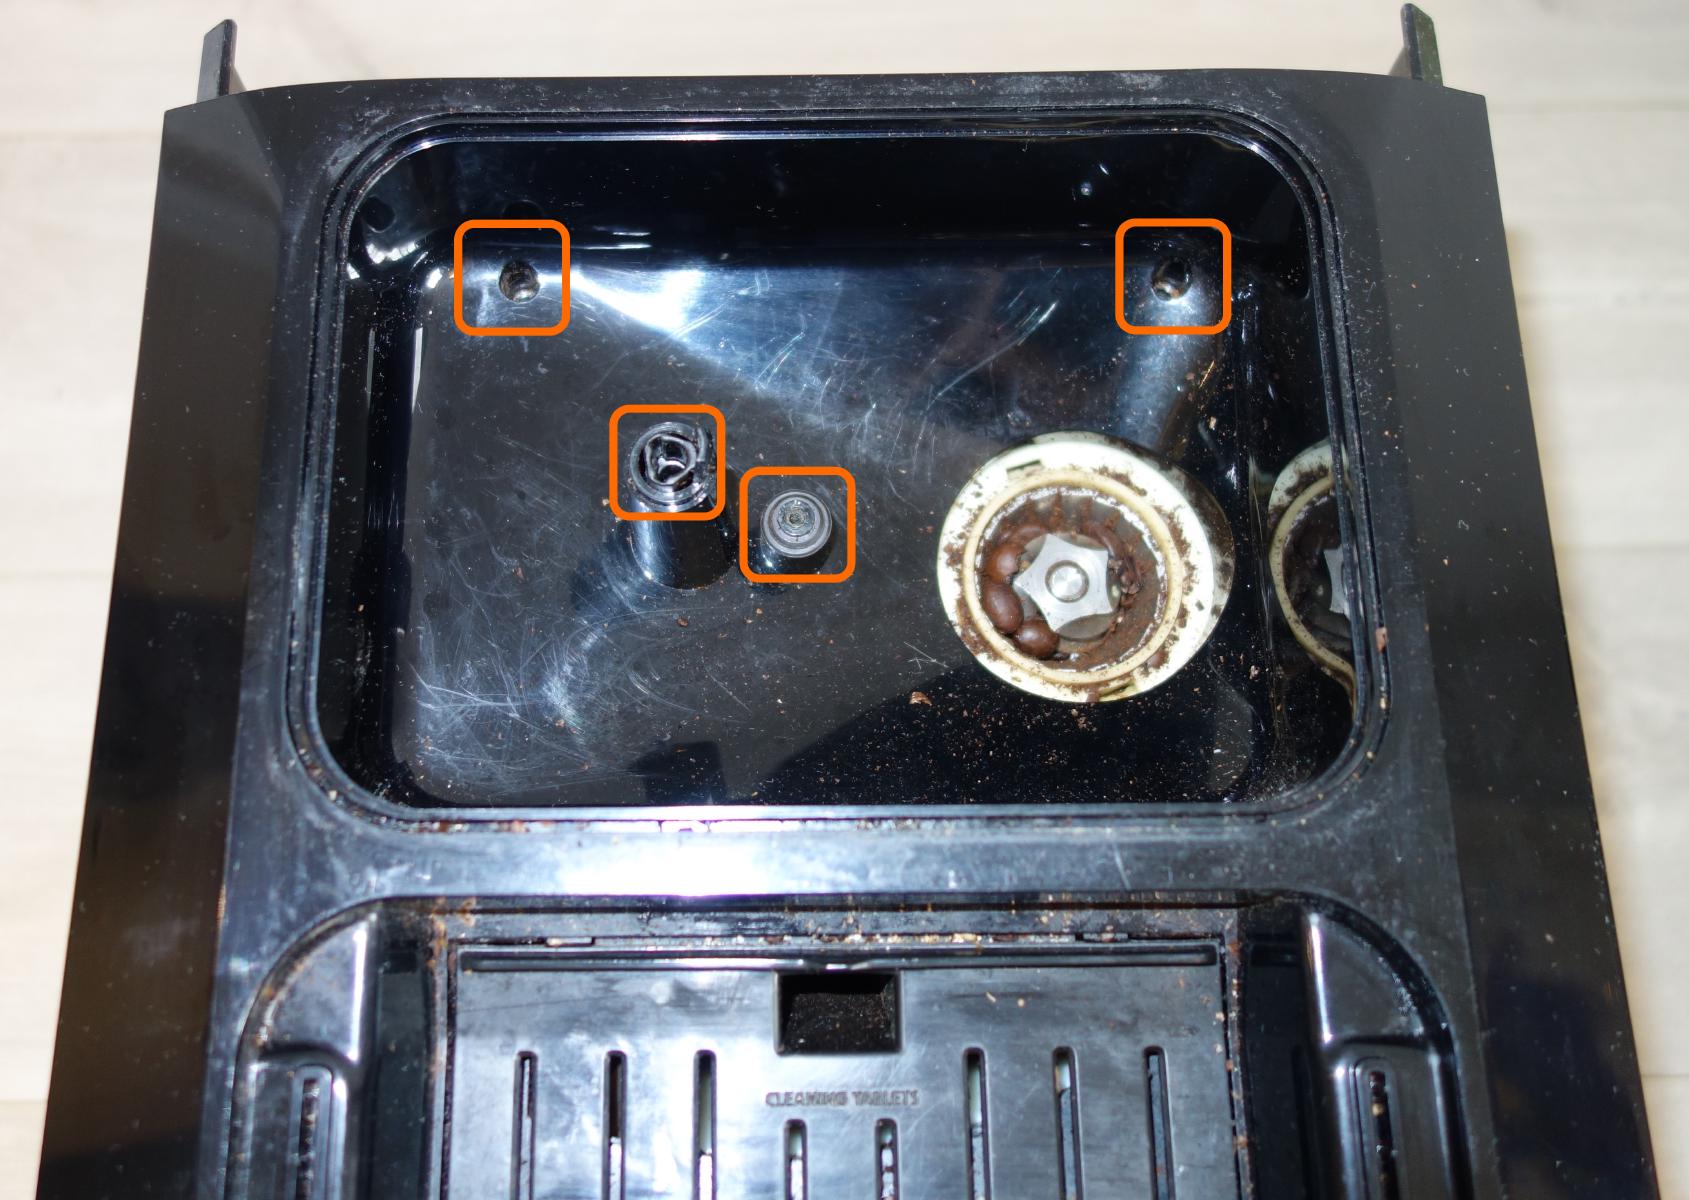
Remove screws that are hiding protecting coffee grinder input, then remove the transparent bean tank.
Under the bean tank, there are two new screws to remove.
Top cover can now be removed without forcing.
Step 2 : Display and coffee dispenser disassembly
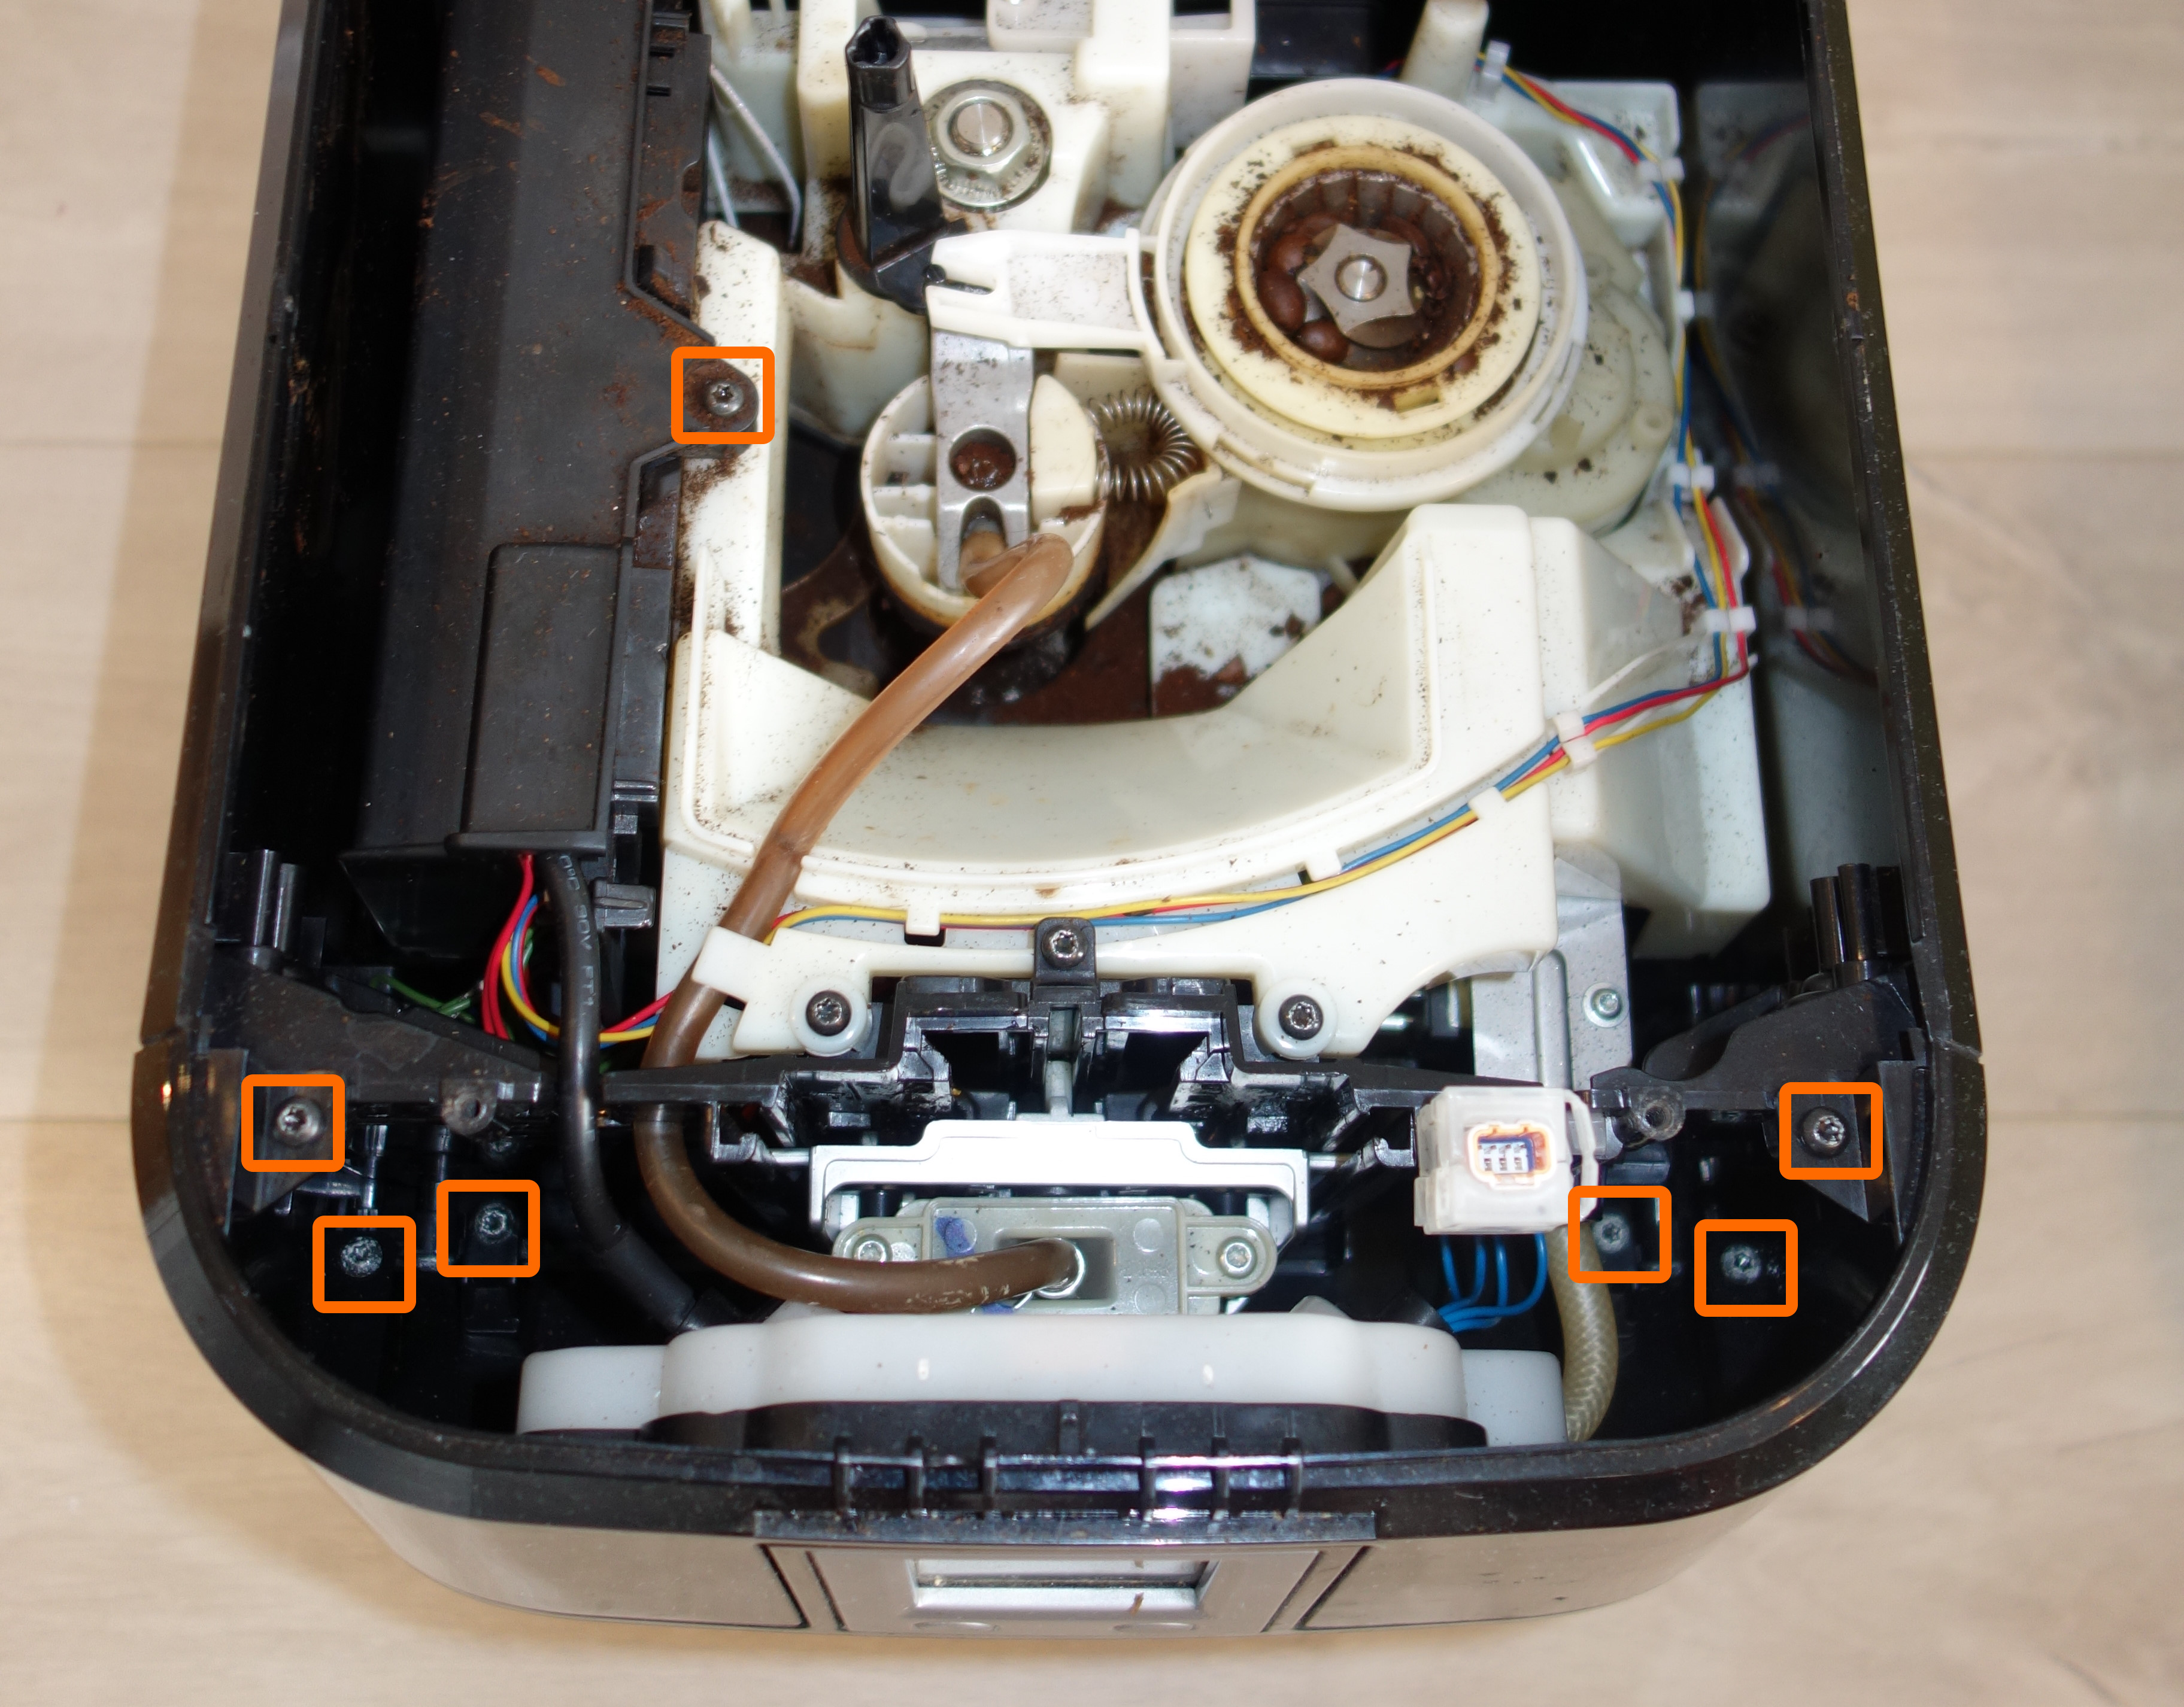
Remove the six screws that are keeping in place the display front face. Remove the screw above controller board.
⚠️ Warning, some screw heads are in depth , you will need a magnetic screwdriver and a good torch light ! ⚠️
Remove controller board protective cover. Remove carefully front face, then disconnect the cable.
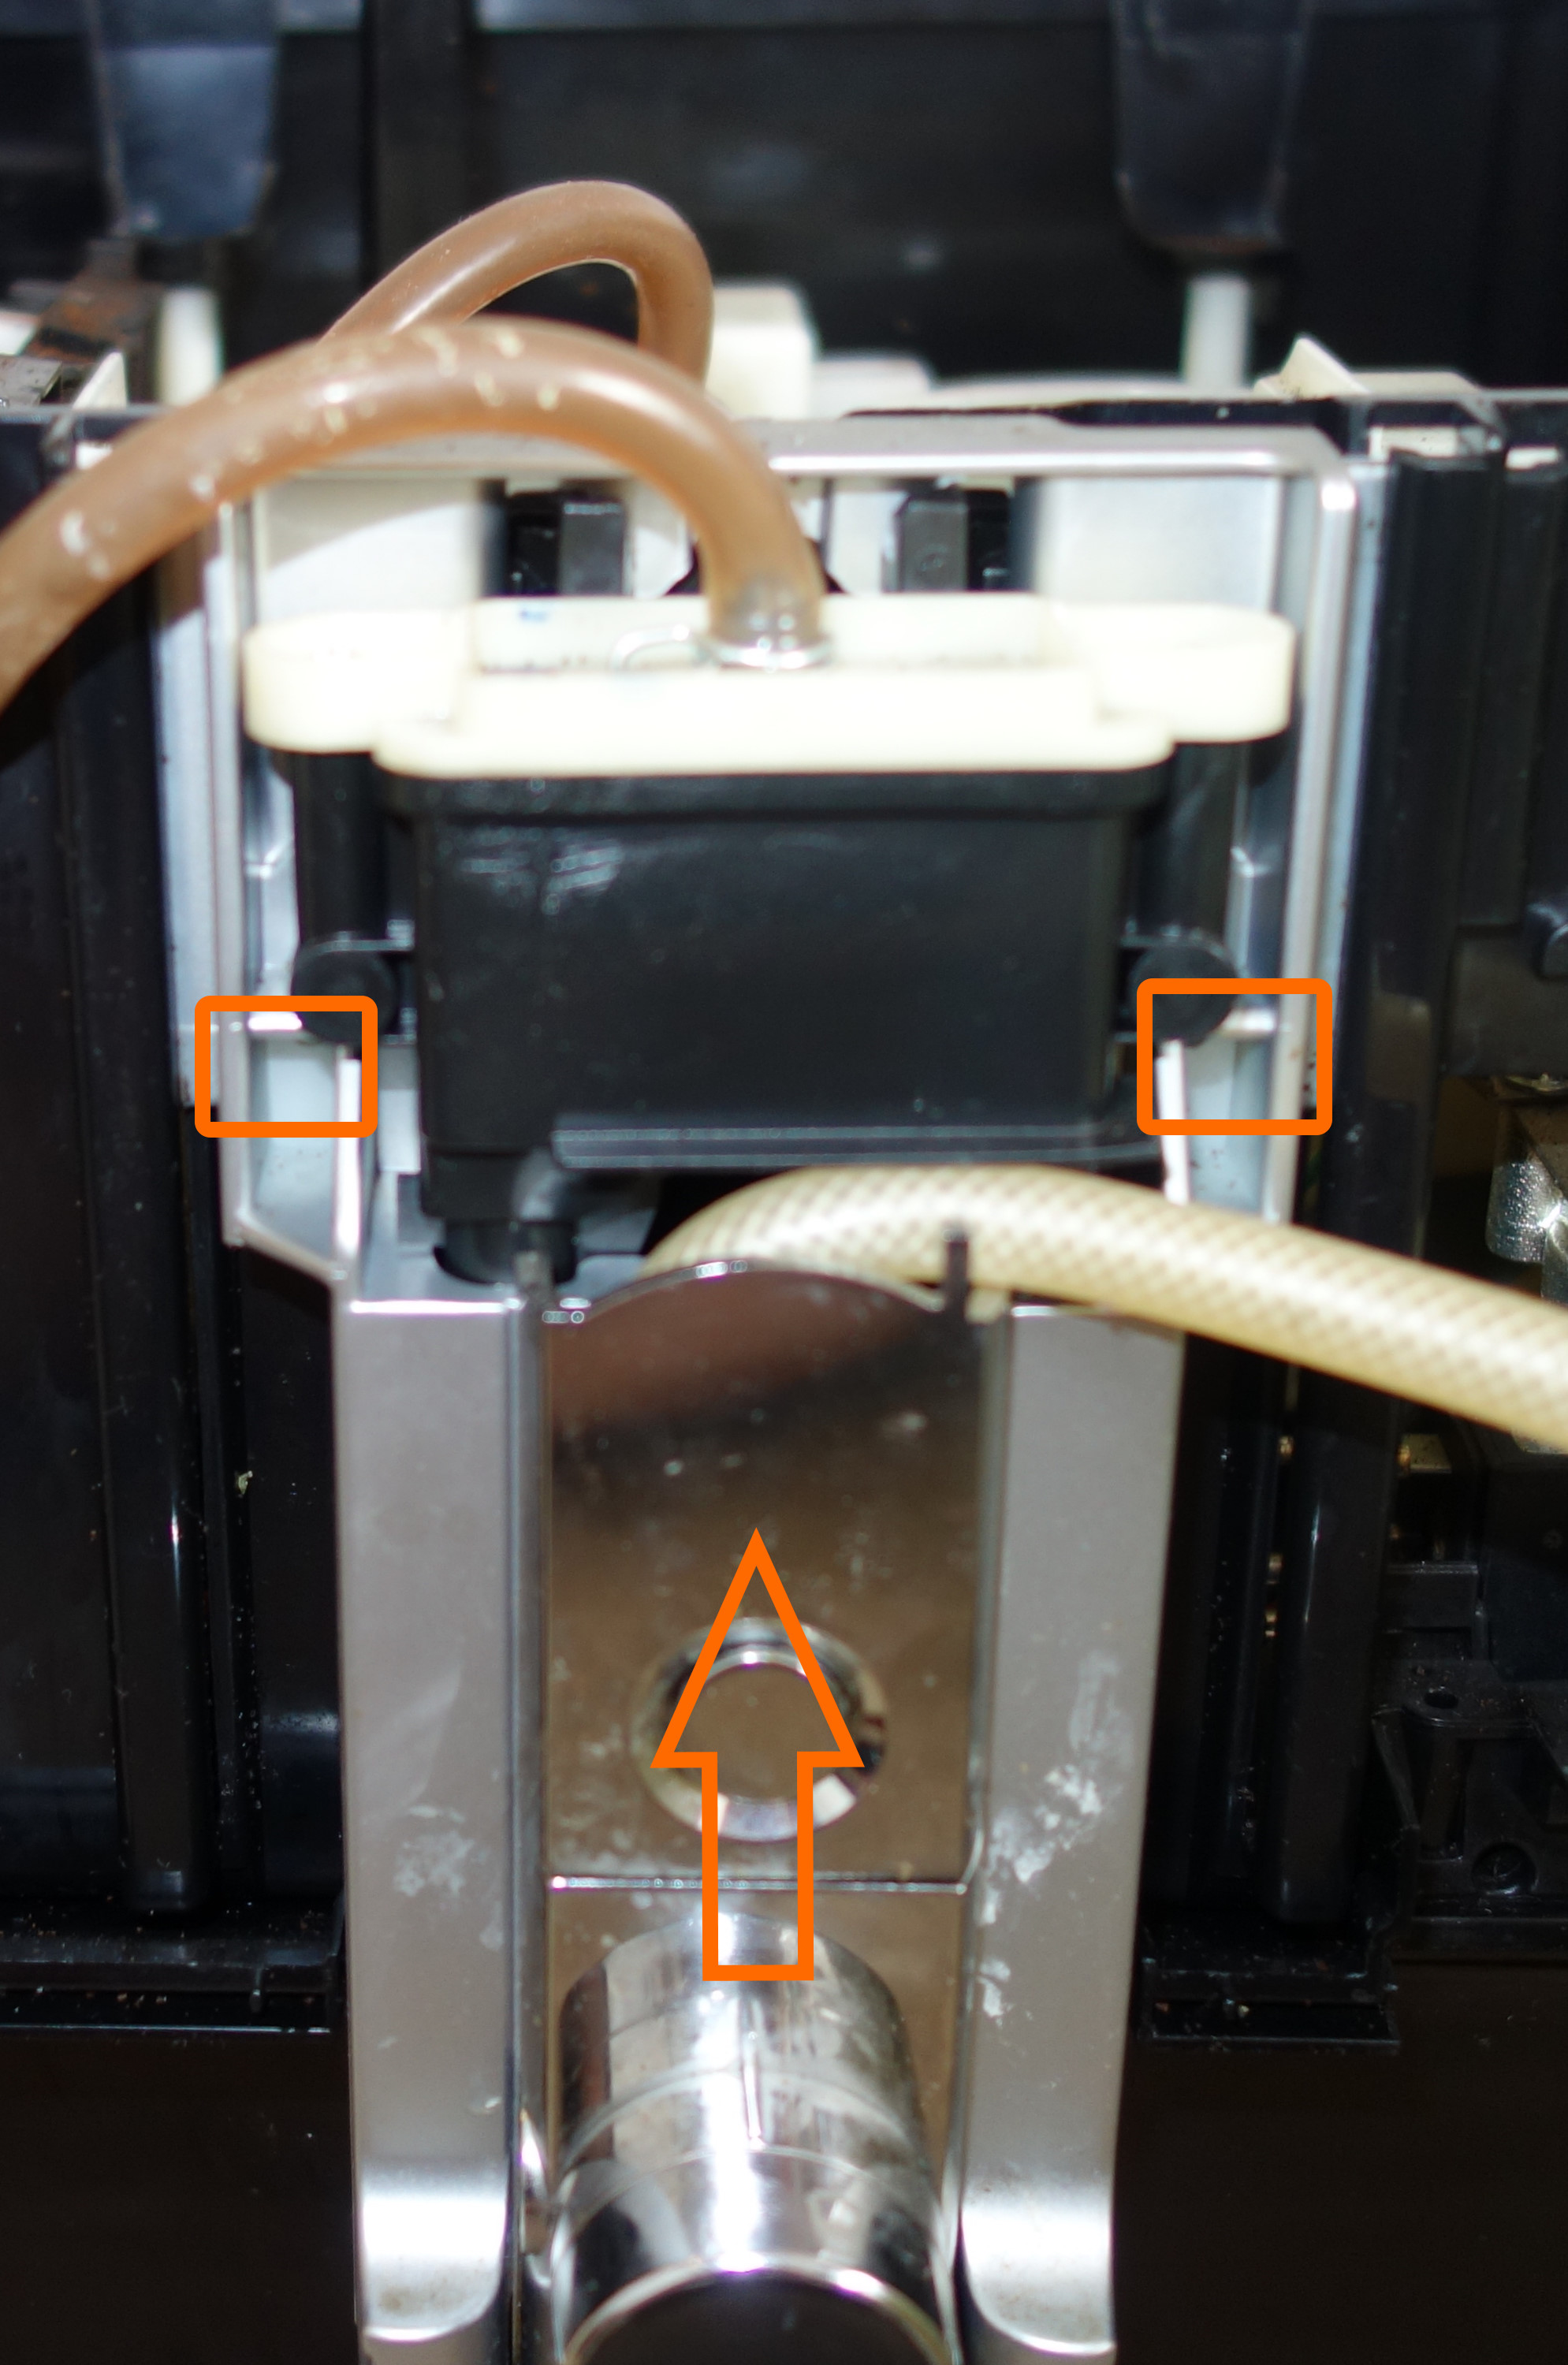
Slide the coffee dispenser silver part to the top until it blocks. Put two toothpicks in indicated holes, push gently while sliding gray part to the top.
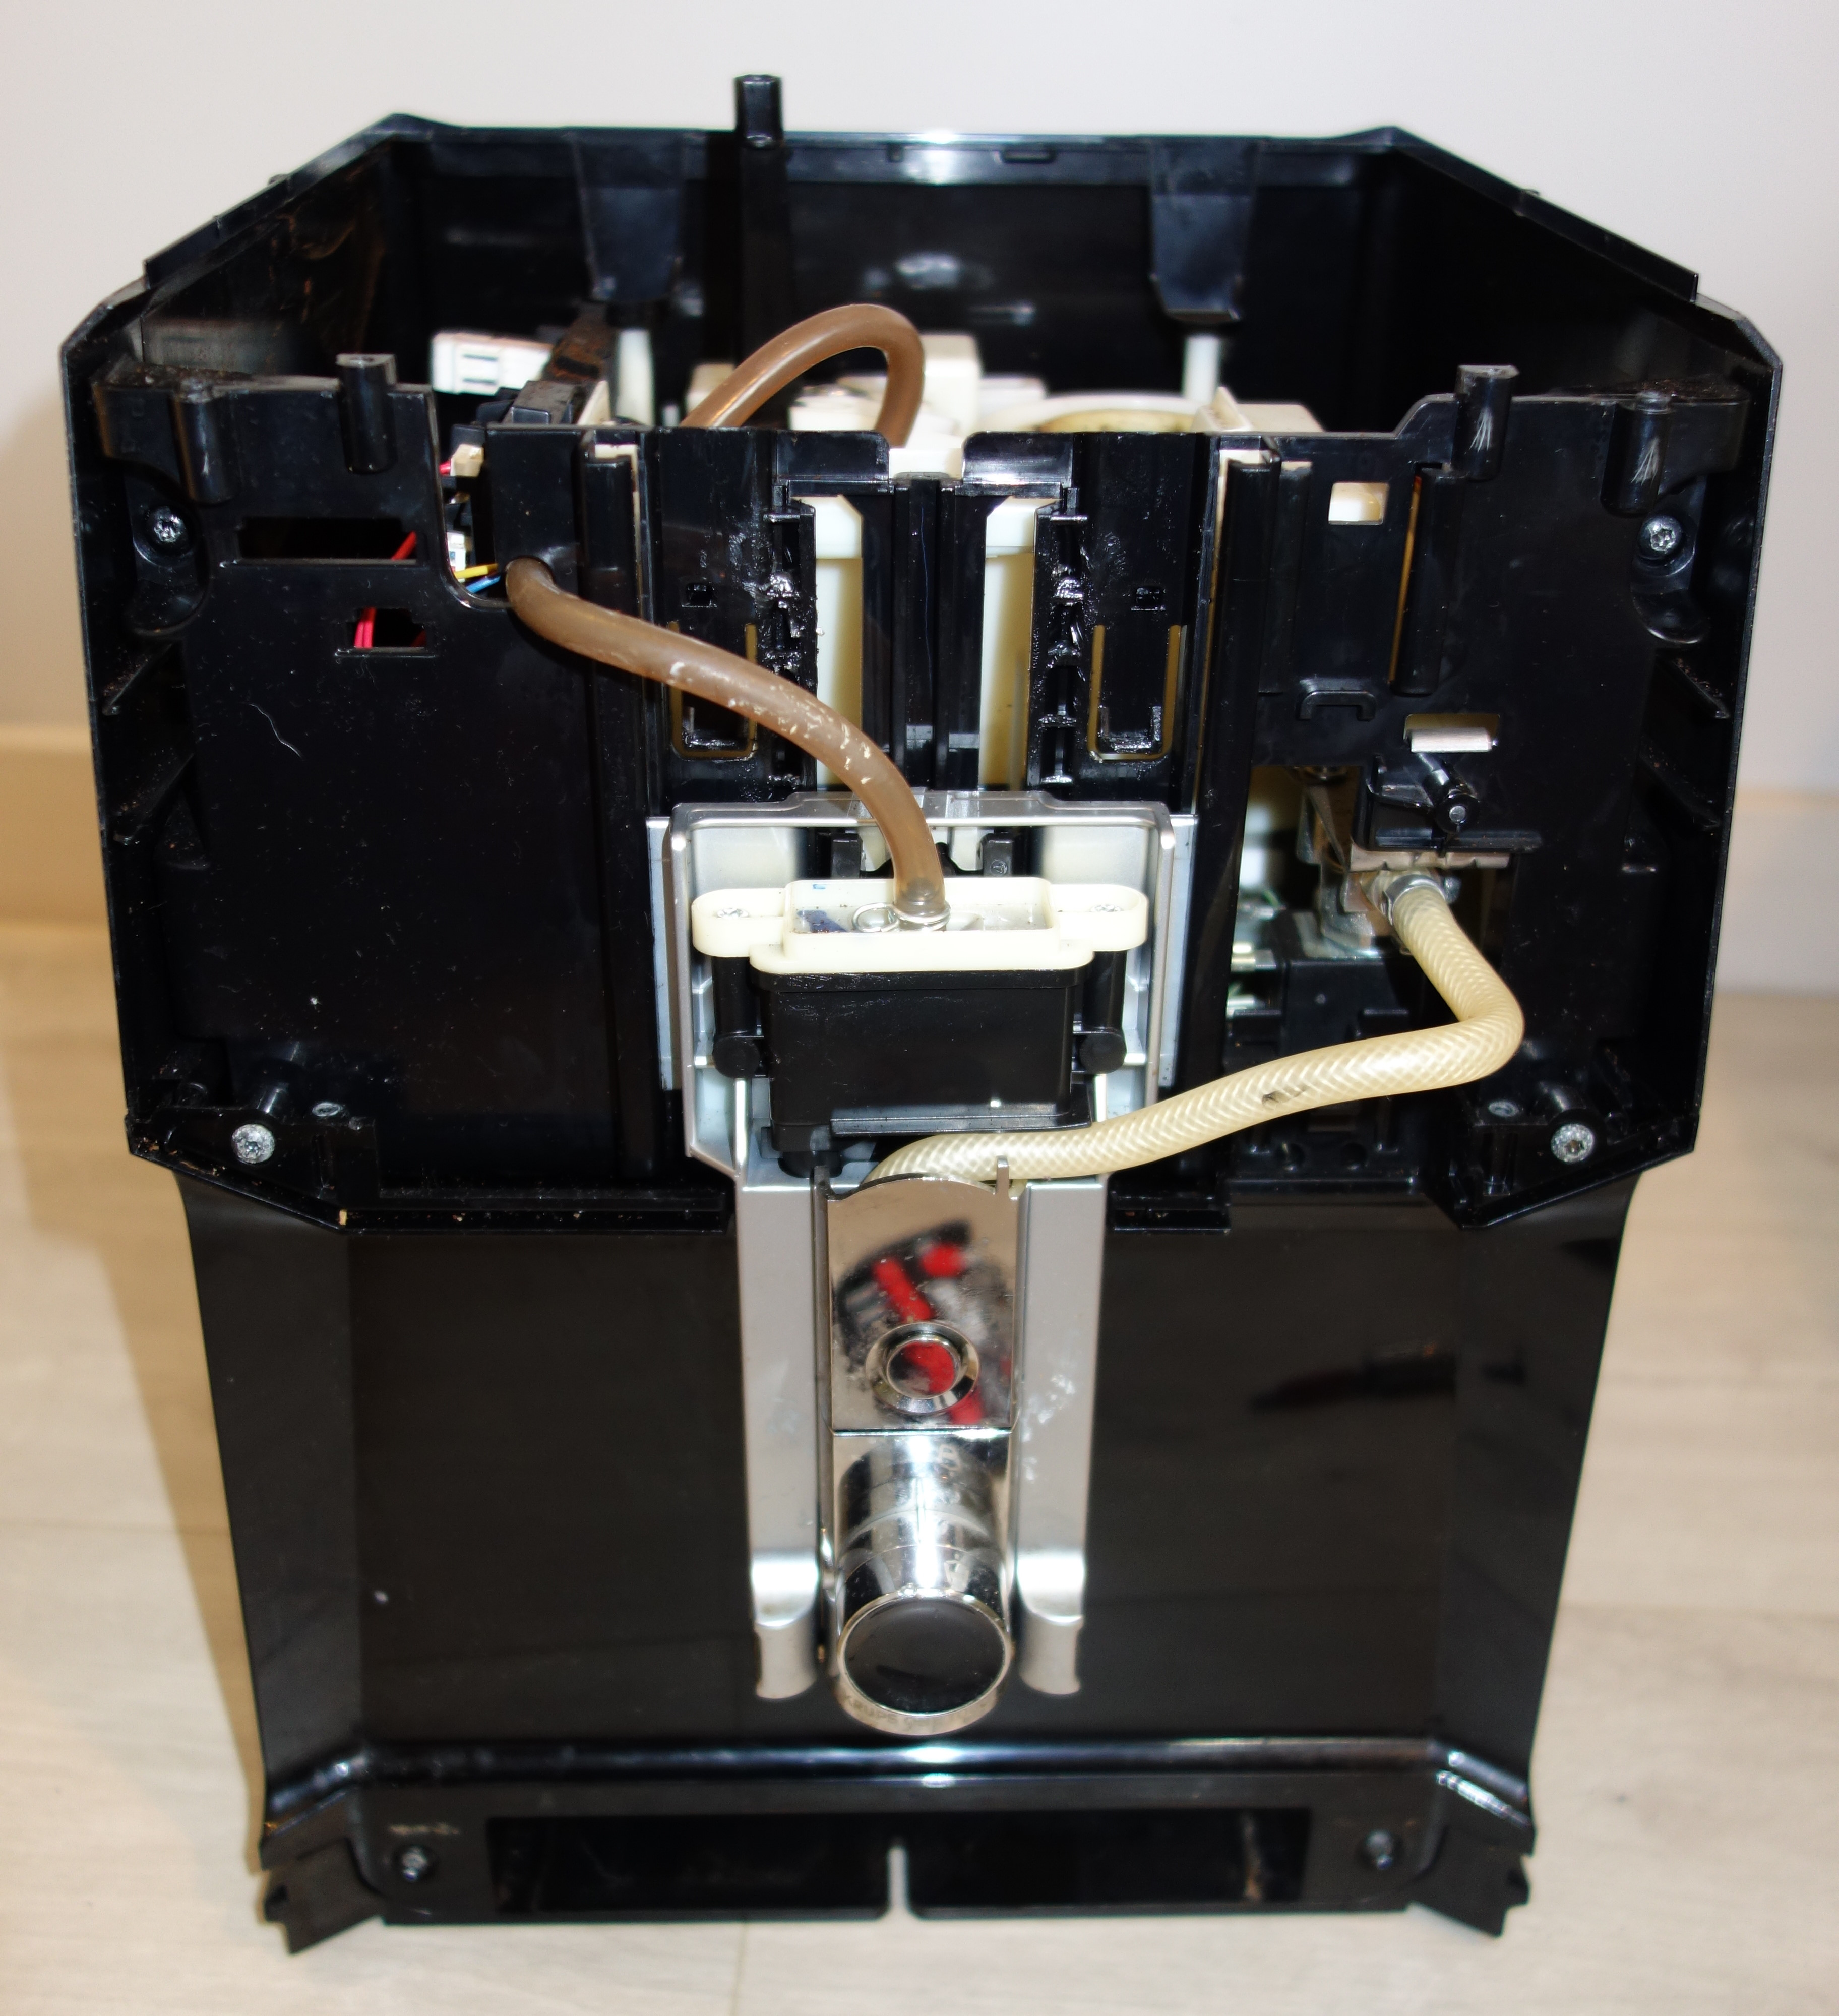
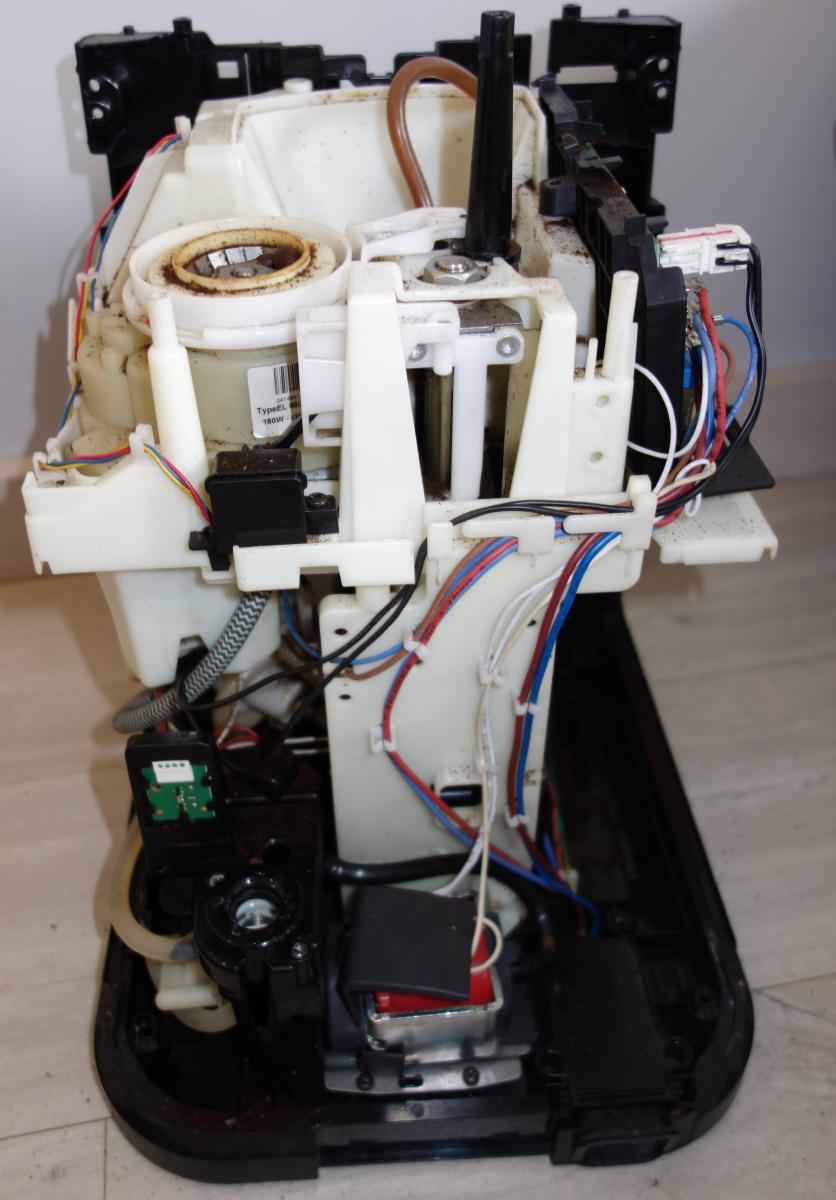
Step 3 : Back cover disassembly
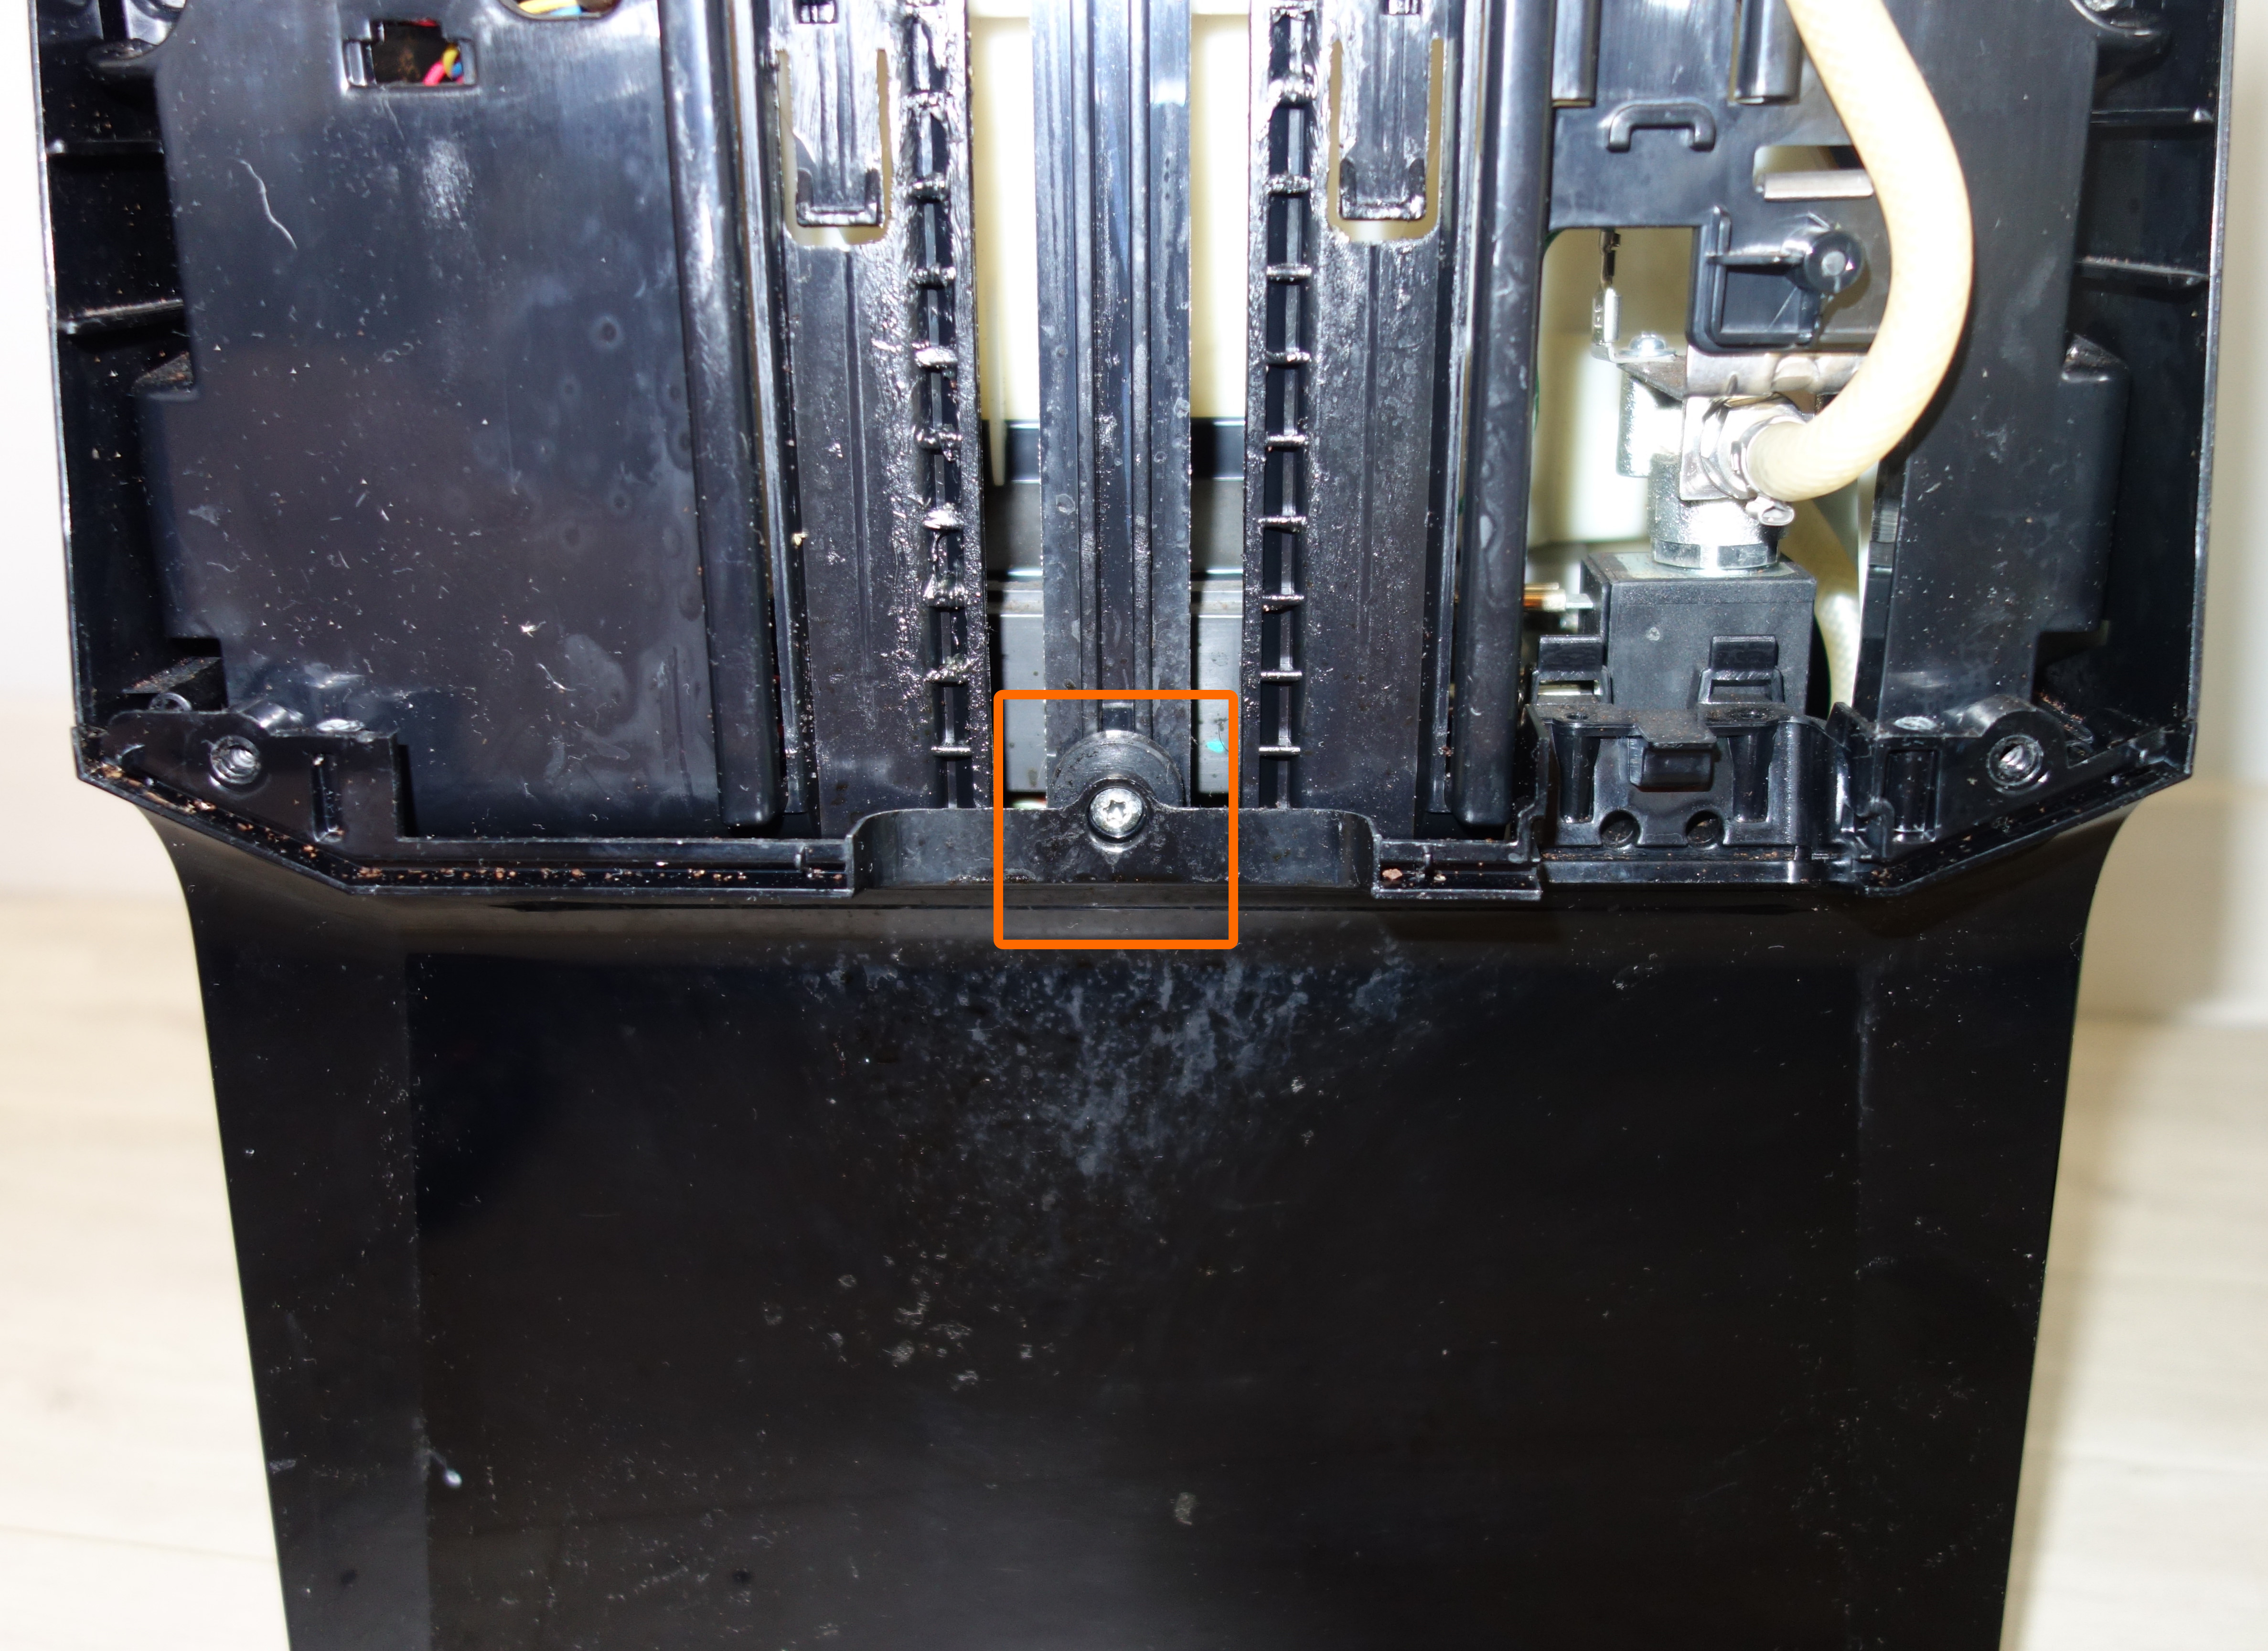
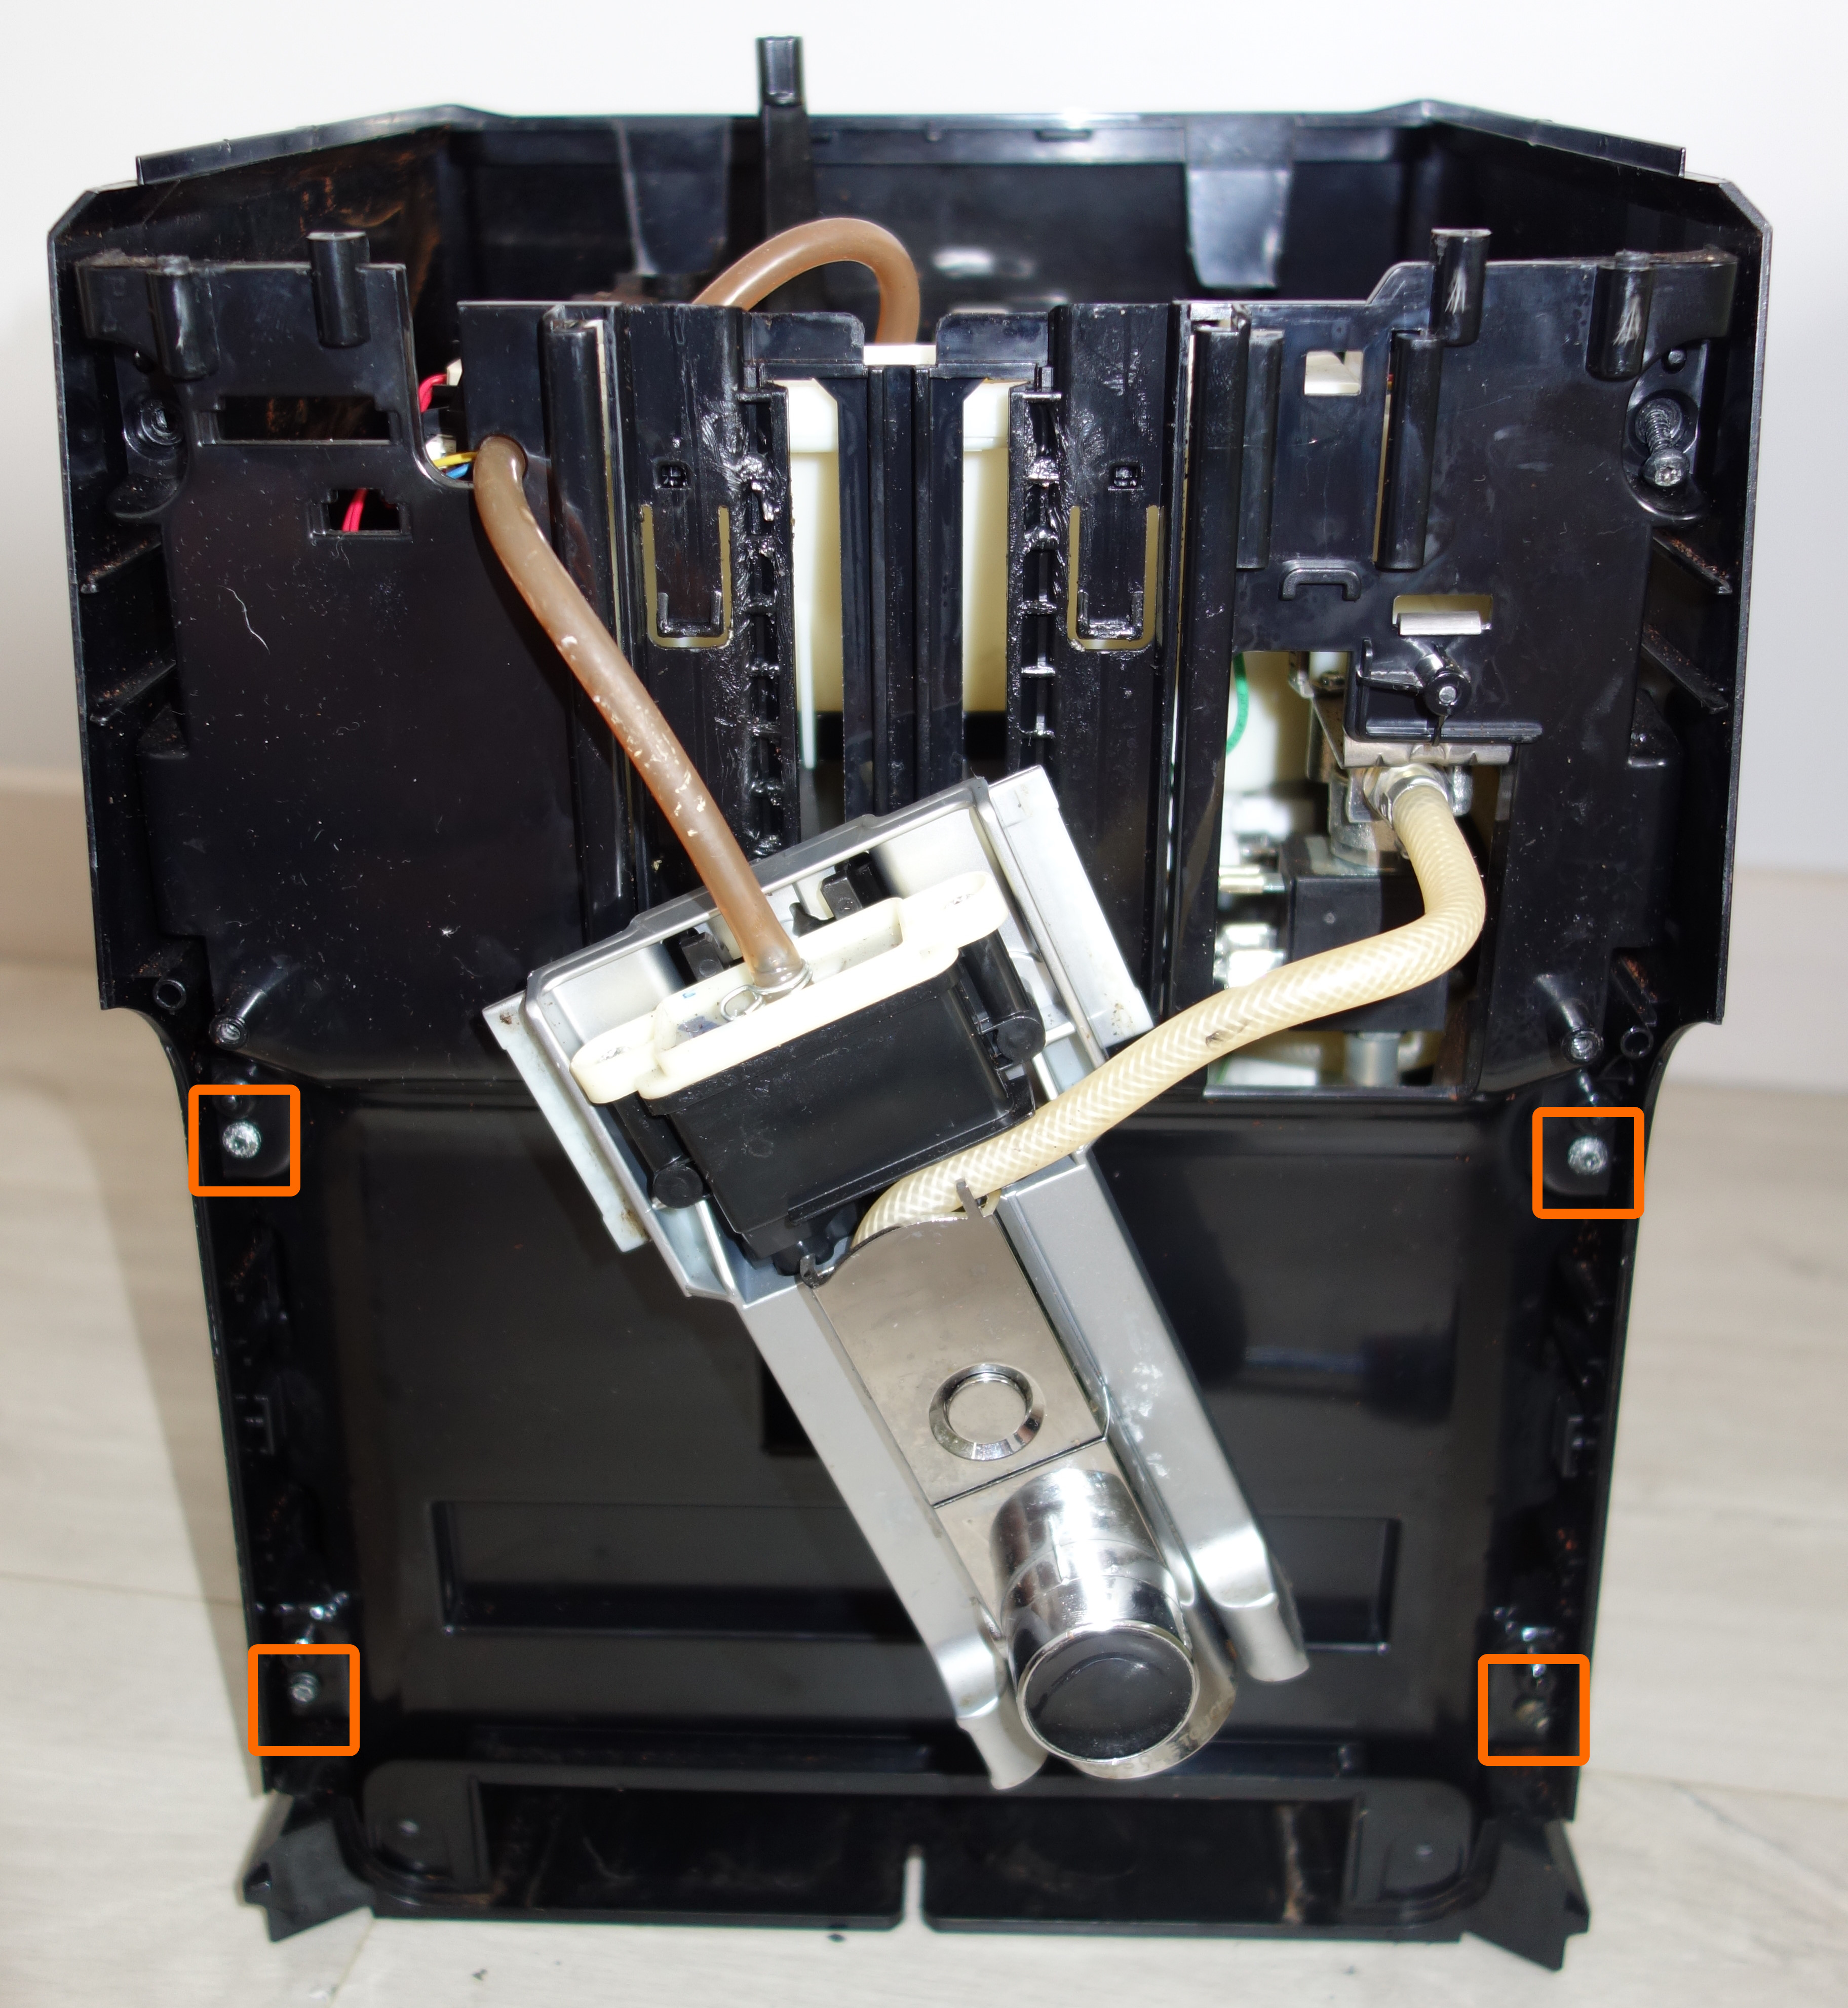


Remove the screw that was behind the coffee dispenser
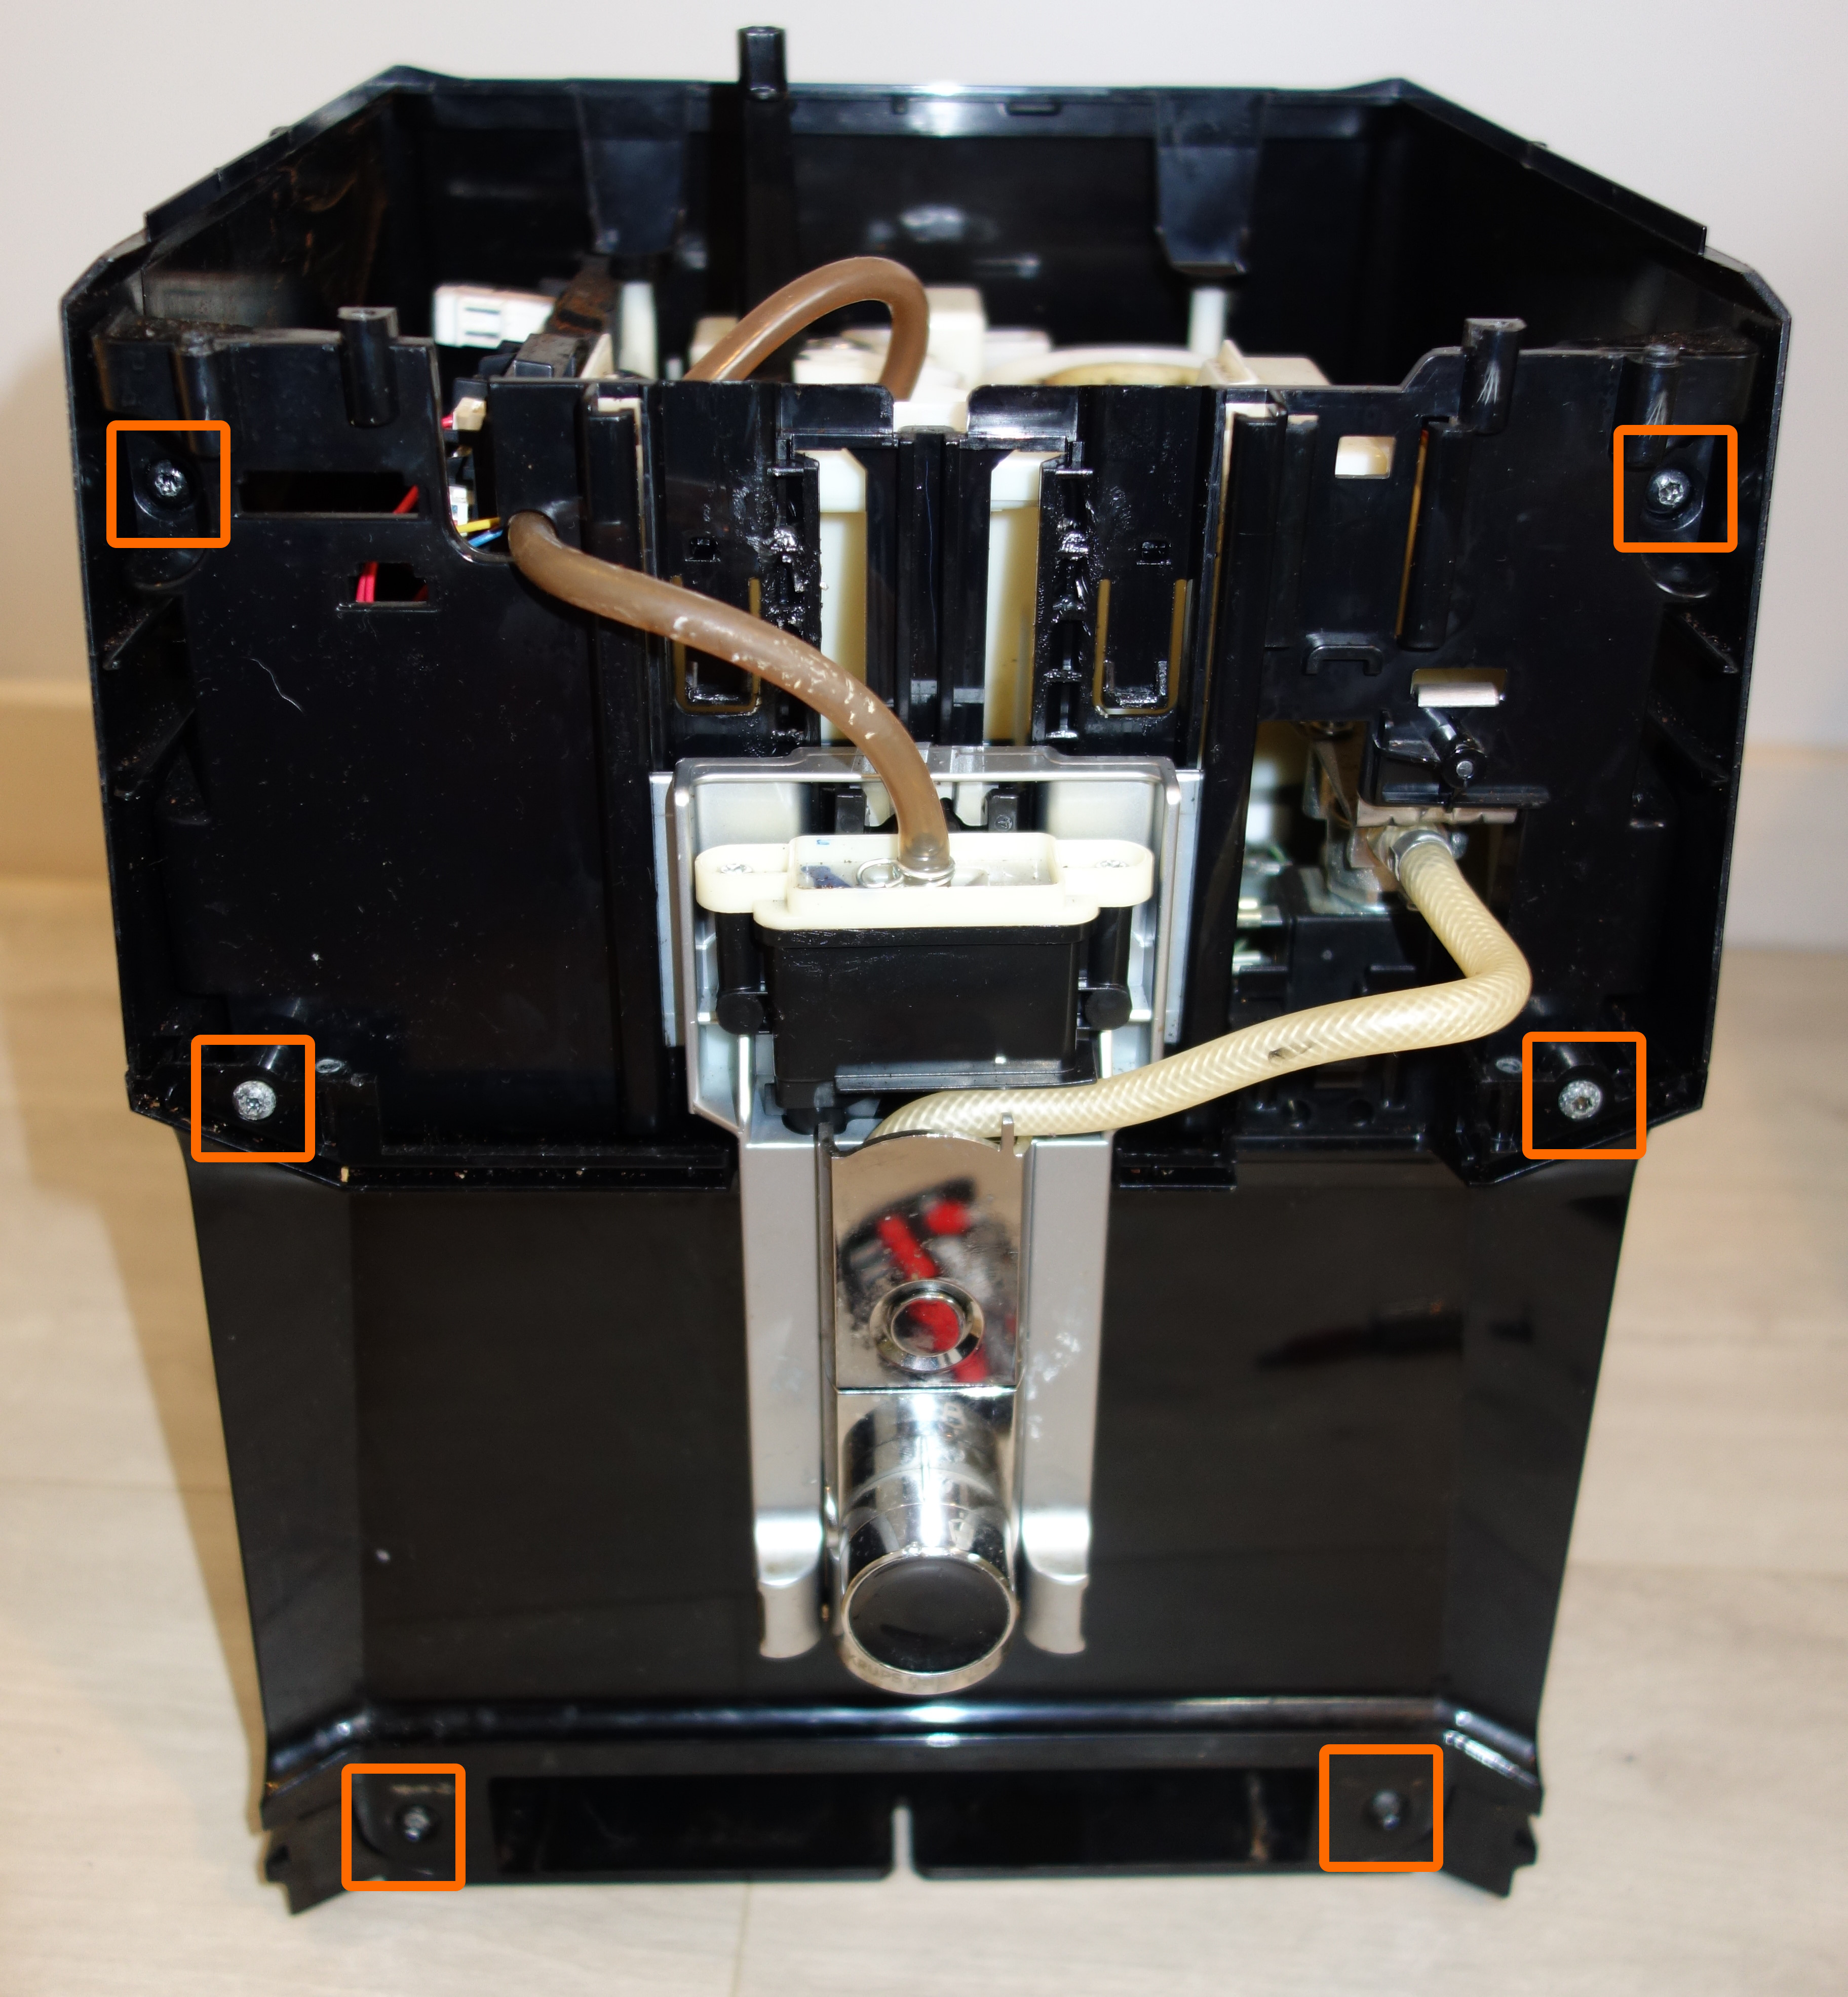
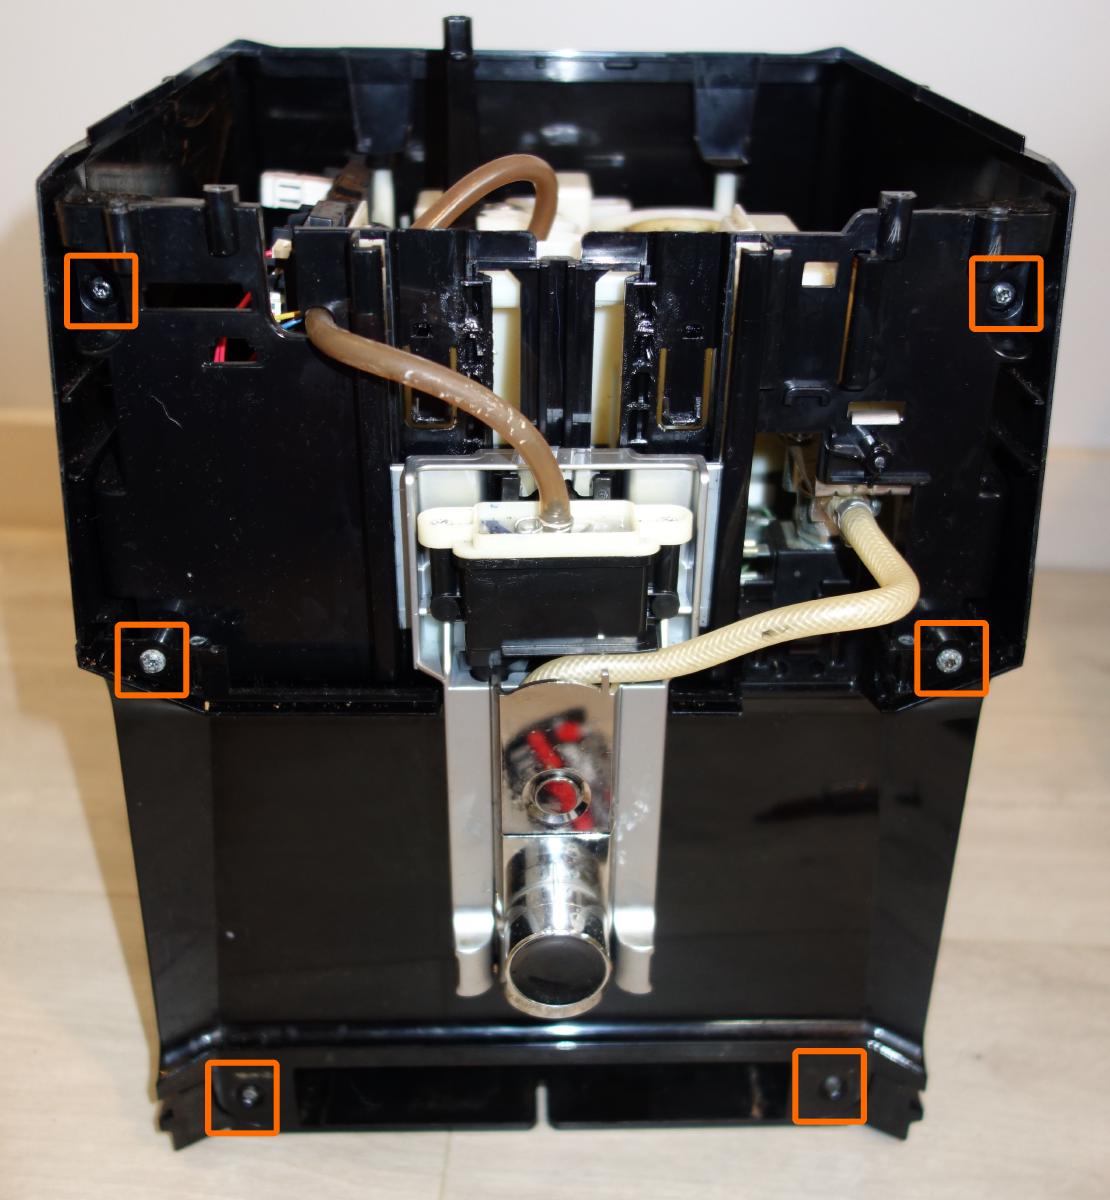
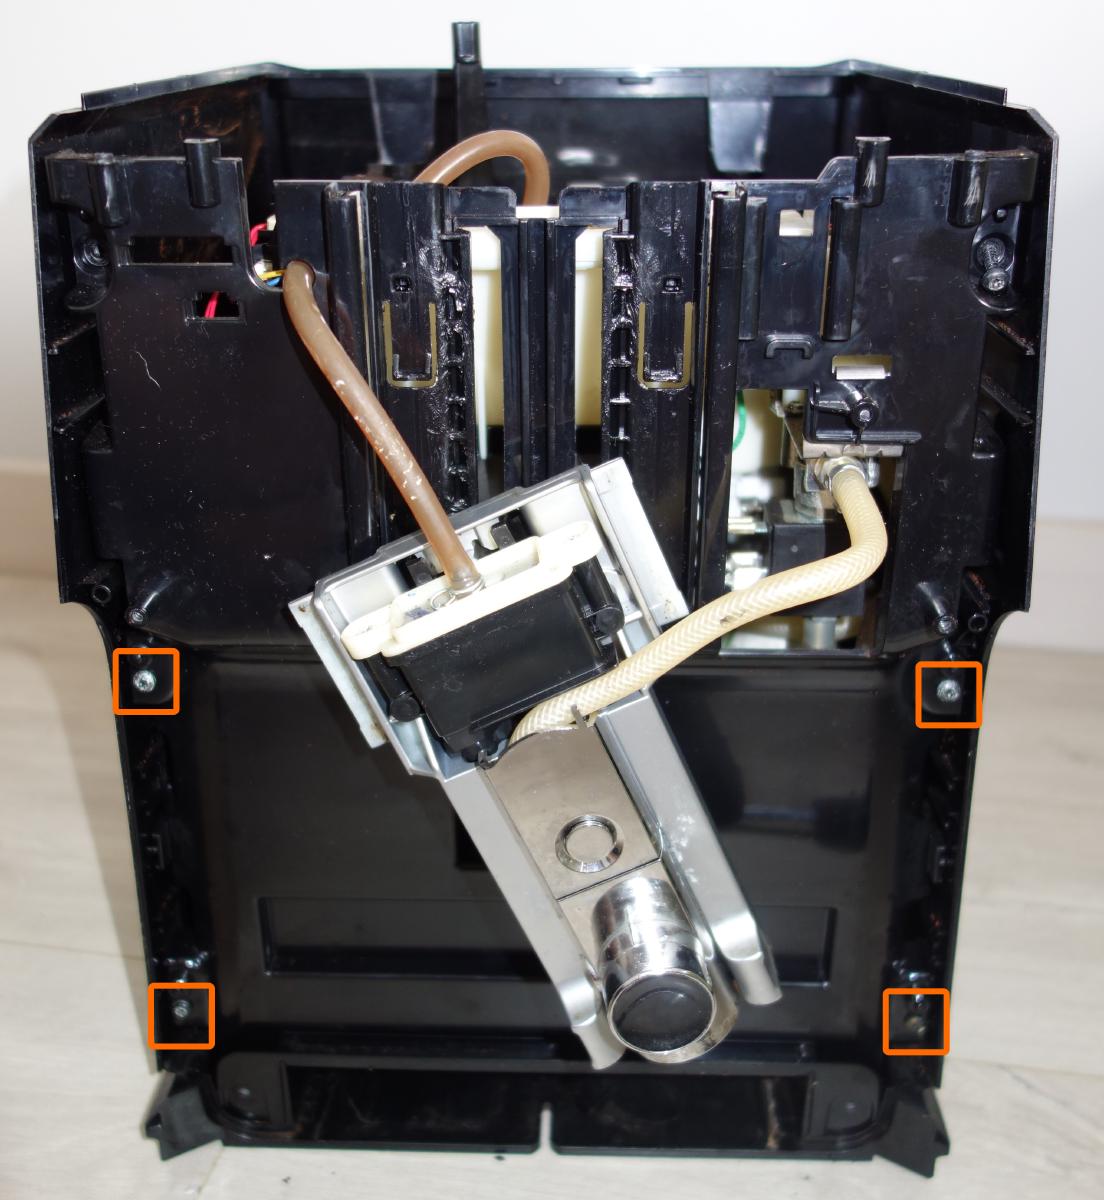
Remove the six screws from the front face
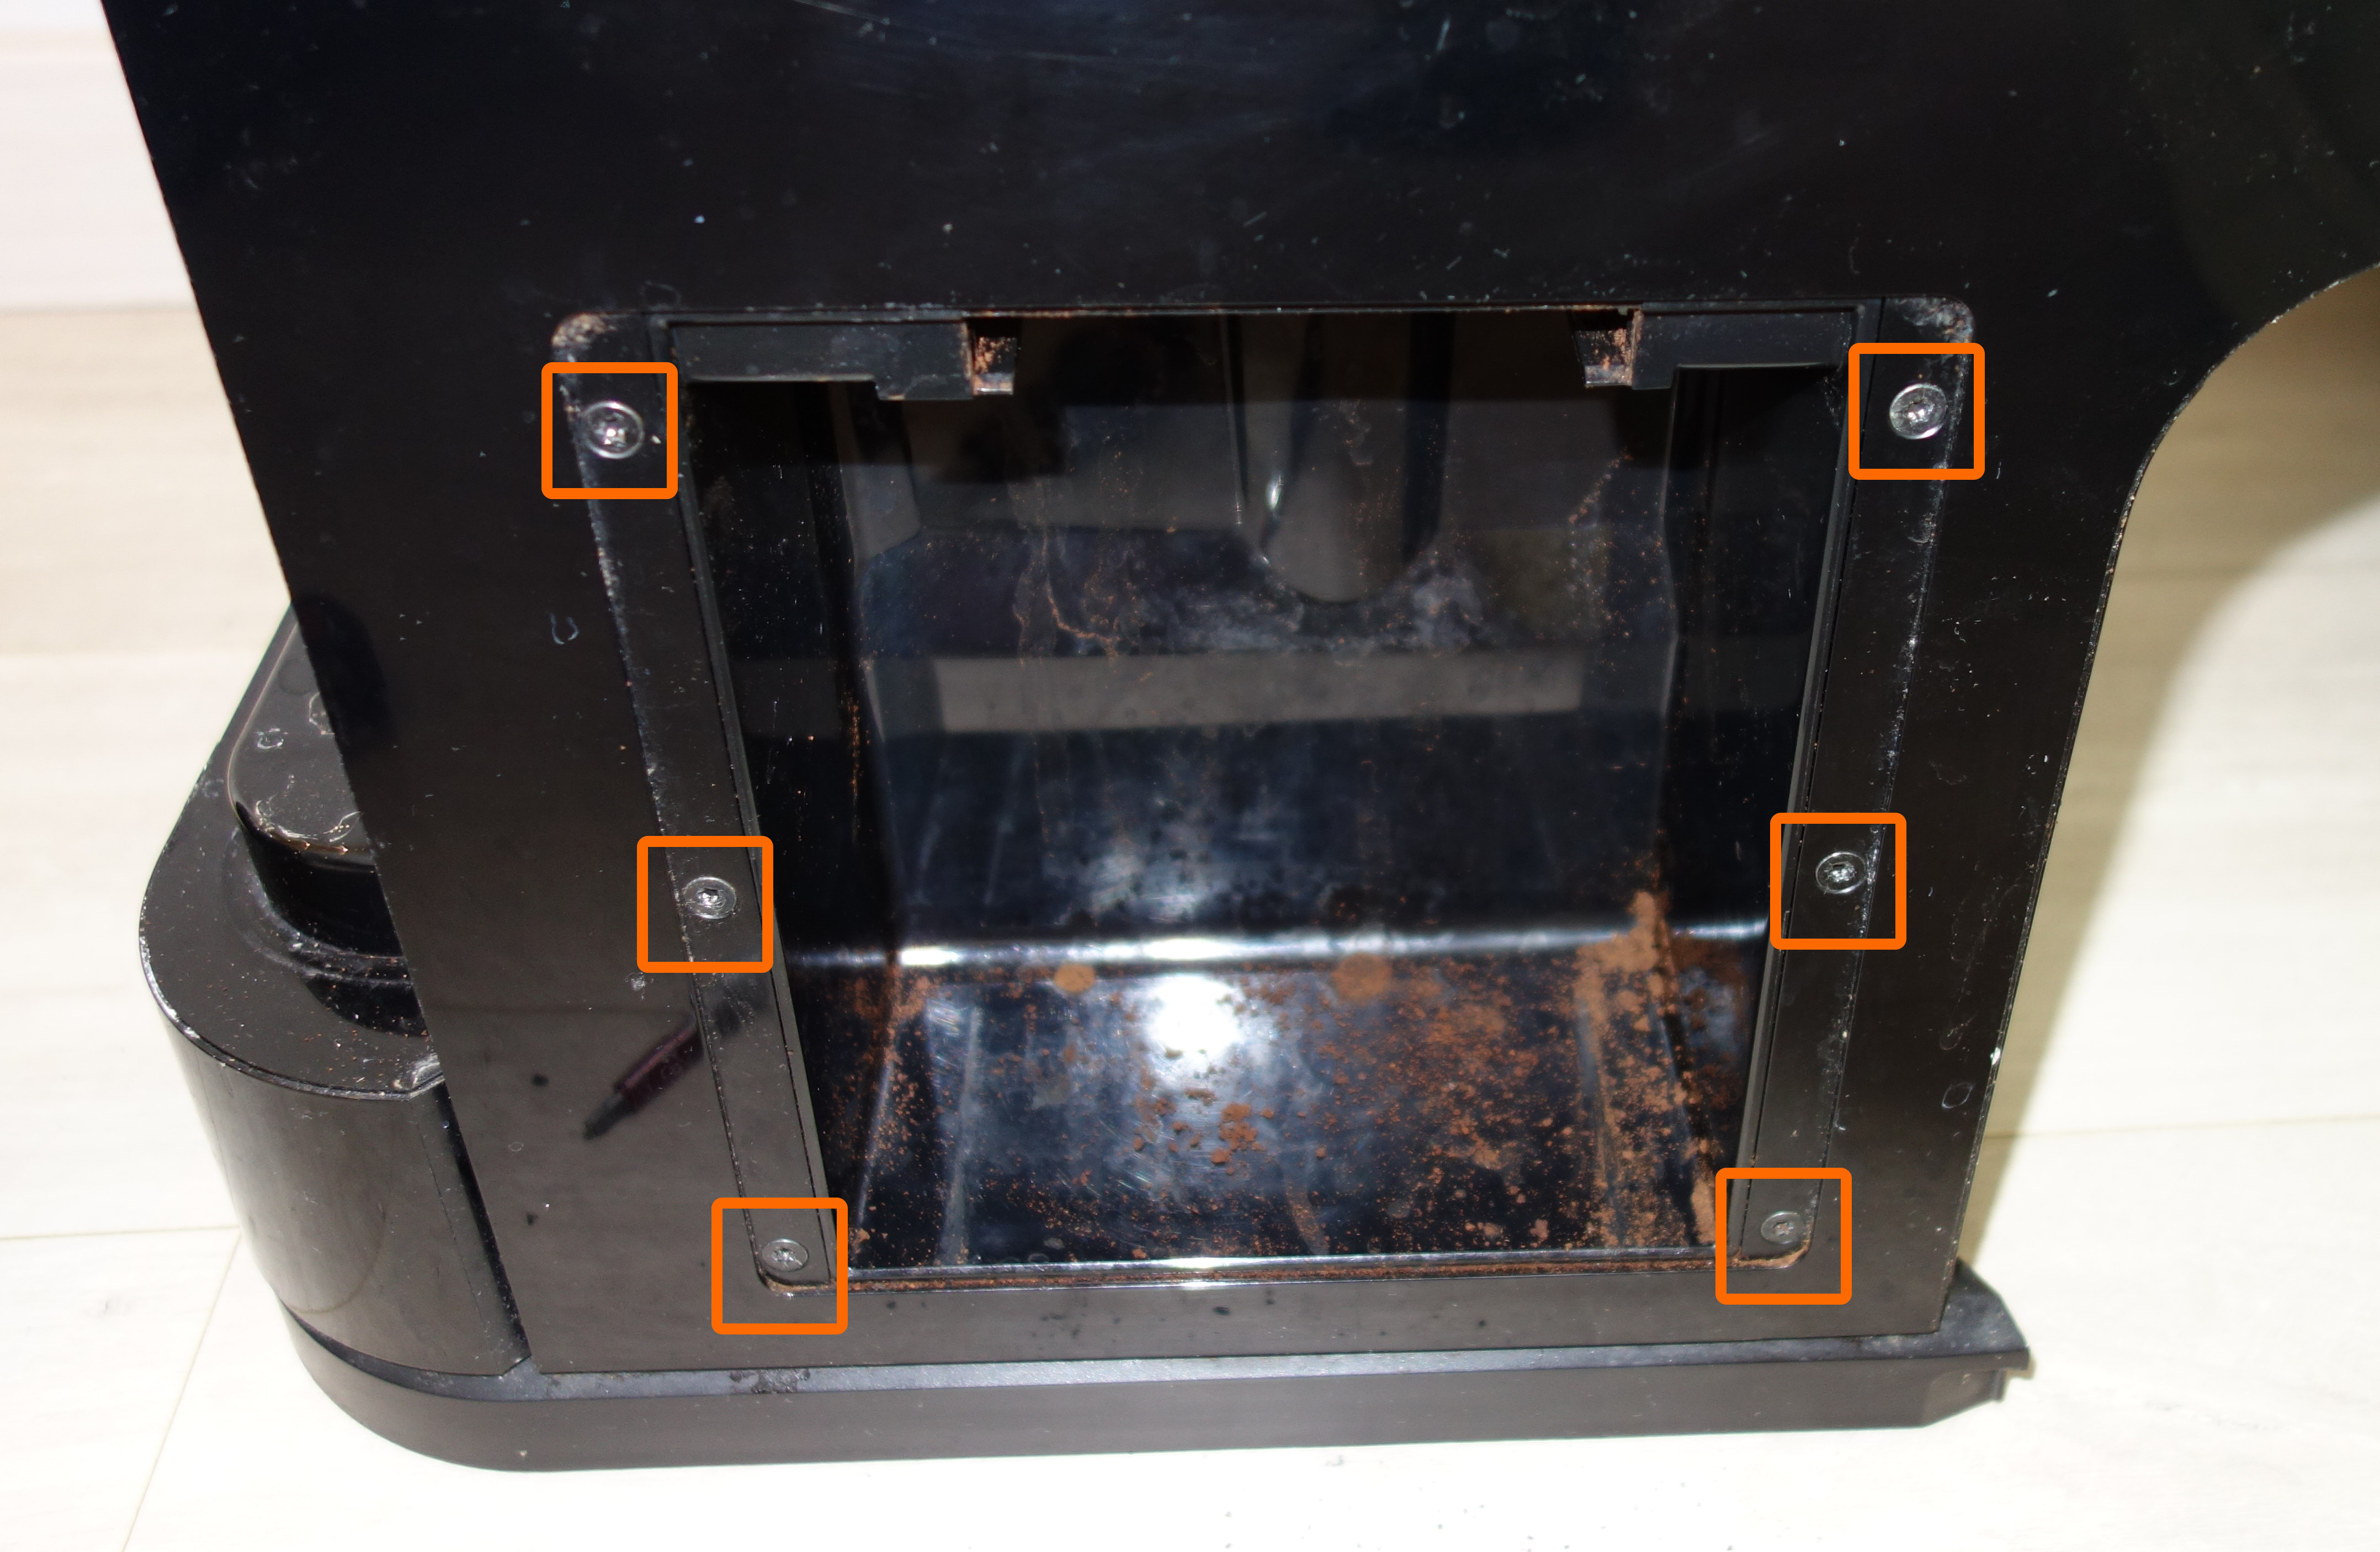
Disassemble the plastic cover at the bottom front face
Remove the four screws that were hidden by plastic cover
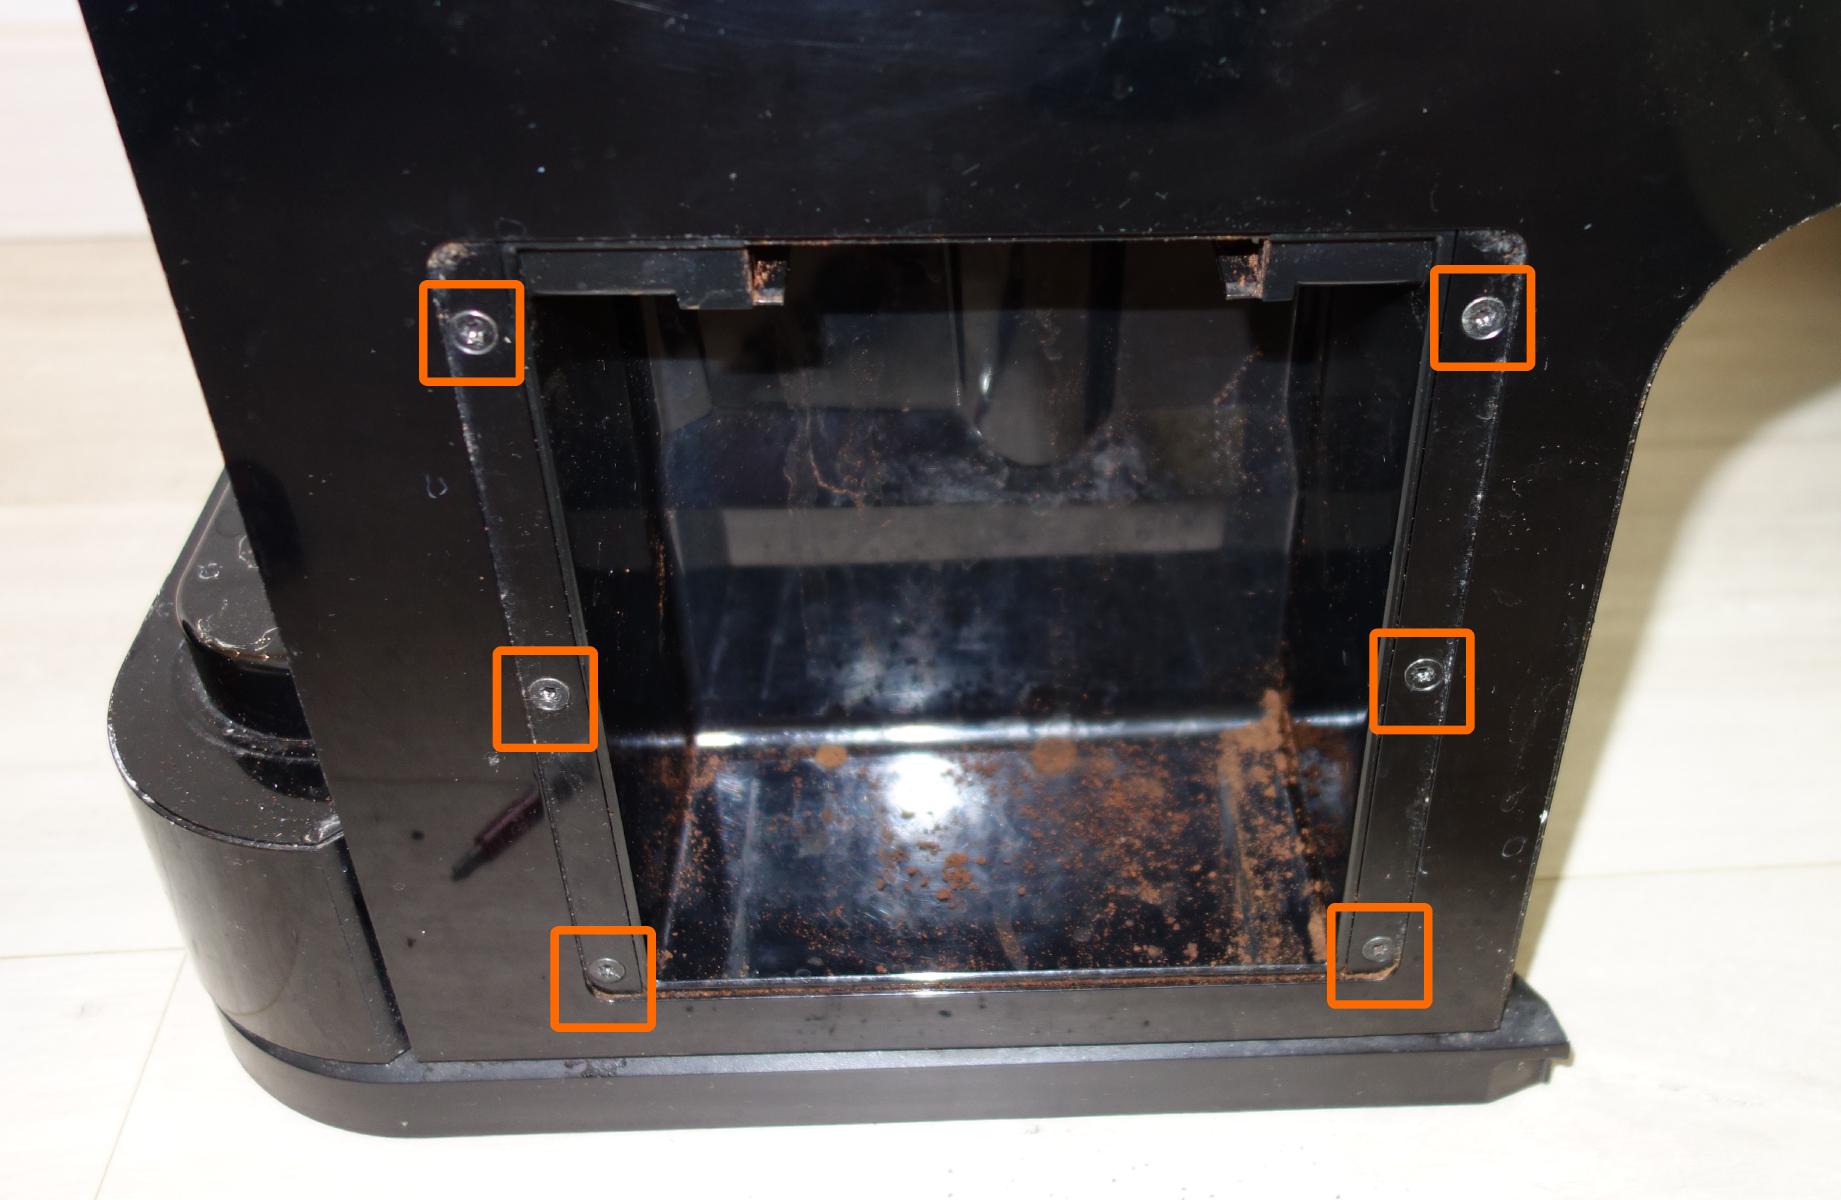
On the left side, remove the used coffee bin, the coffee drawer then remove the six screws.
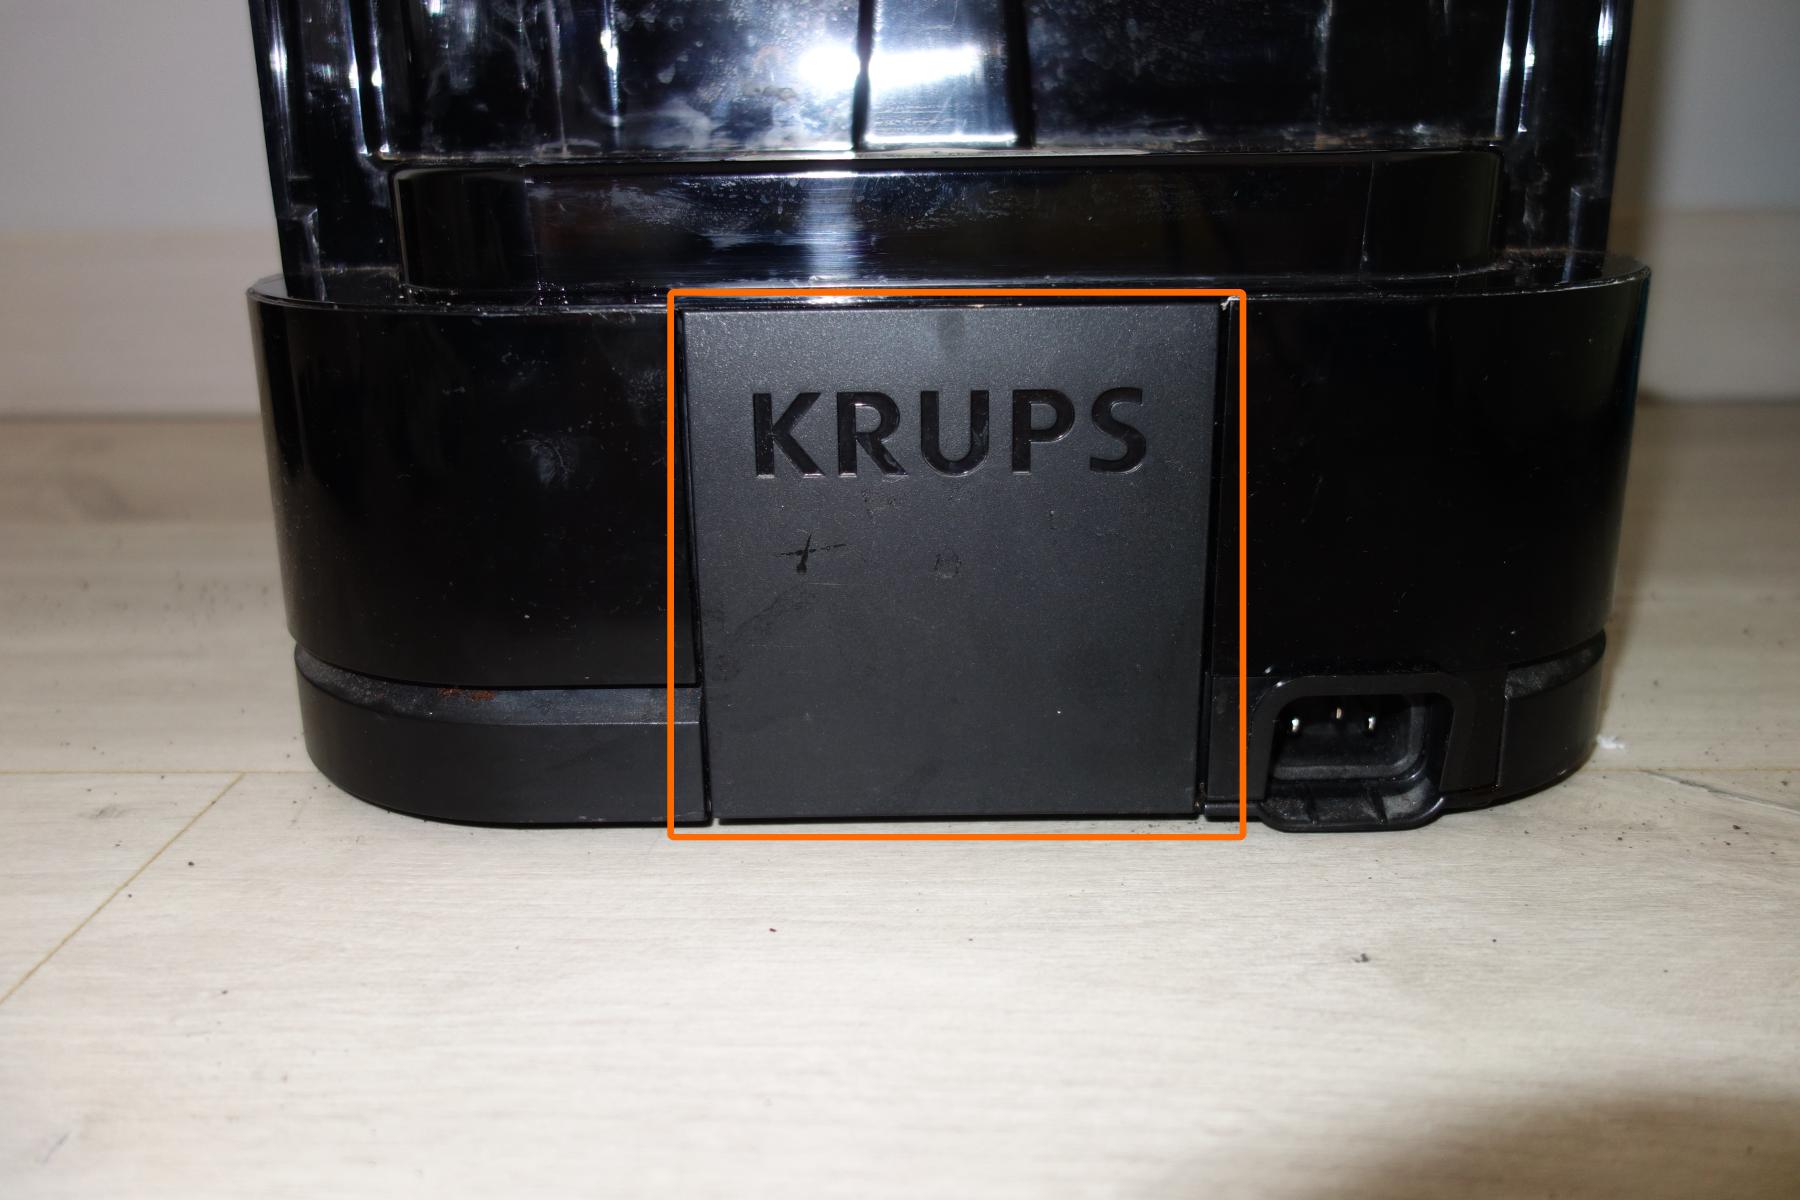
On the back of the machine, remove the Krups cover by pulling it gently.
You can now slide the full-machine cover to the back !
It is now time to celebrate your victory against the machine.
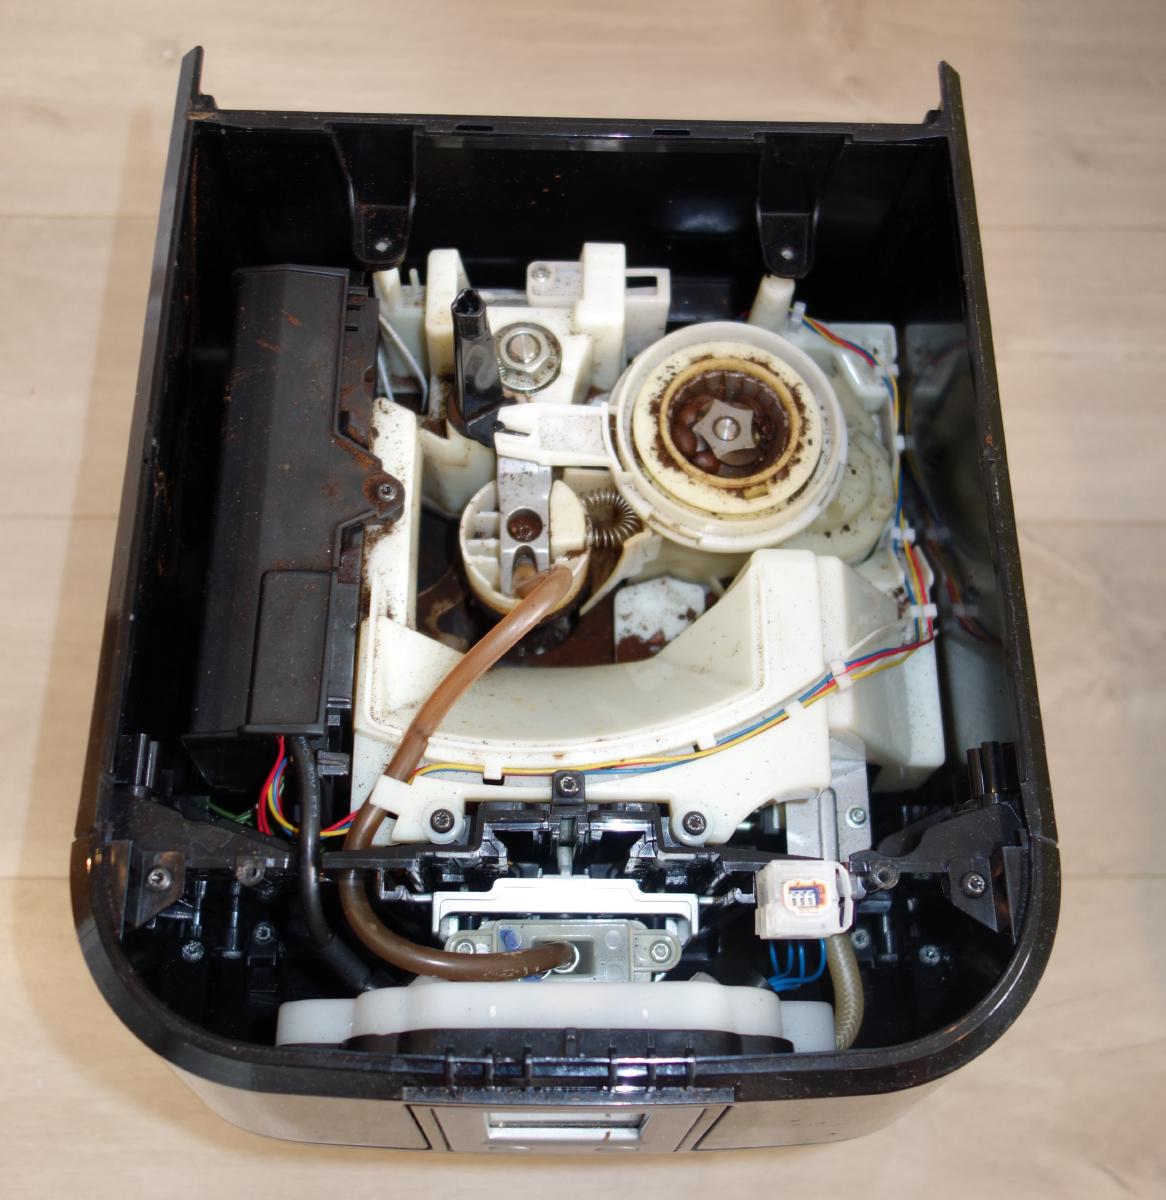
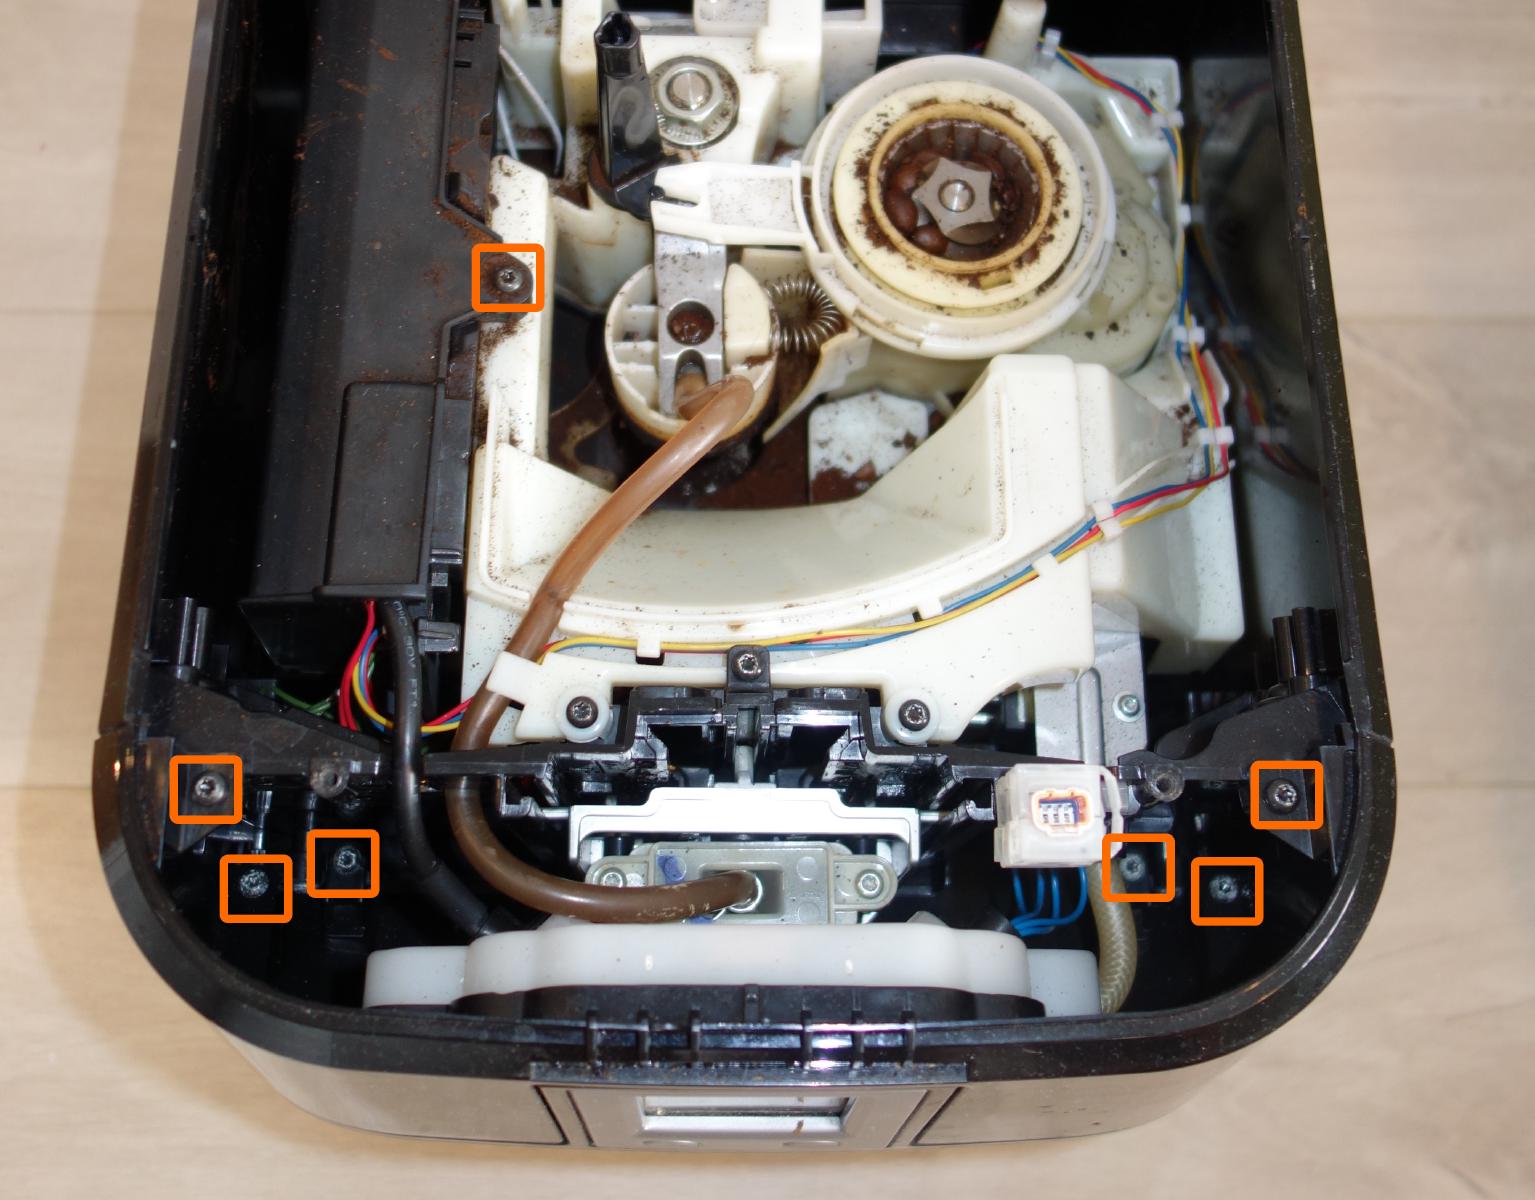
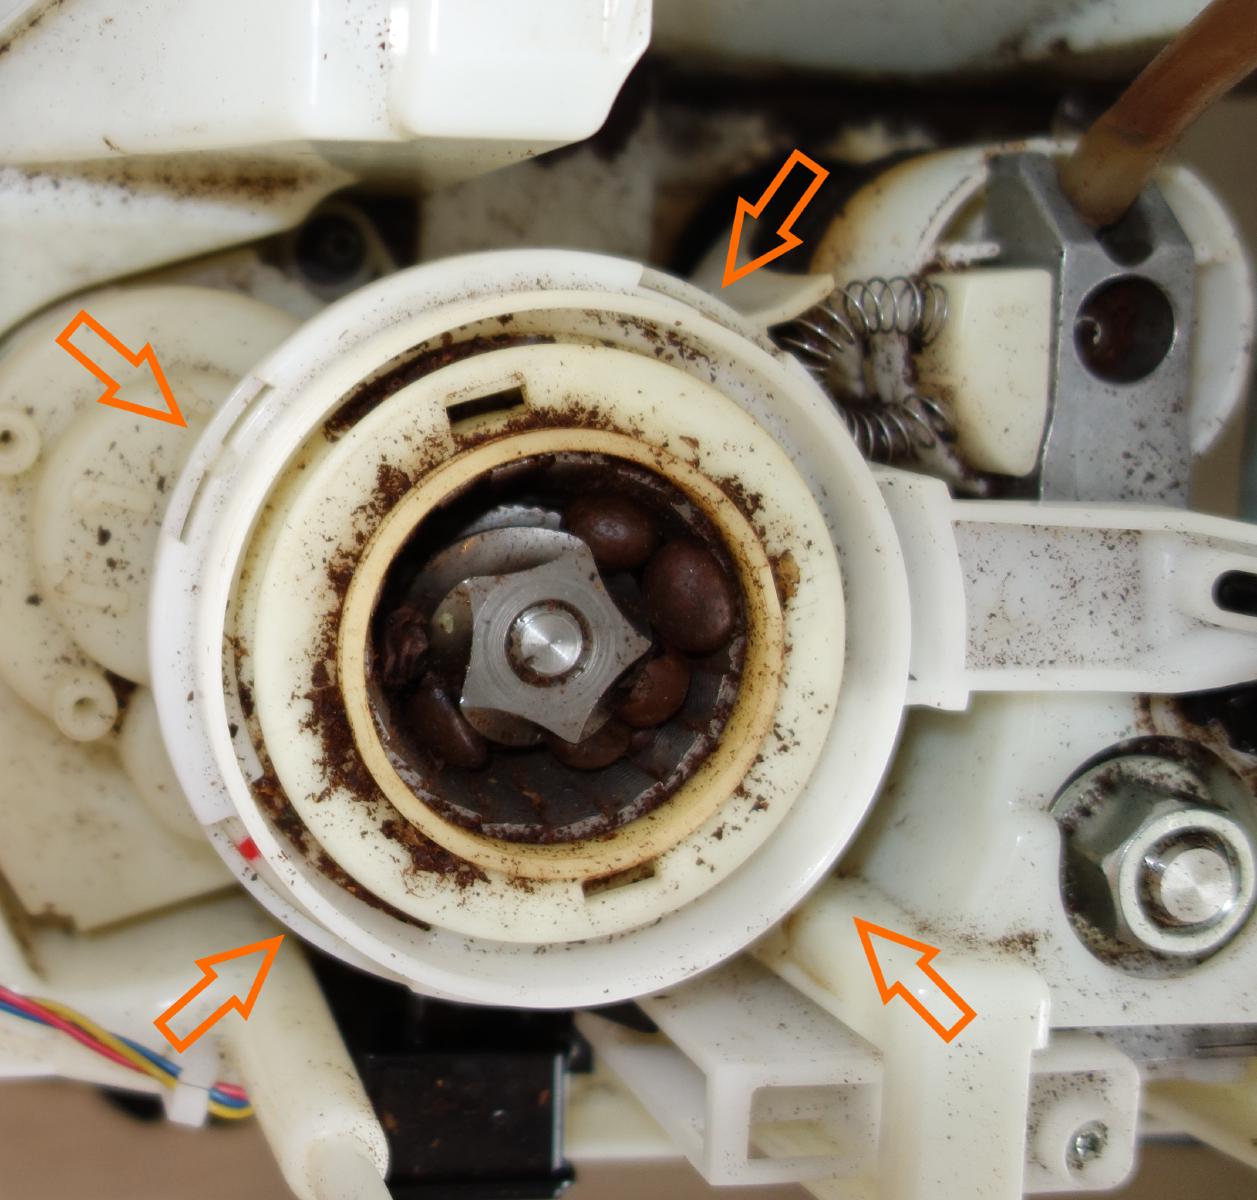
Step 4 : Coffee grinder disassembly
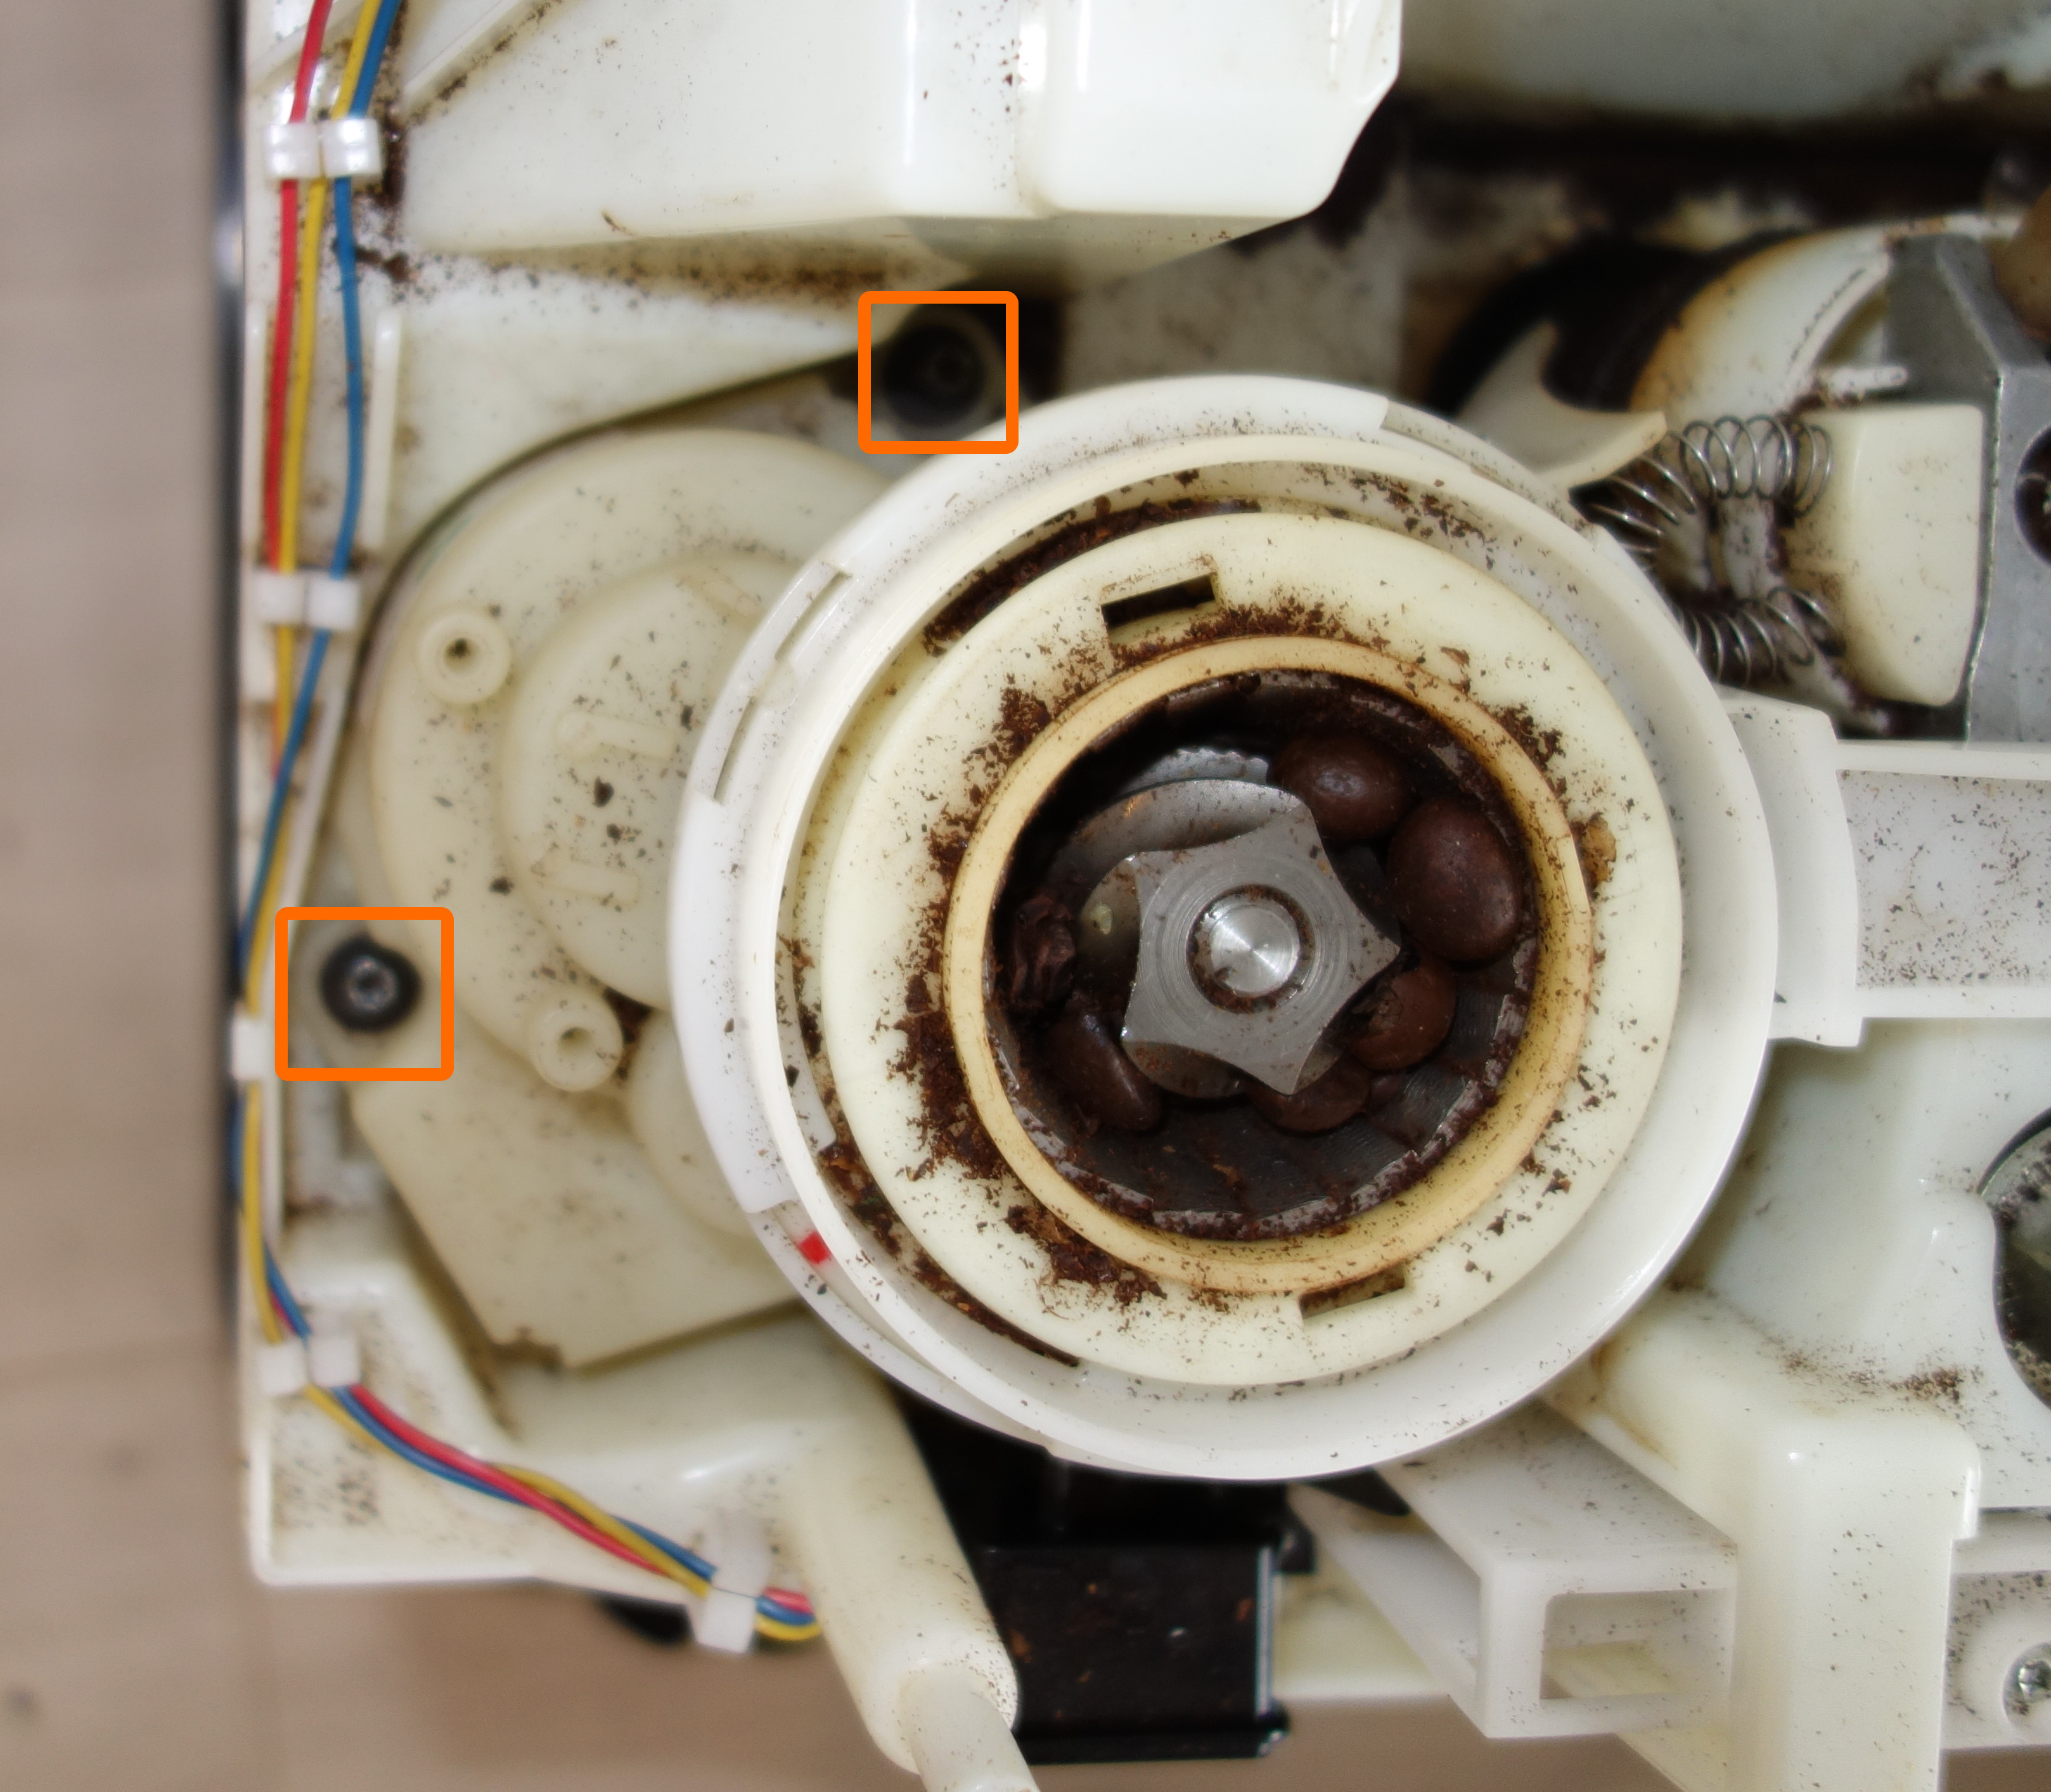

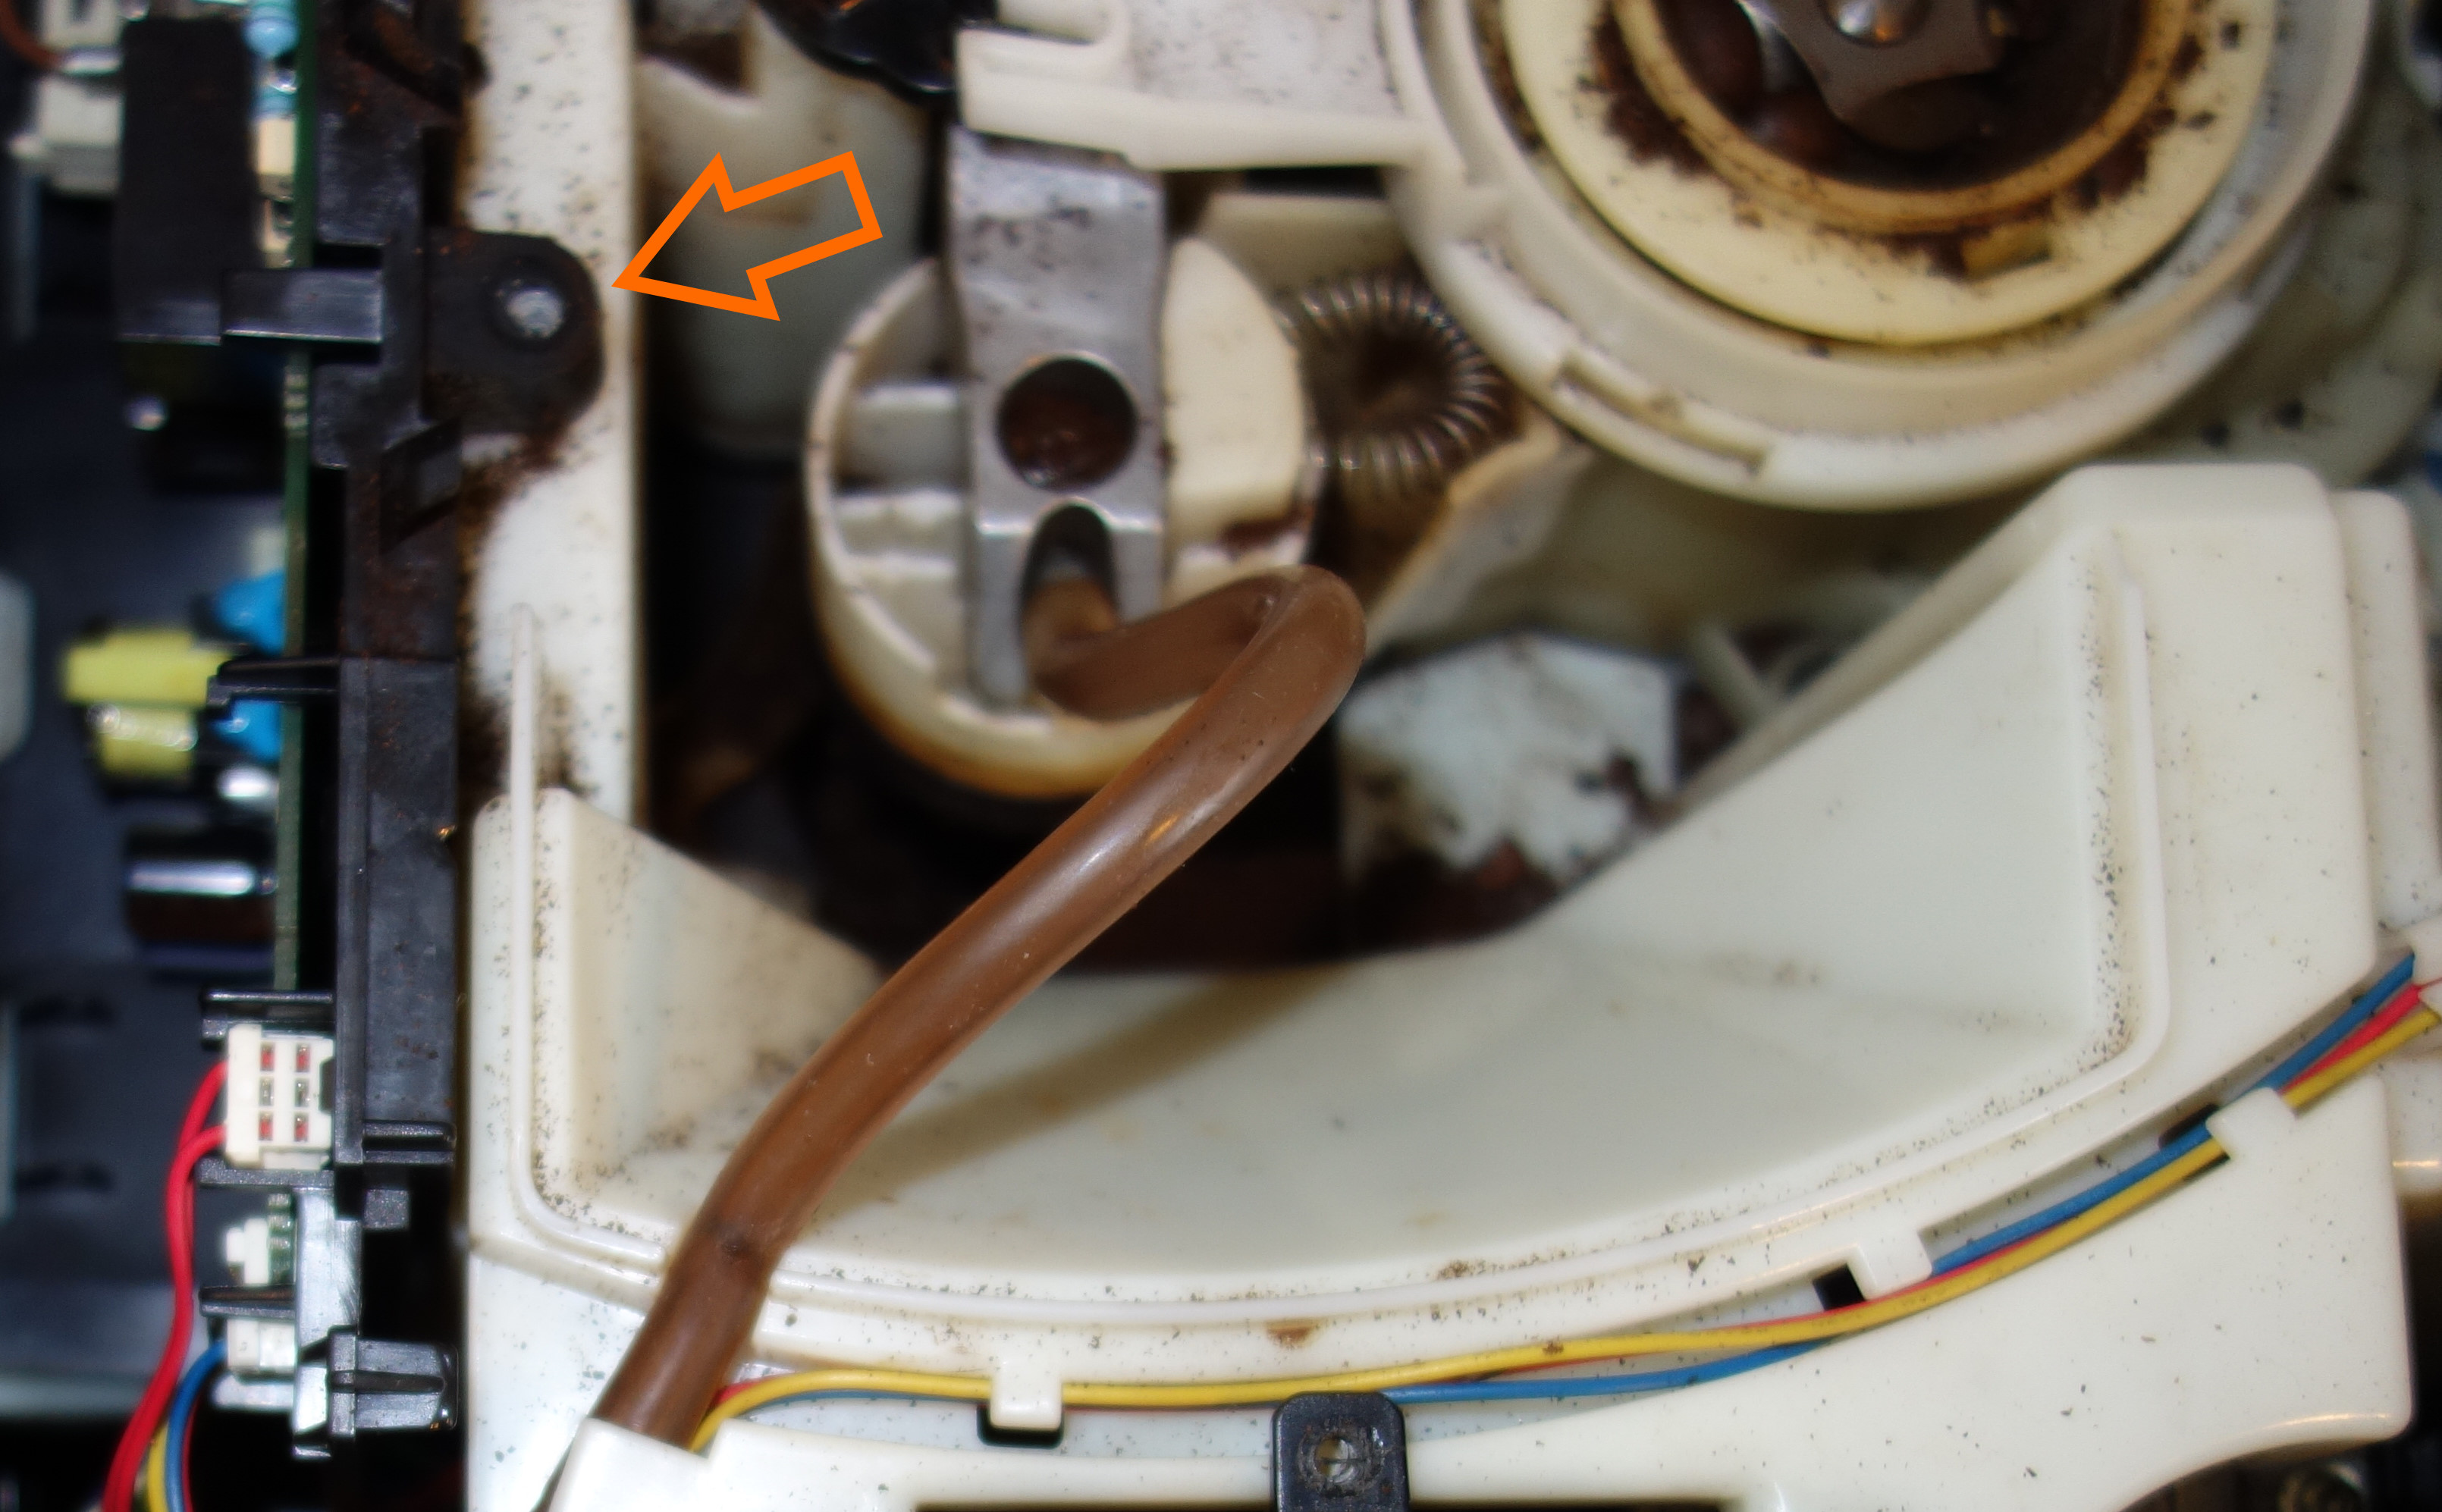
Remove coffee grinder screws
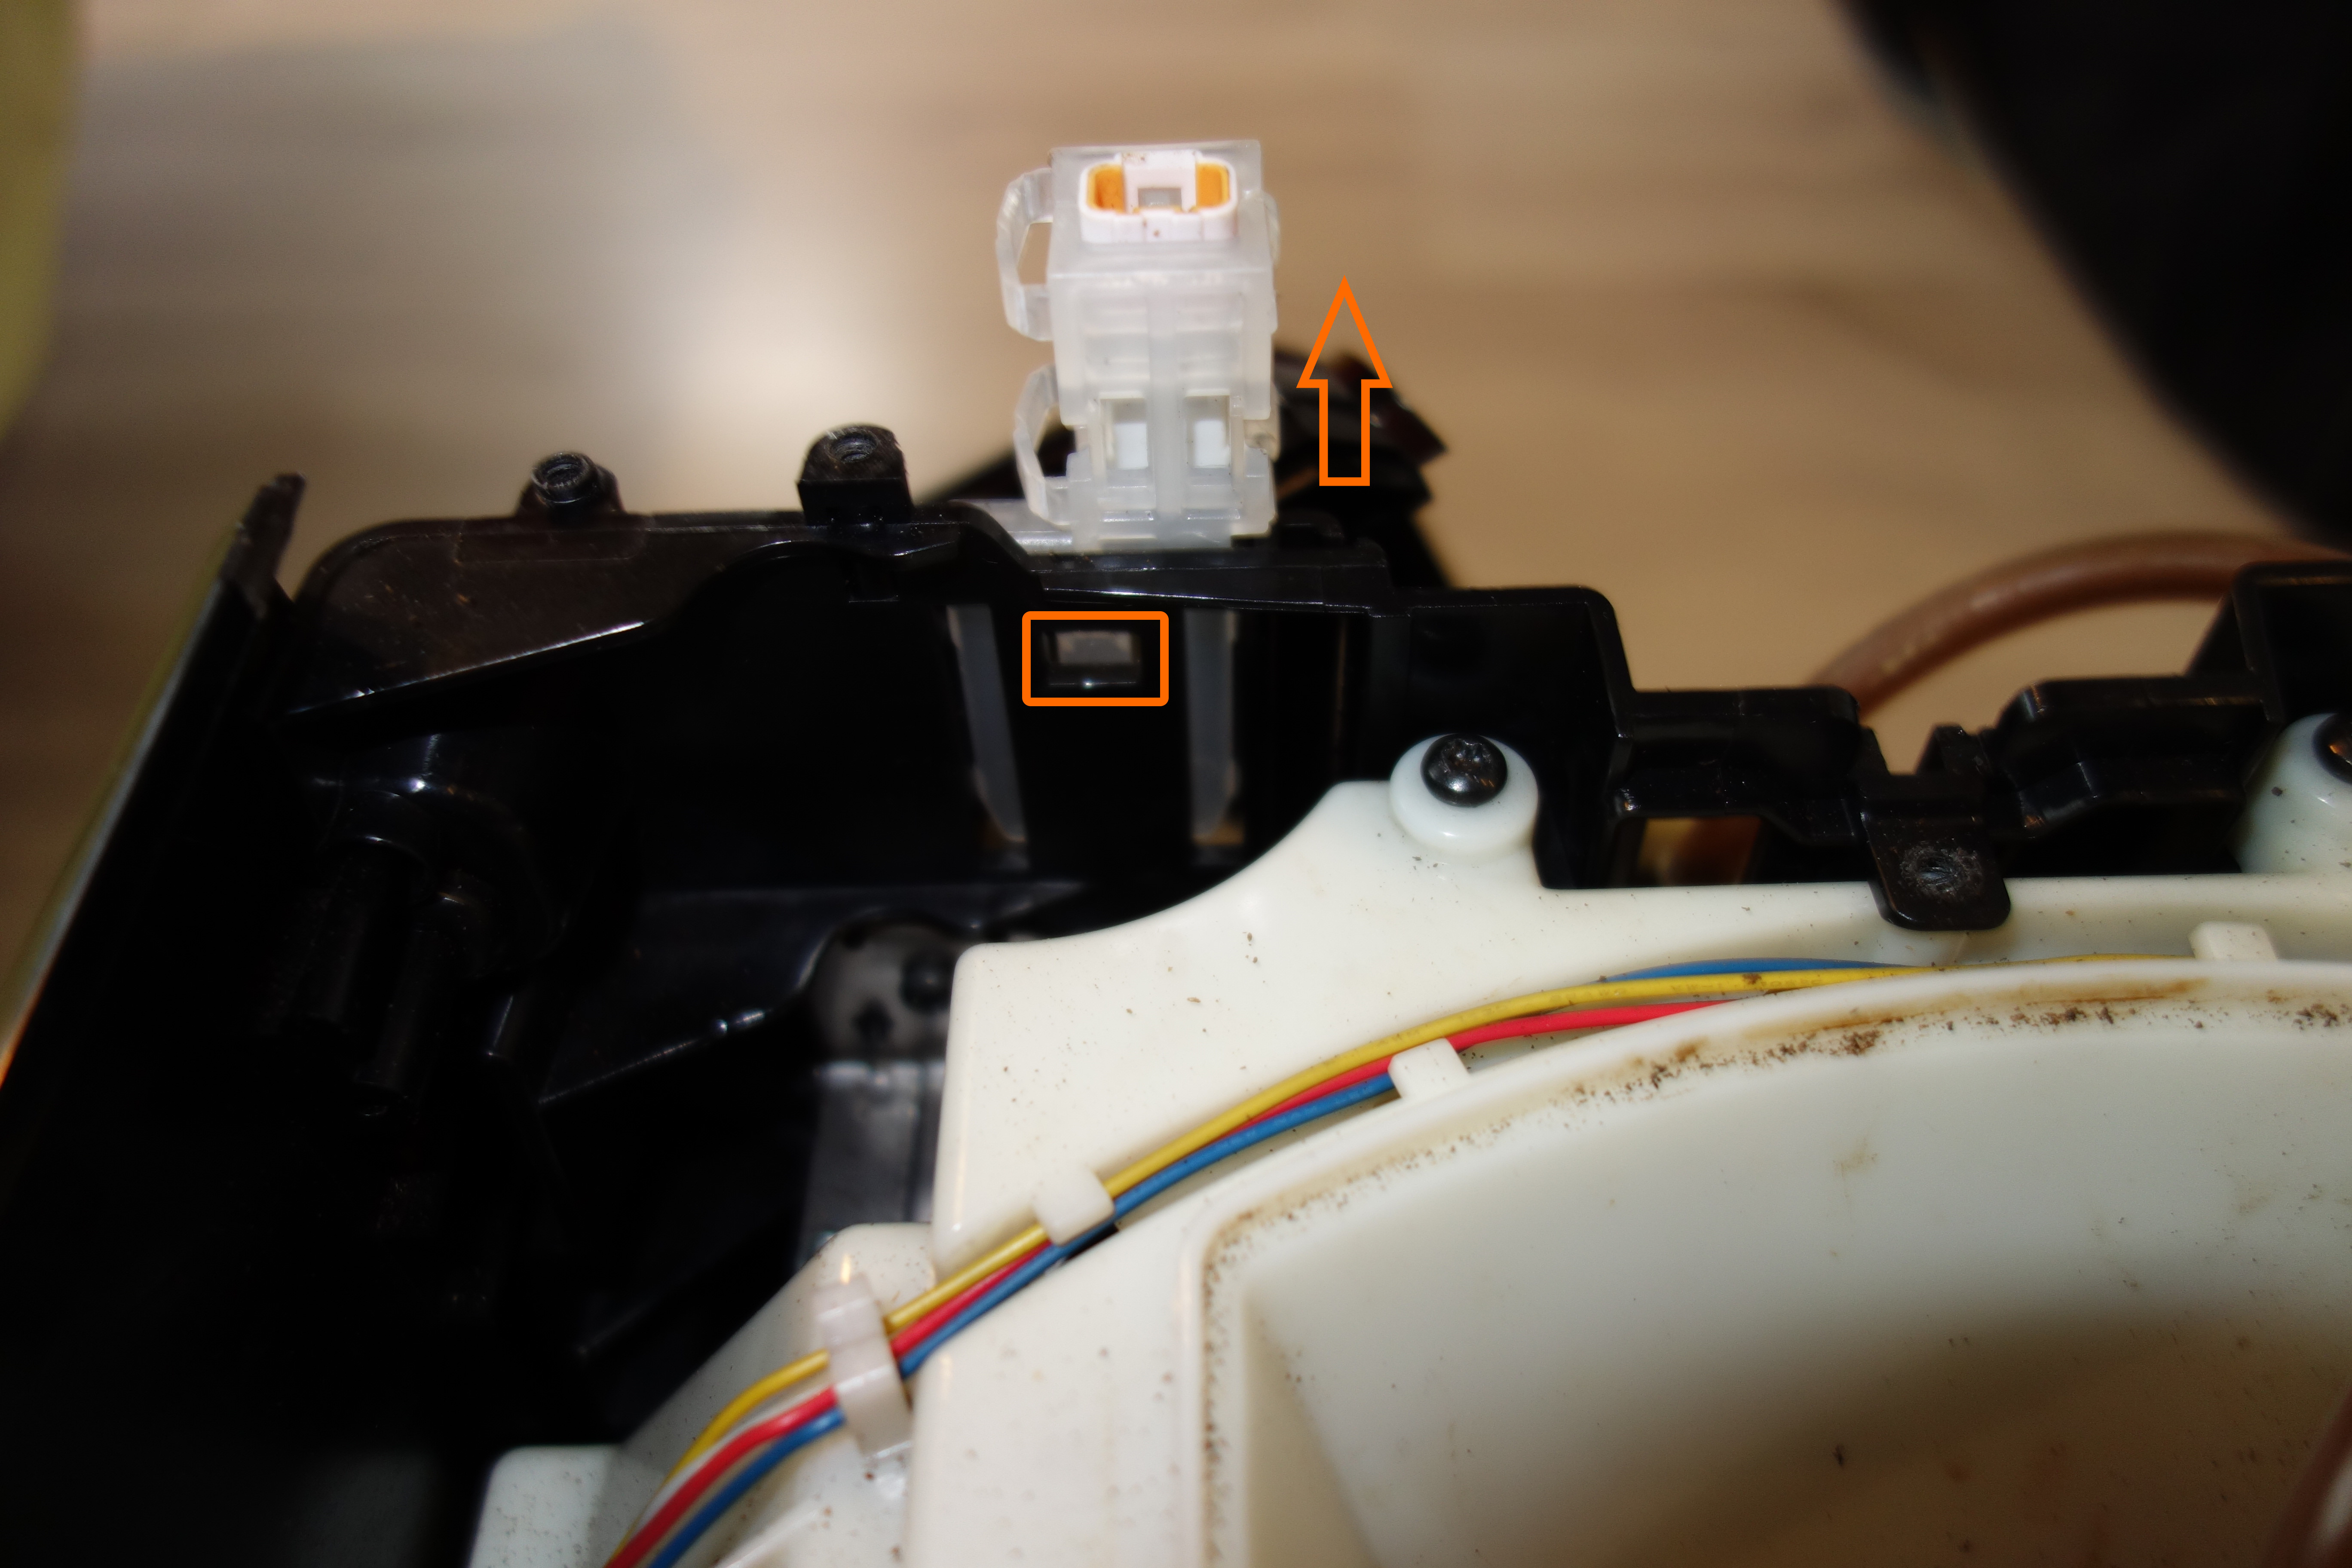
Disconnect coffee grinder cable
Remove the coffee grinder
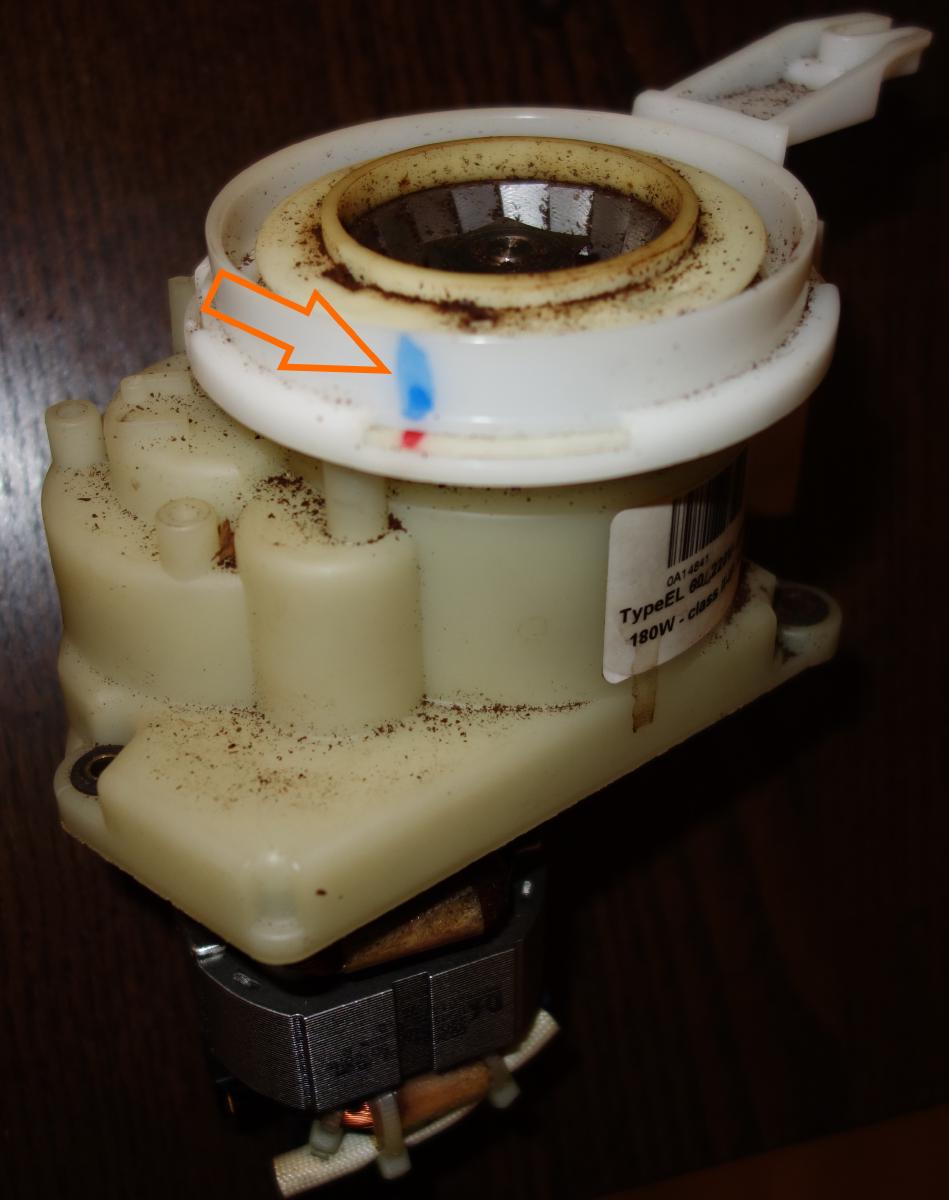
Step 5 : Adjusting the new coffee grinder
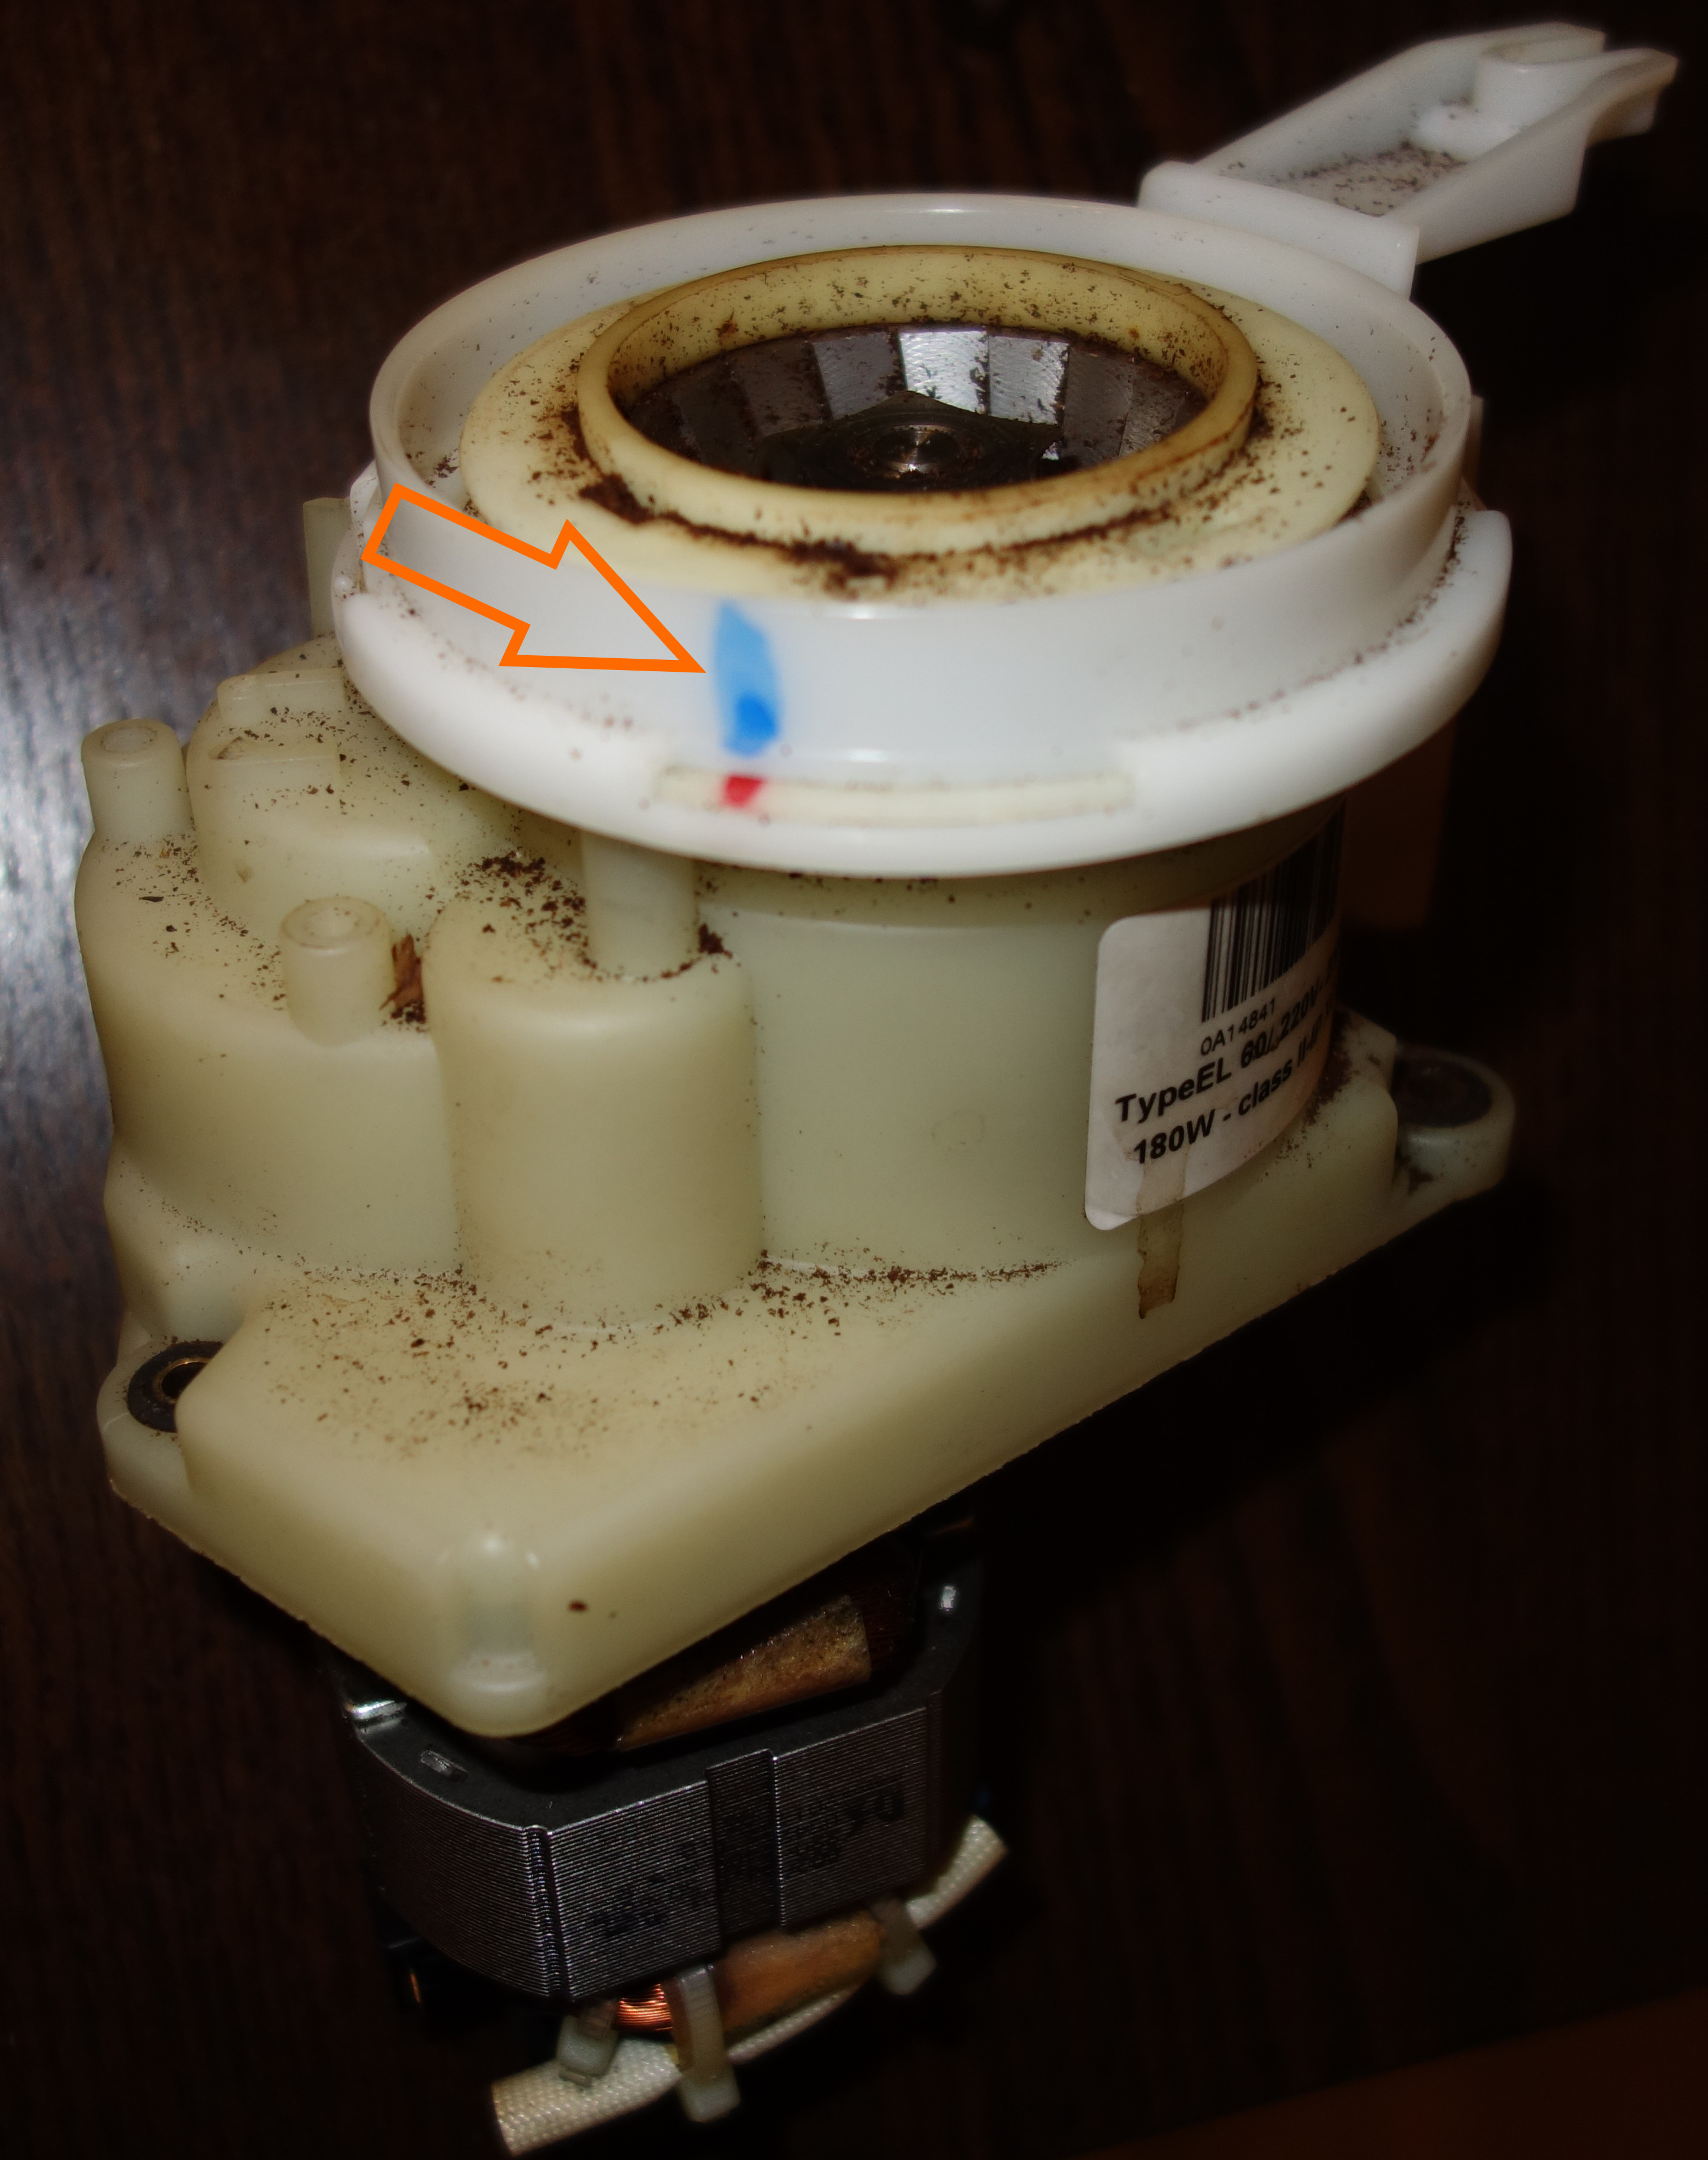

When replacing the coffee grinder, we need to adjust the new one to get the right quantity of coffee.
Here is what I did :
- Copy the mark from the old coffee grinder on the crown
- Disassemble the crown by opening clips using fingers or small flat screwdriver
- Align the new grinder white mark with the one on the crown, then put the crown back on the new coffee grinder.
If you did not copy the coffee grinder mark, you need to align the new grinder white mark with the index ball. Index ball is located in the higher corner of the grinder. Then place grinding adjustment part on the coarse setting by turning it clockwise to the stop. Put back the crown while keeping grinding adjustment part in place. Complete process is detailed in French in page 11 of the service manual .
Step 6 : Verifying grinder adjustment
Before reassembly, I advise you to clean your coffee machine completely.
Then put everything back together except the top cover. Put only the coffee bean tank.
It allows to check and adjust easily the coffee grinder.
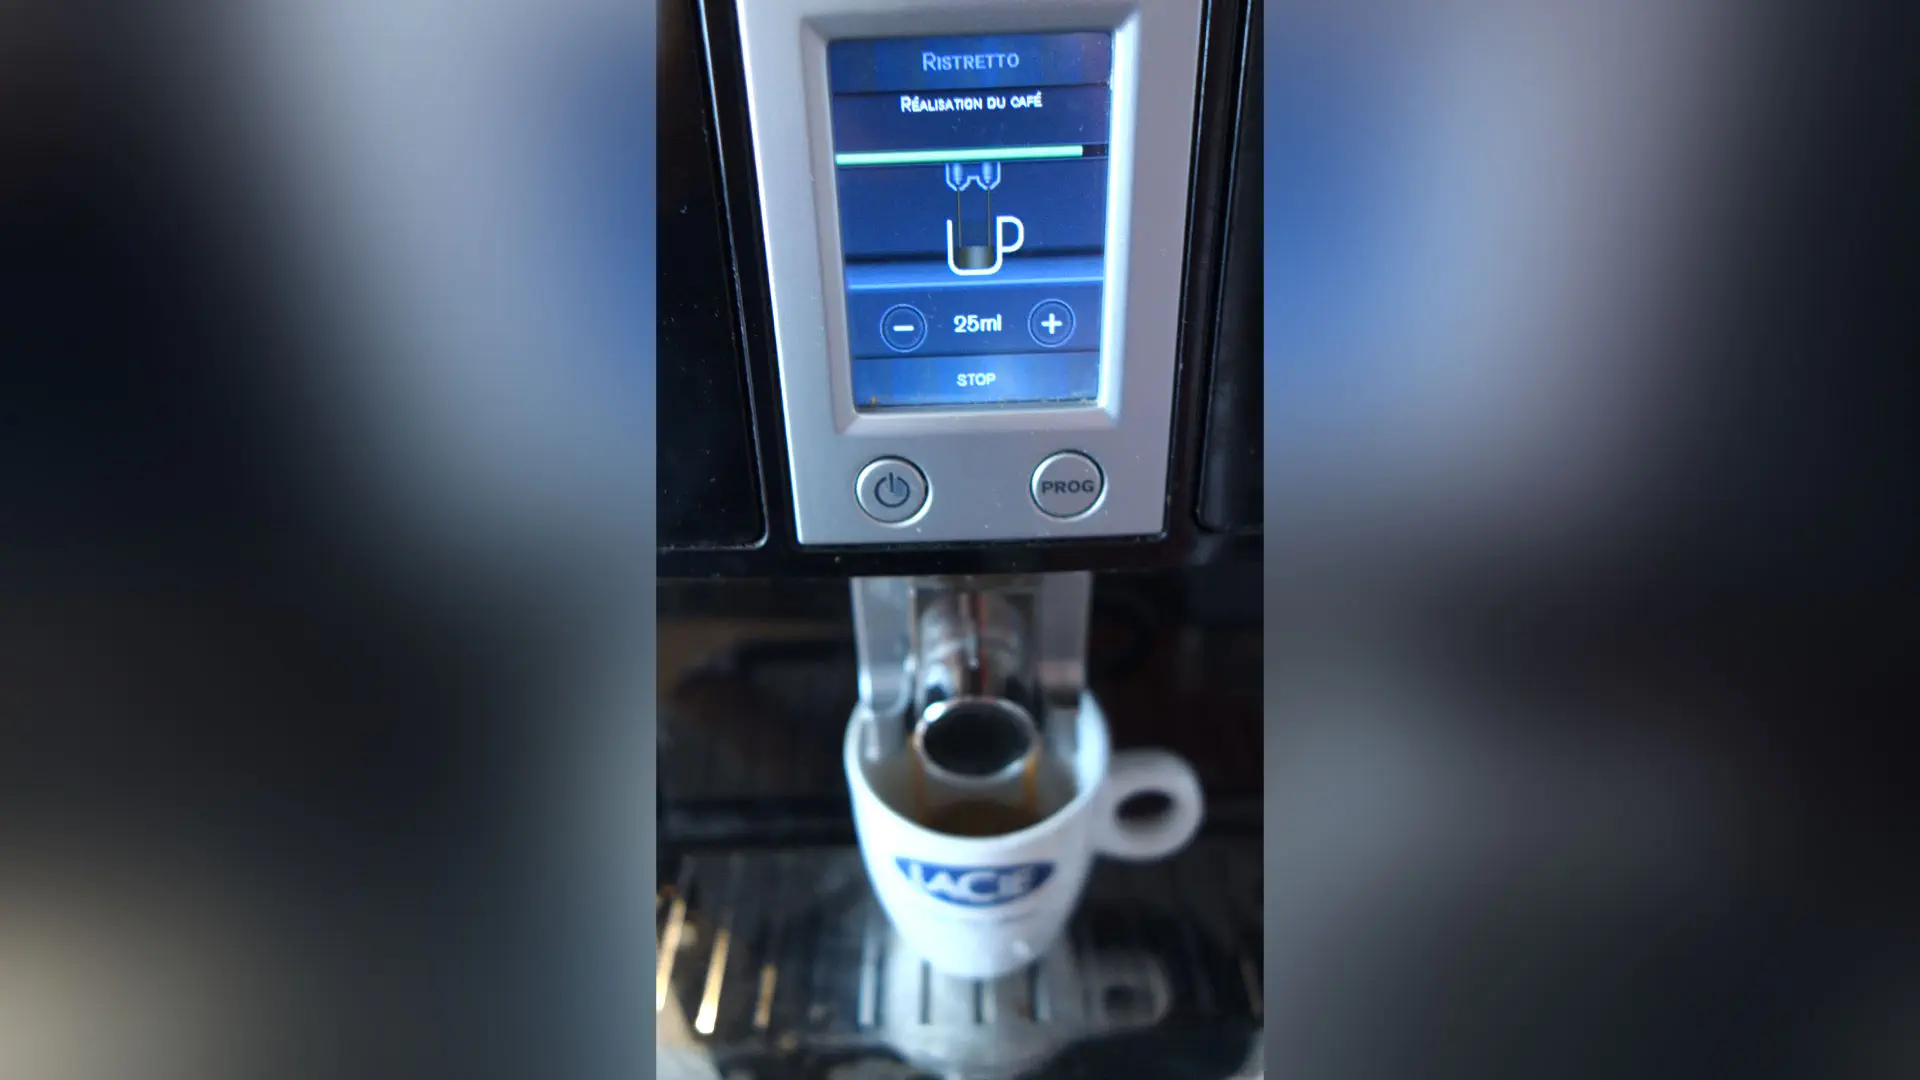
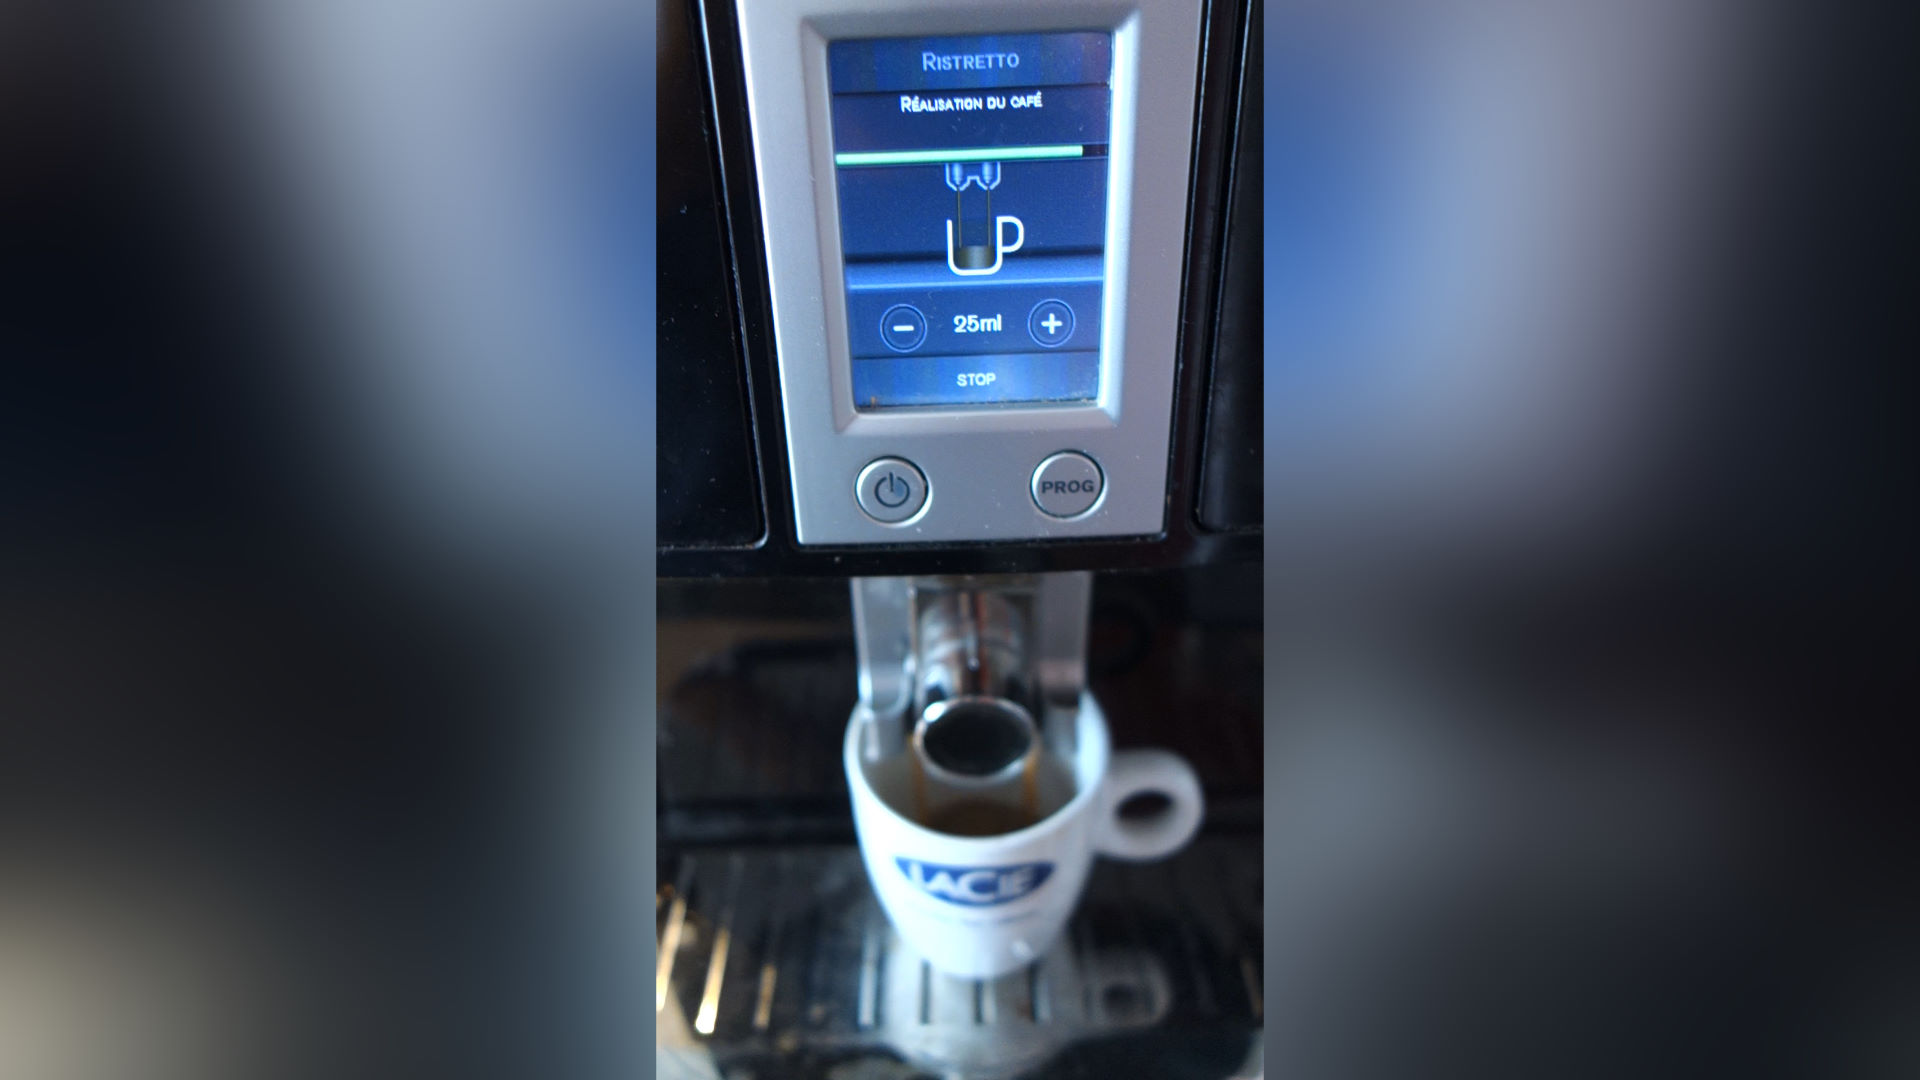
To check that the coffee grinder is correctly adjusted, you need to read the future in coffee grounds.
Make three coffees ☕ ☕ ☕ in strong espresso mode ( 3 coffee beans setting ) with the grinder in coarse setting.
The last coffee ground disk height in the ground tray shall be between 12 and 14 millimetters
This process is detailed in
page 11 of the service manual
.
To go further and clean up
Now that everything is apart, it is time to clean everything up !
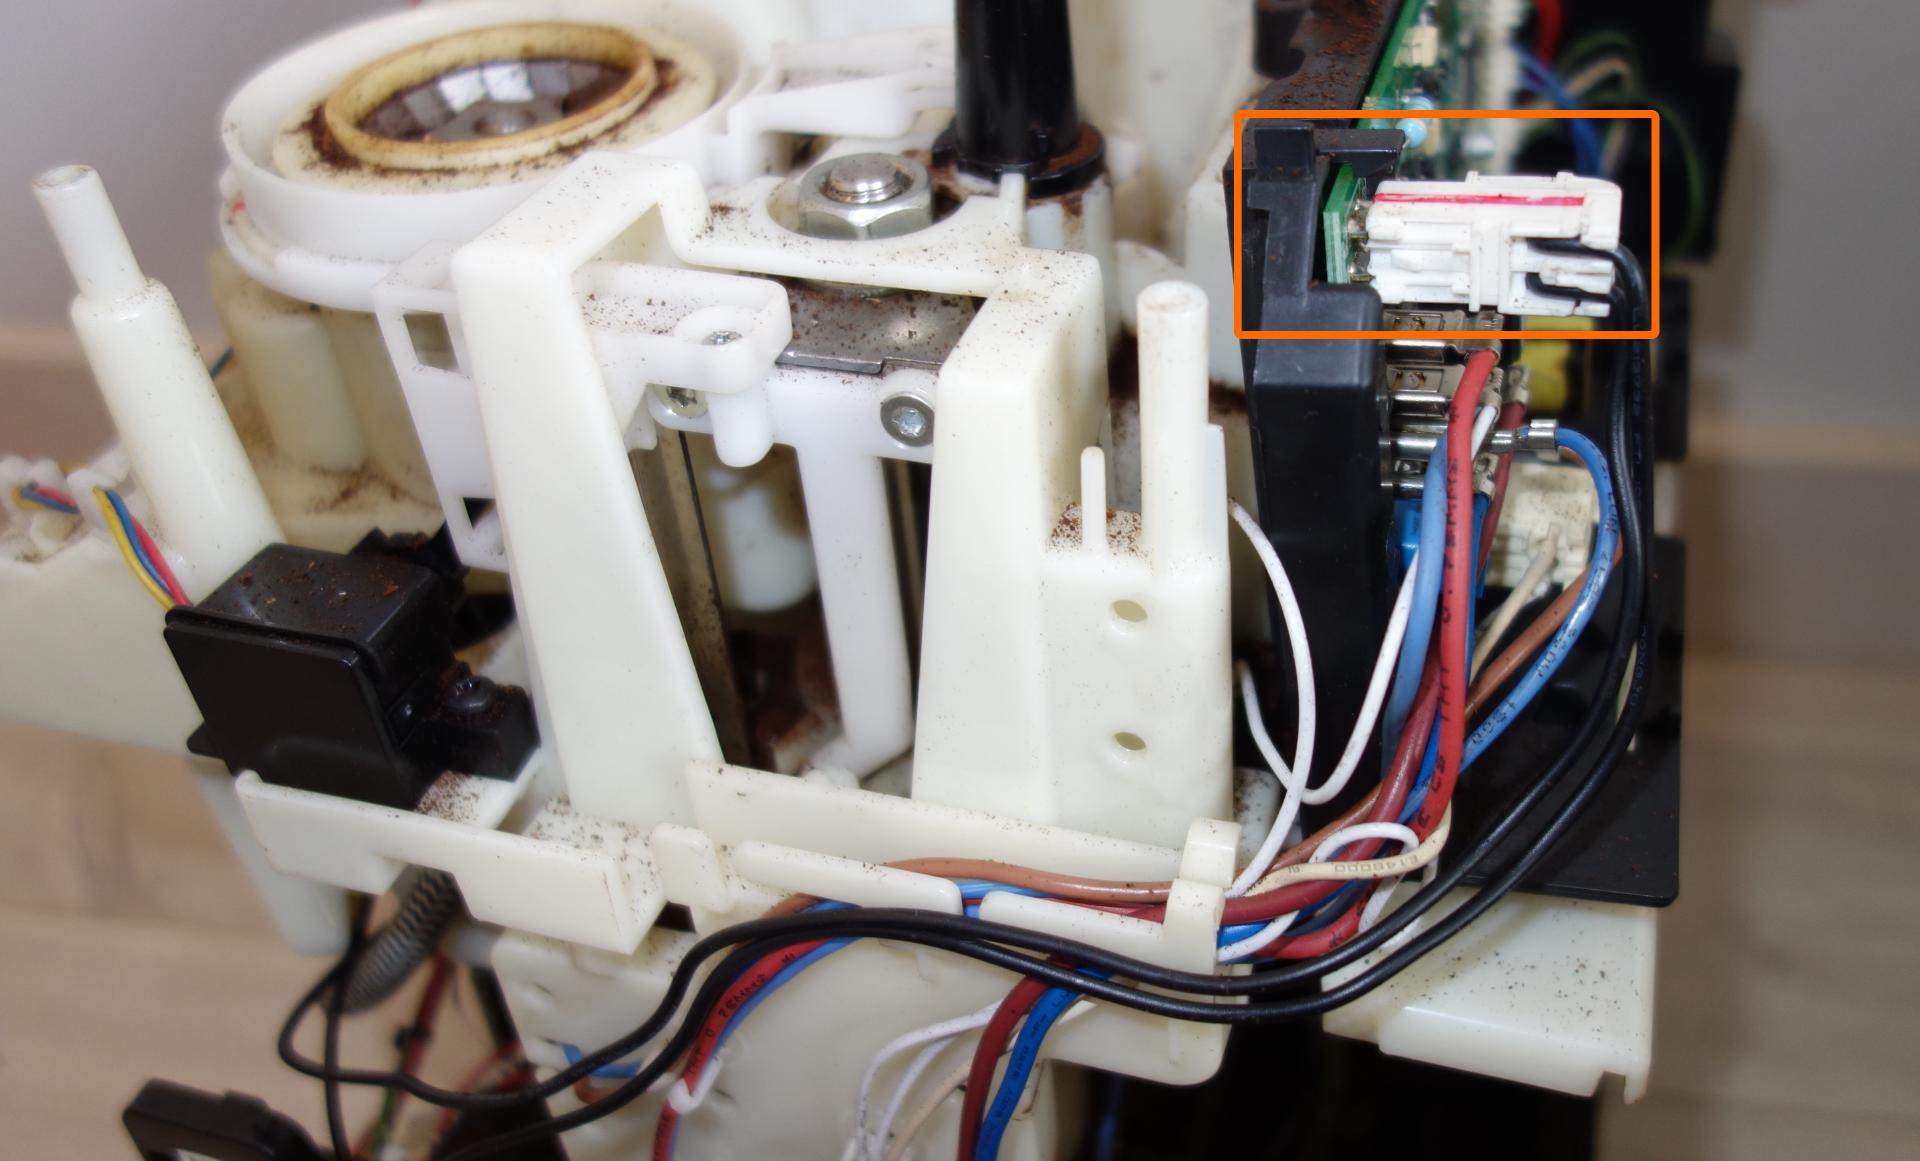
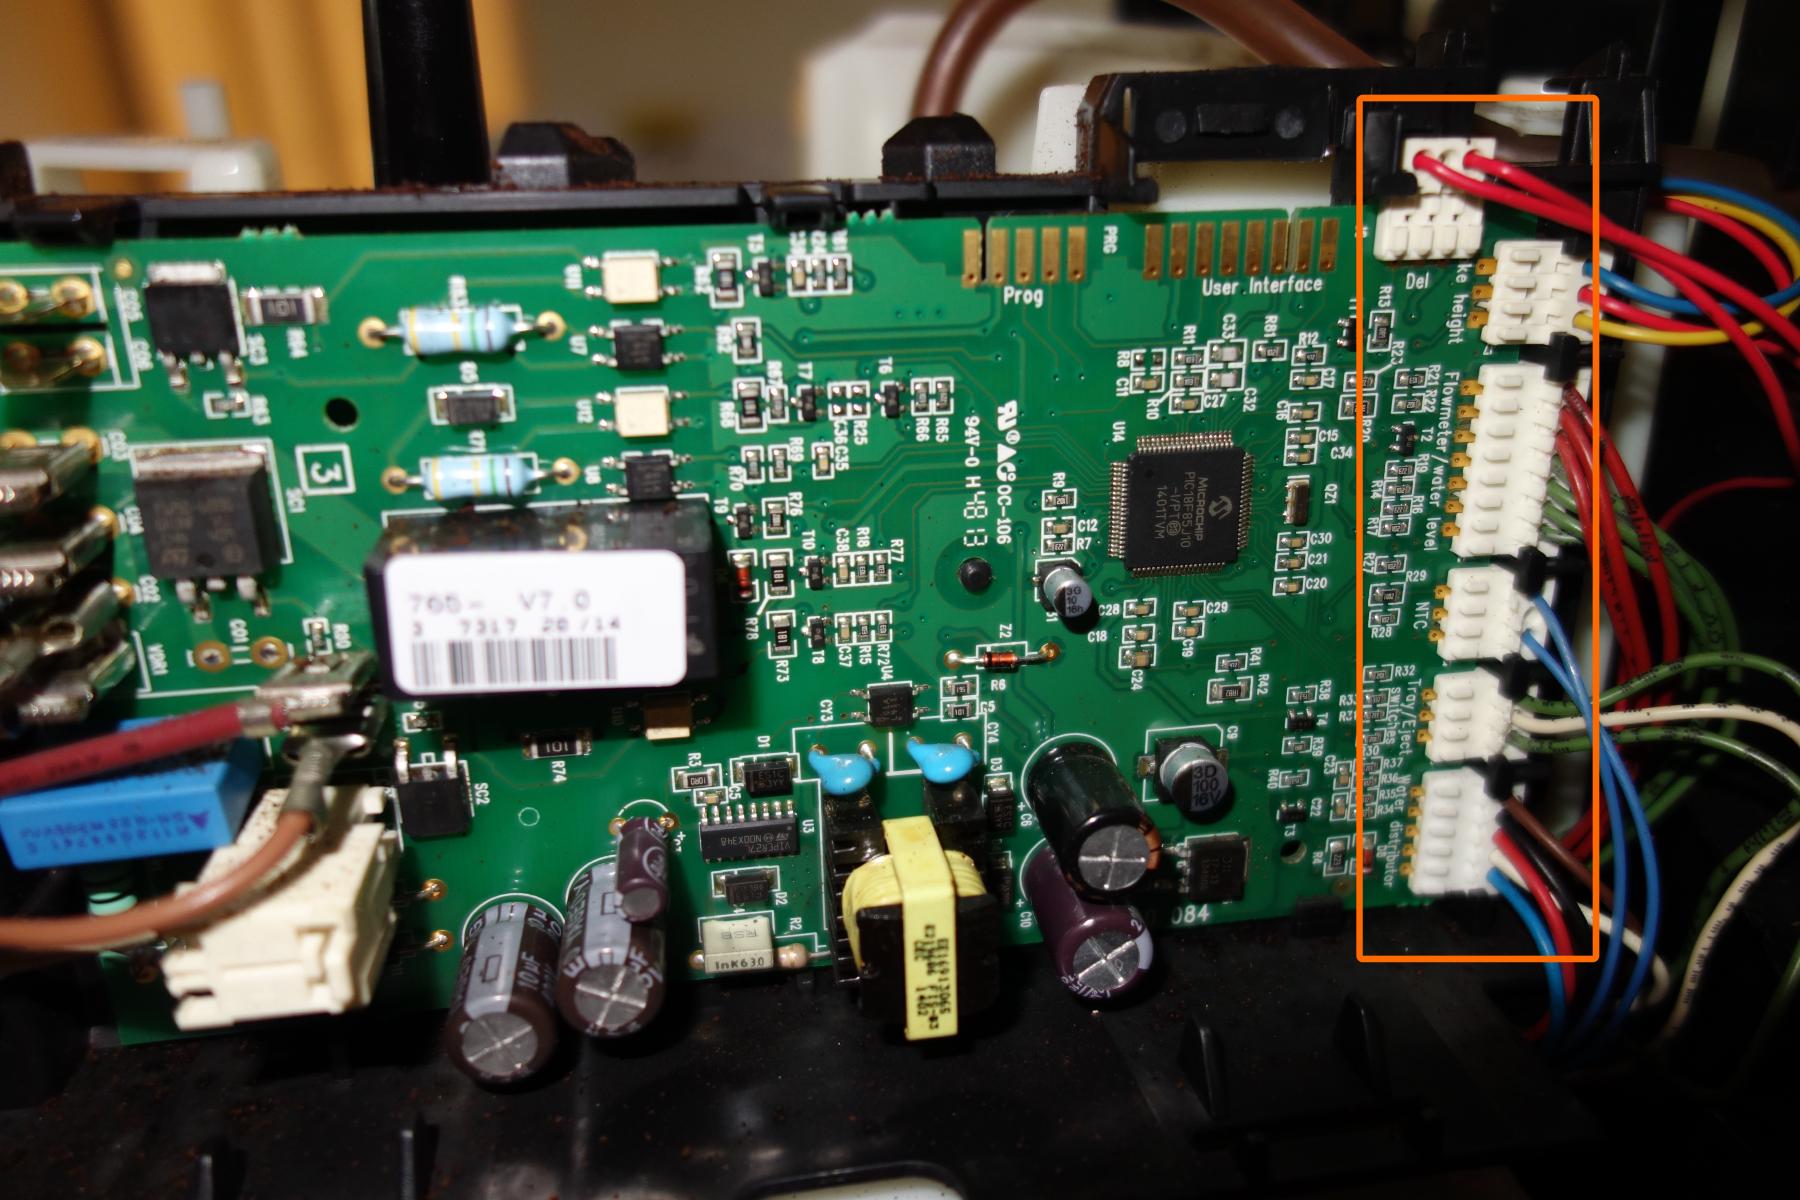
Step 7 : Removing the control board
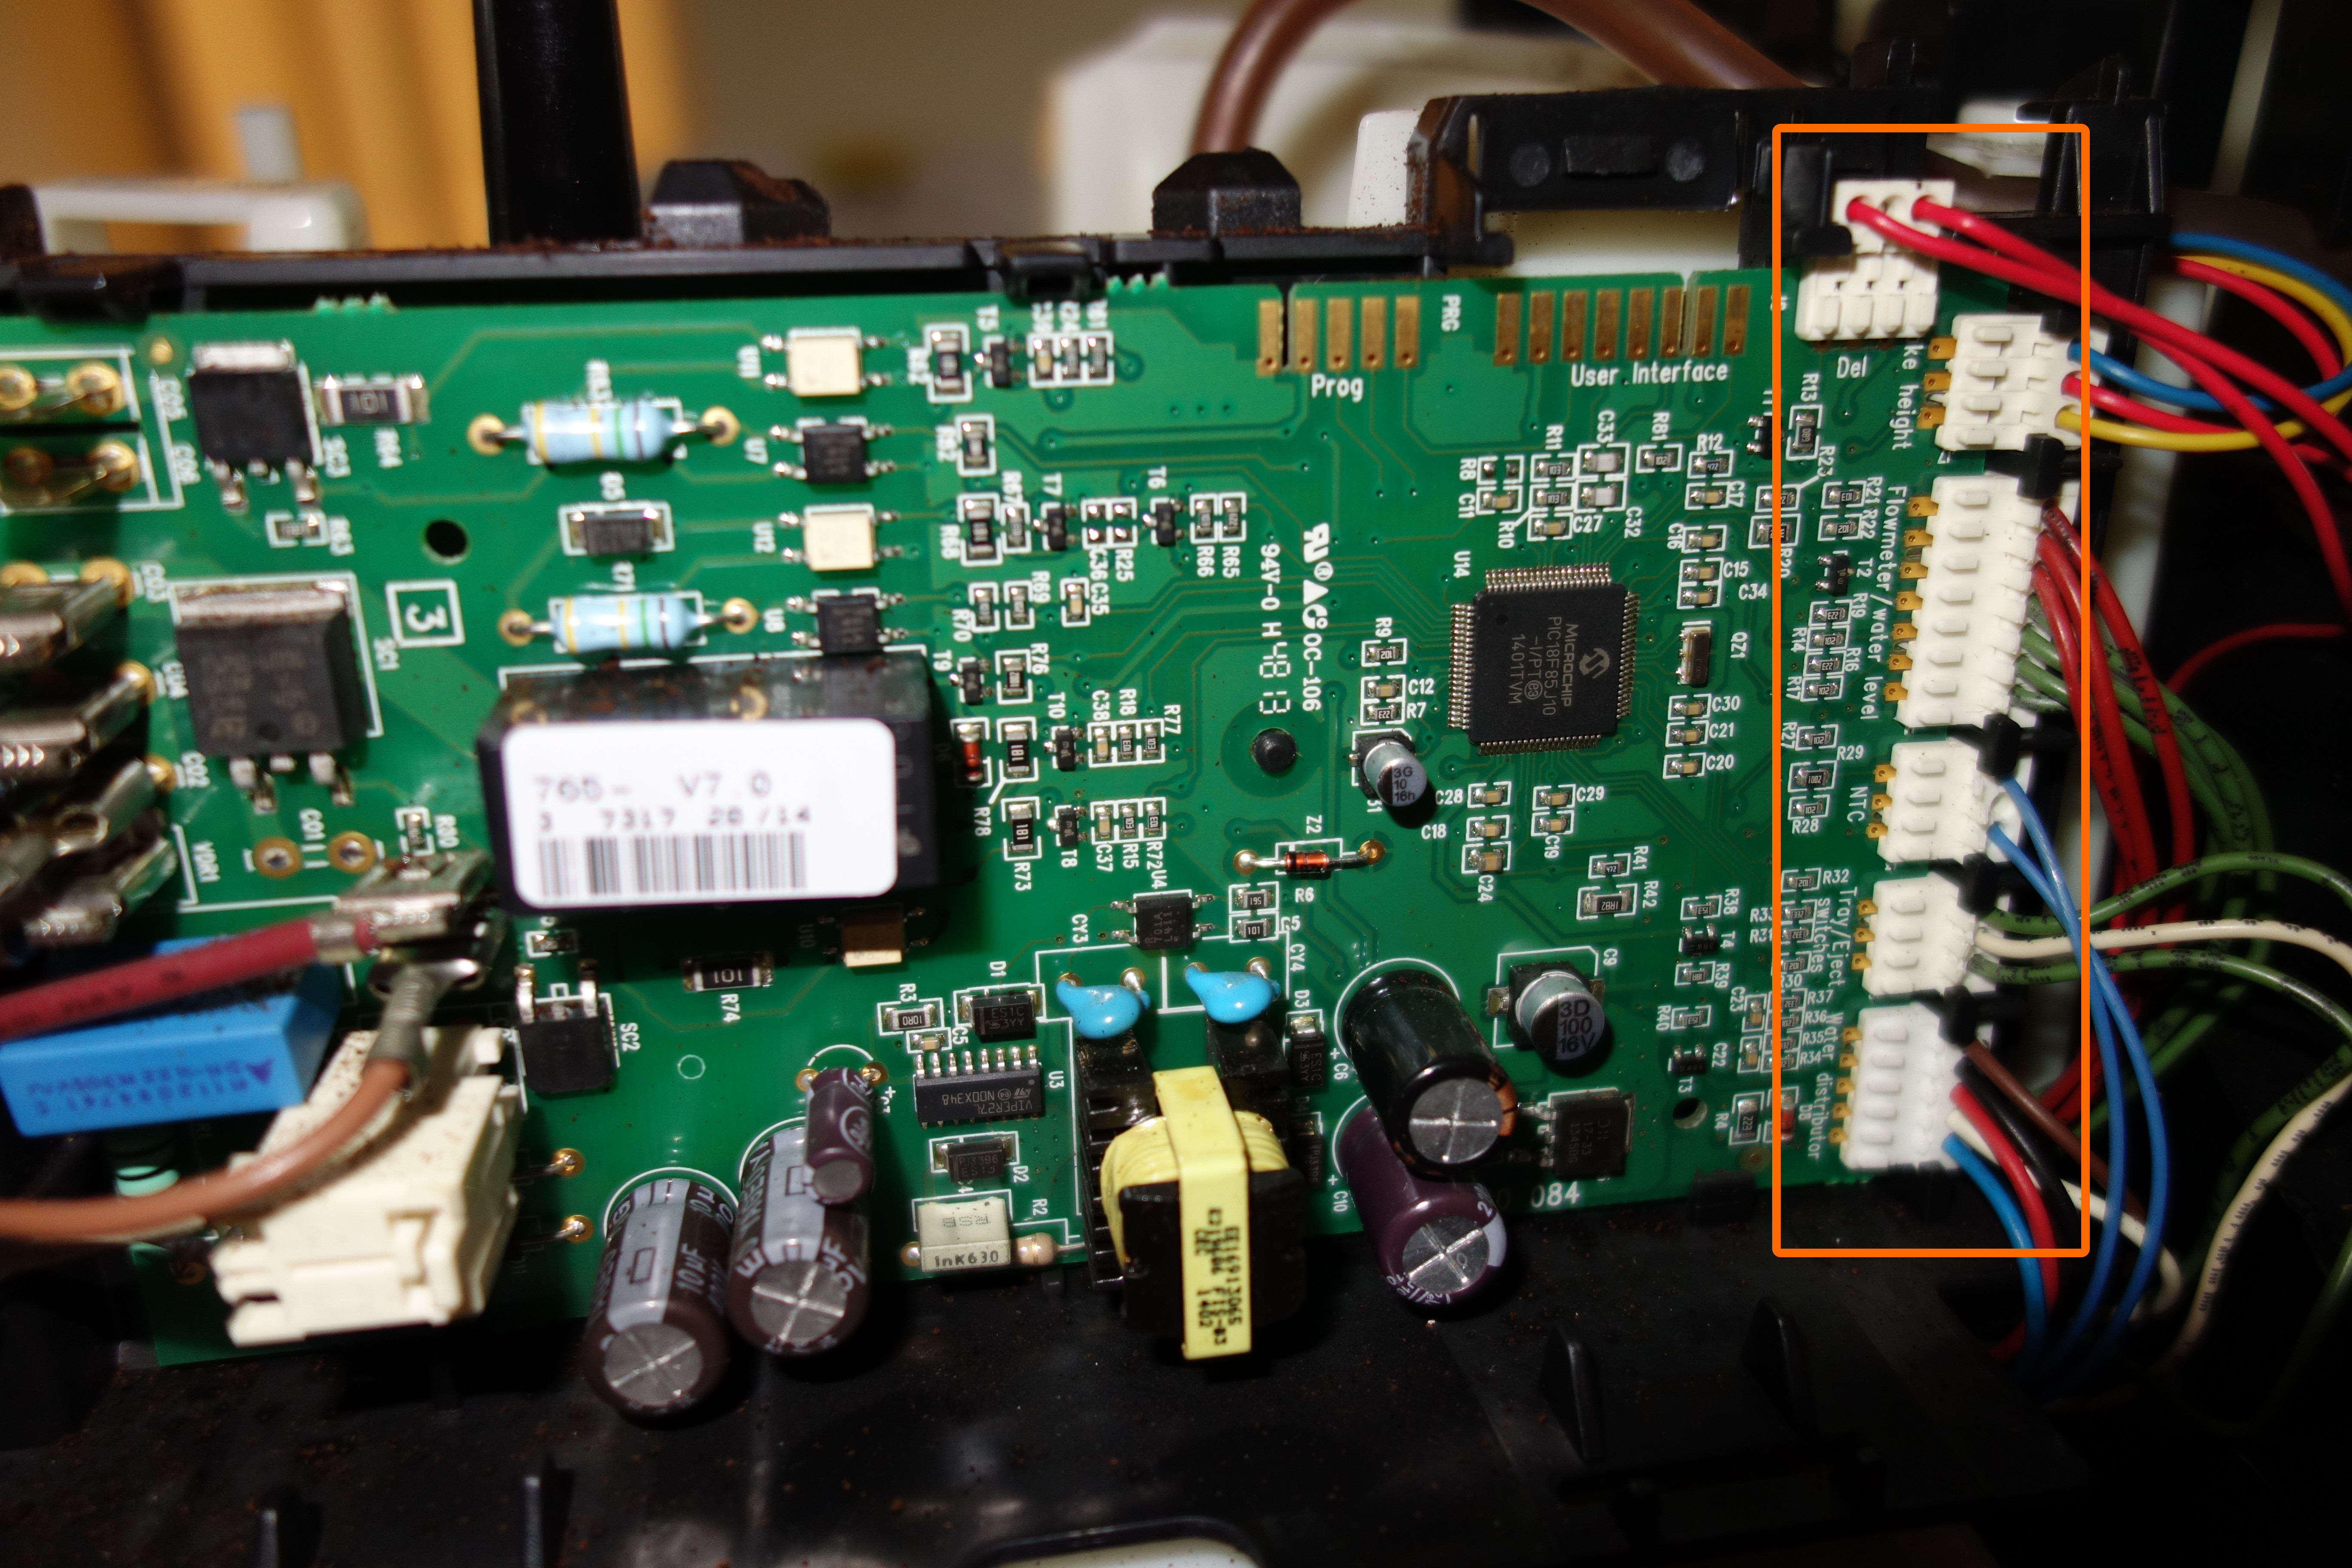
Remove connector from electronic PCB
📷 Do not forget to take a photo to remember cables and connectors positions 📷
Lift the black plastic holder up close to the screw
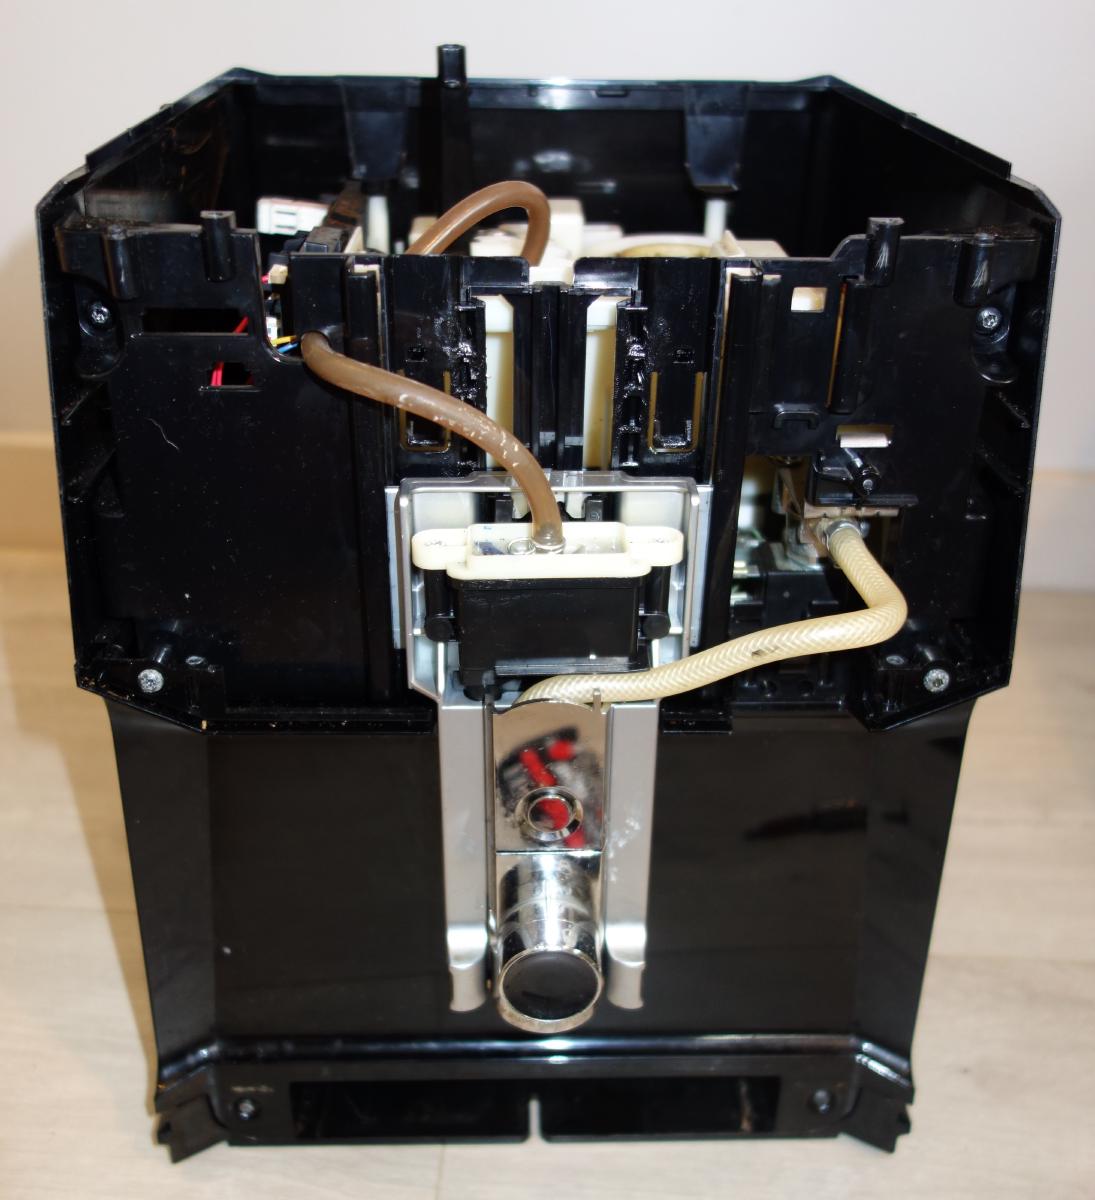
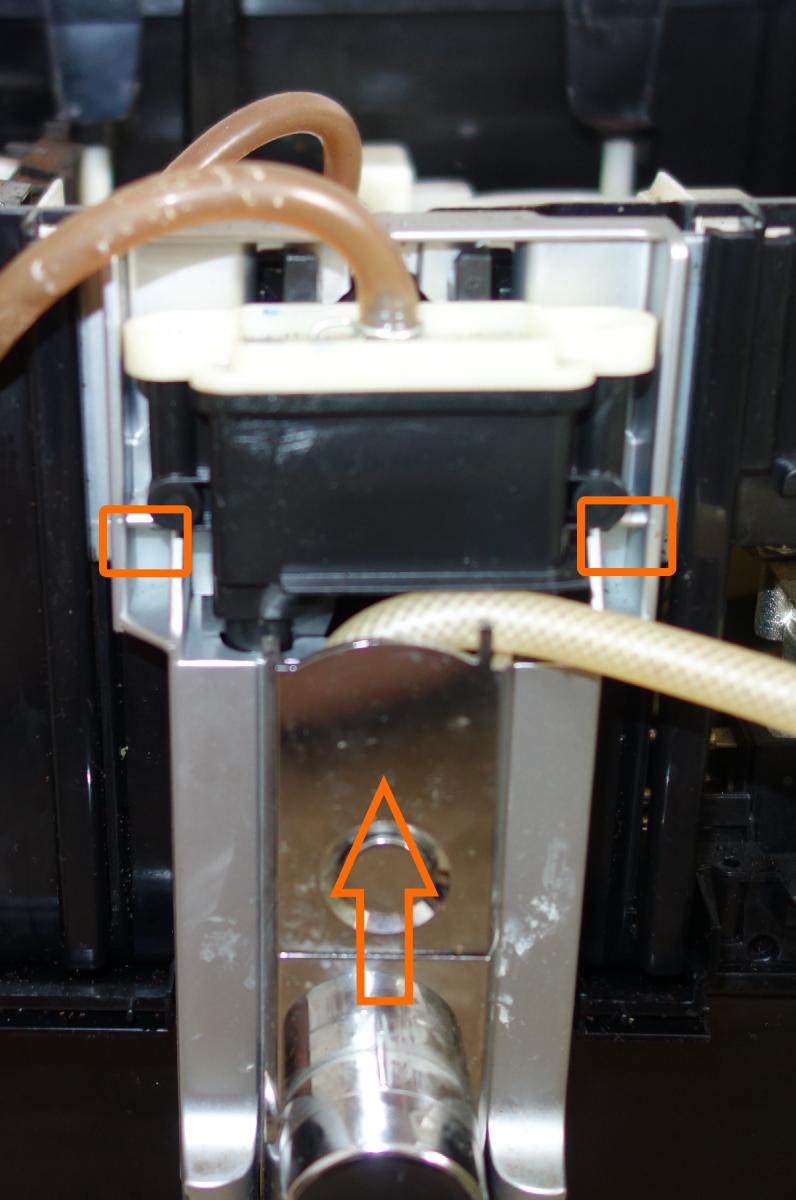
Step 8 : Disassembly of the brewing chamber


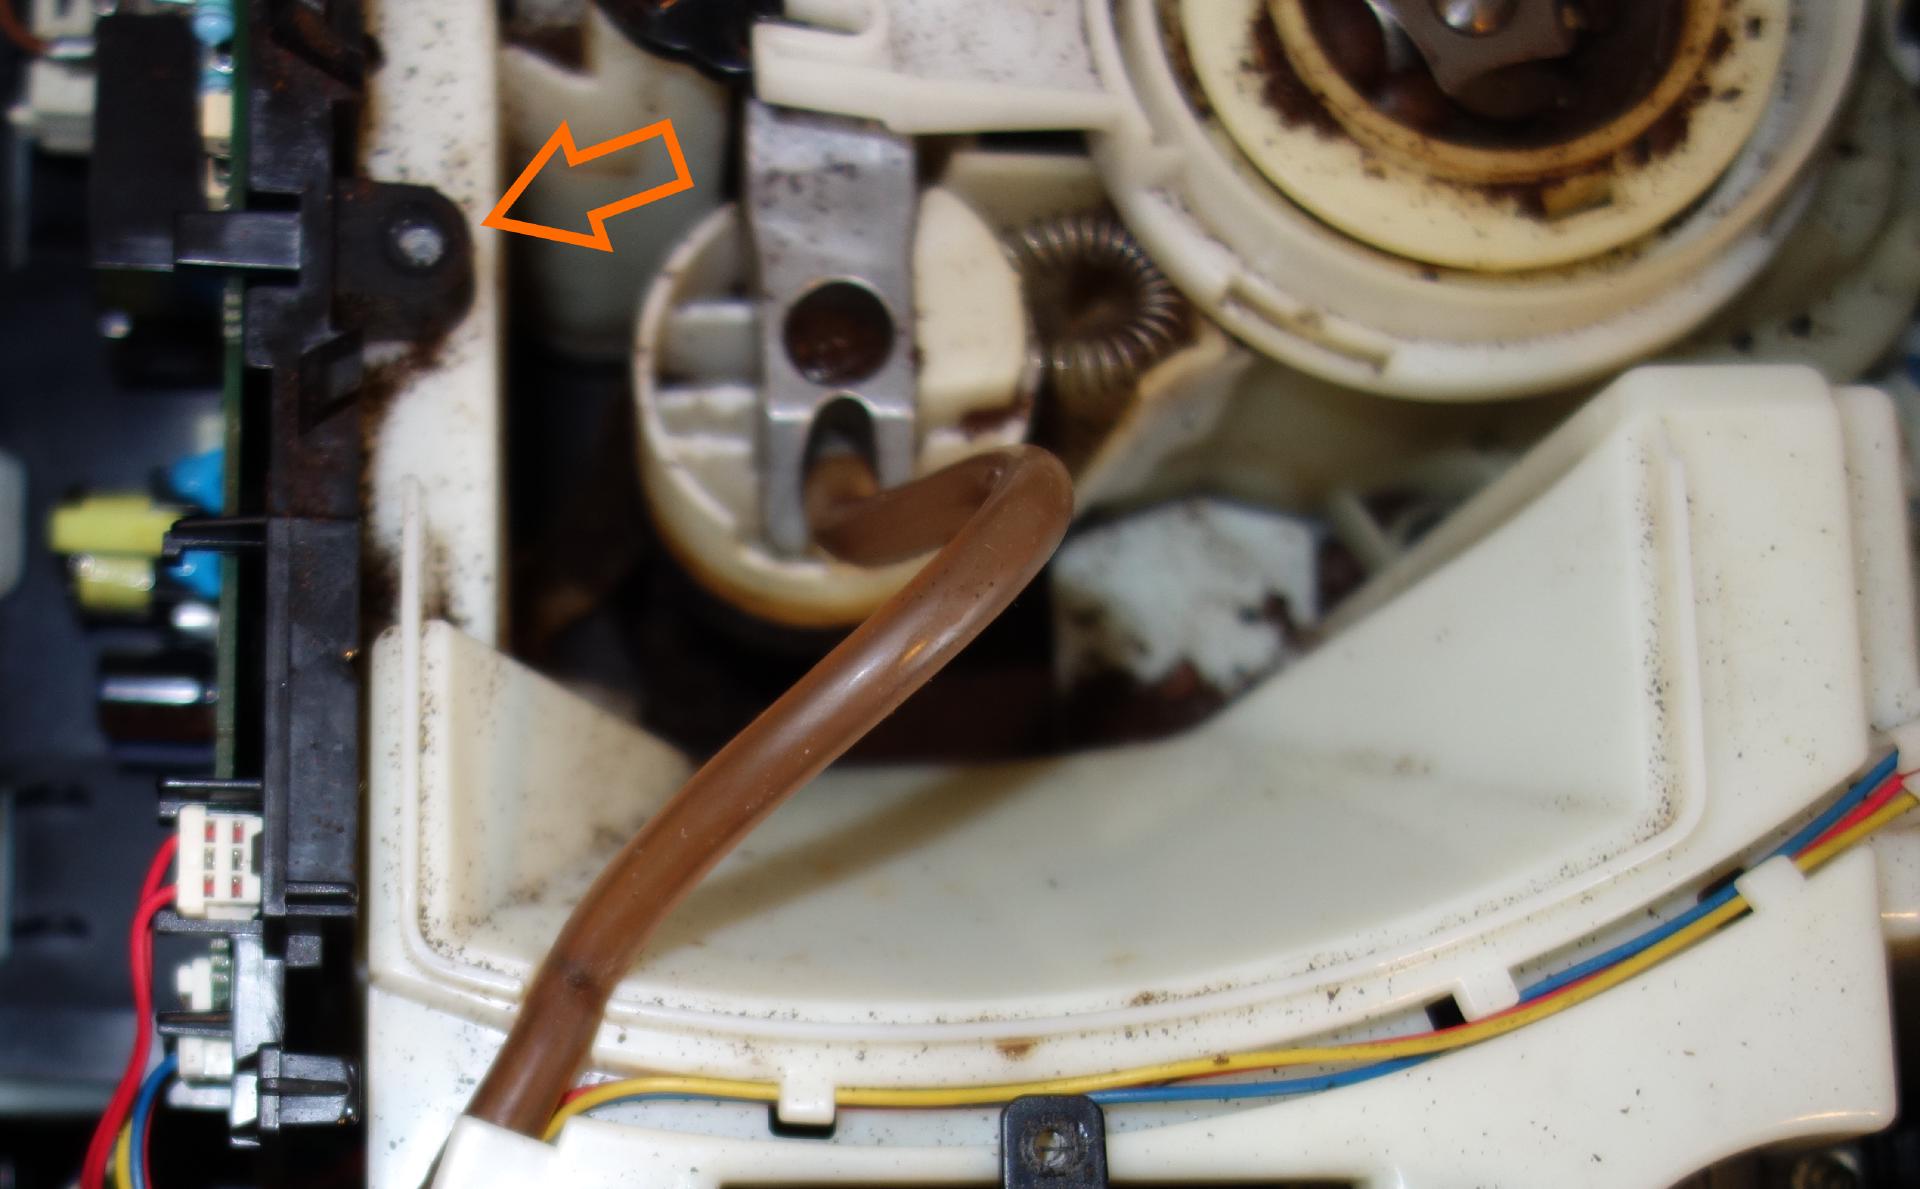
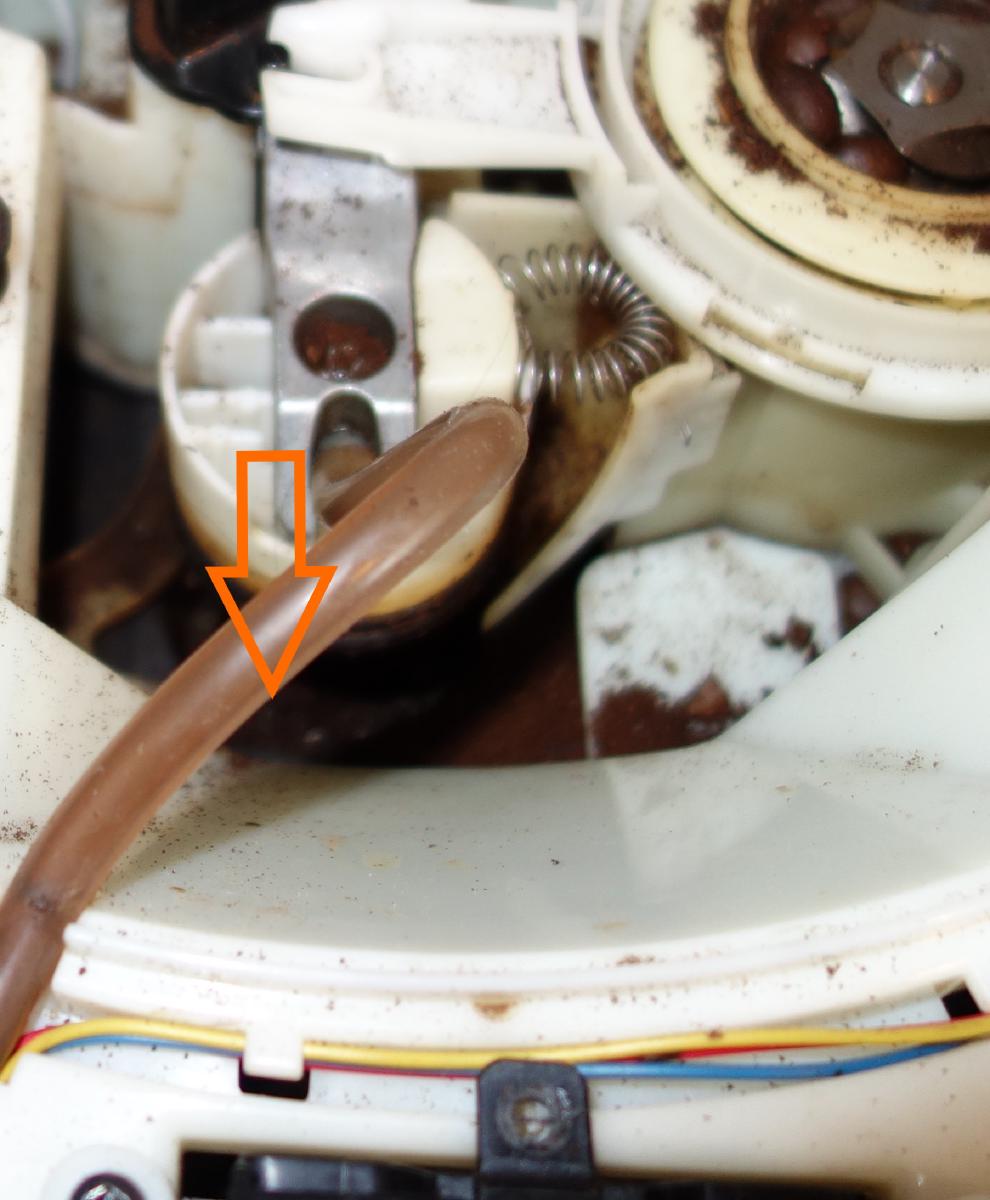
Remove the coffee out pipe.
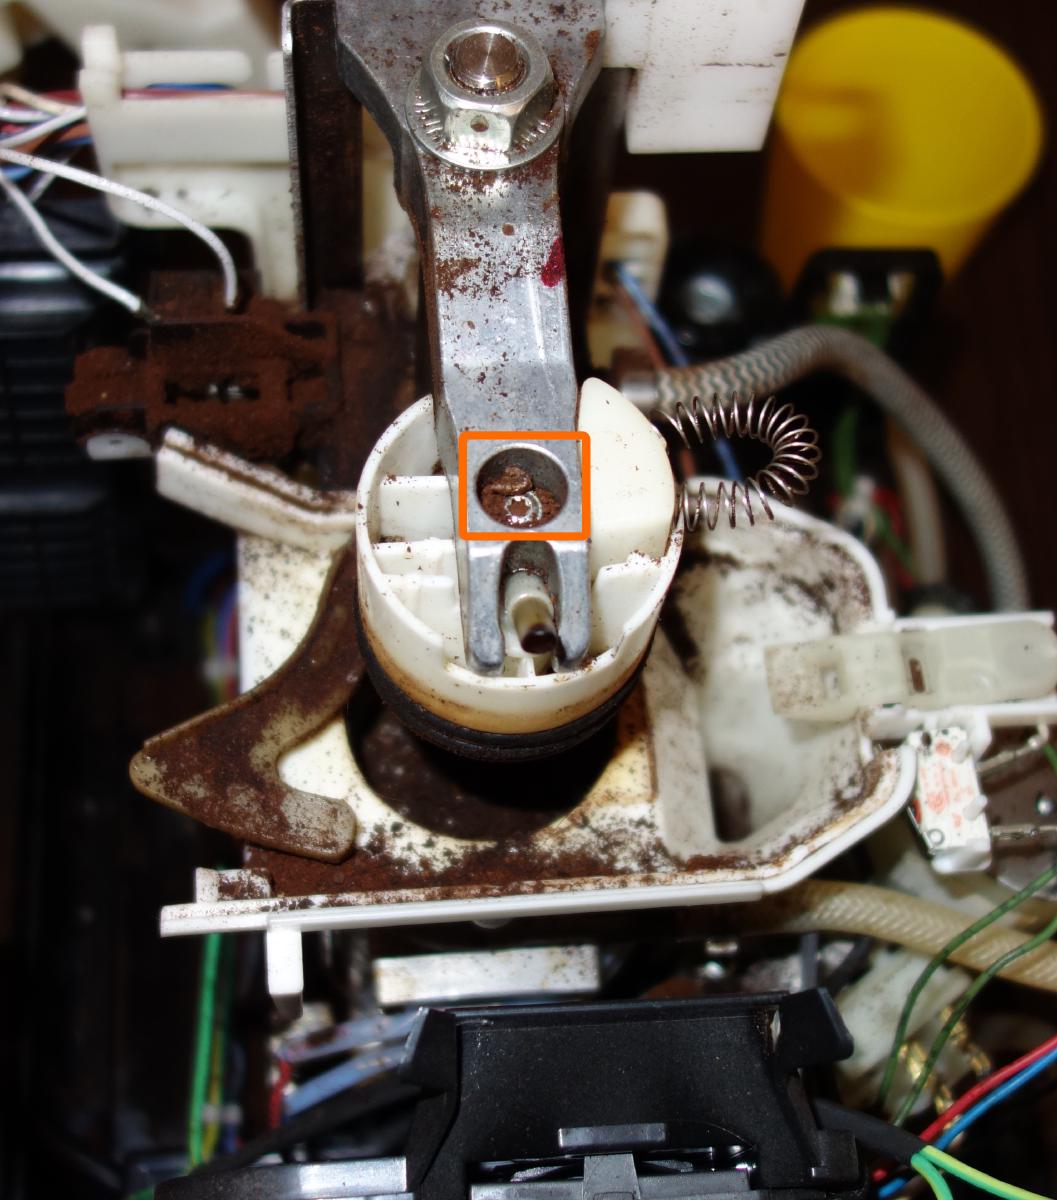
Disassemble high part of the piston with a T10 Torx screwdriver
With a pencil and a vacuum, clean what you can.
Conclusion
My coffee machine is working perfectly again, what a great day ! 😀
I think that this coffee machine was well designed. Everything can be disassembled easily, there is only one screw type (except for the brewing piston and for the coffee ground tray)
There is nearly no clips assemblies and I found spare parts easily on internet.
This machine was think to last many years ! 👏
My only little regret is that screws are directly screwed inside plastic. It is more durable with metal inserts. I do not think it will support dozen of disassemblies.
Now, I really deserve one ☕
Useful documents
Krups bean to cup repair and service manual Krups EA850 exploded view


